600 monsters slain, 247668 gold, 21939 ore, 17237 aether, 500 souls
I continued with the final portion of the Mage Legacy variant, picking up in the aftermath of completing NG+1 difficulty. The last heir's run had been particularly successful in dropping five different estuaries for a full 500 souls along with oodles of gold, ore, and aether. I spent most of these resources on additional ranks of Embroidered Investments and Runic Horizons, as NG+2 difficulty would unlock the possibility of finding more equipment with the +2 modifier and the third rune in each slot. The player can spend souls to unlock these earlier but the only stuff that appears on NG+1 difficulty typically isn't very helpful (lots of Scholar +2 gear that isn't worth running). There were no runes that I wanted to purchase on this occasion but lots of equipment to acquire, several different types of Ammonite items where the +1 version had dropped during the previous heir's journey. I picked up the Ammonite Chest +1 and Trinket +1 which somewhat surprisingly only cost three equipment levels. I could have reached the second unity bonus of the Ammonite set but didn't want to drop the Kin Helm or Leviathan Cape for far inferior Ammonite options in their slots. Hopefully I'd find the Ammonite Sword +1 or any of the Ammonite items +2 which would allow me to hit the unity bonus without sacrificing too many other stats.
At this point I had 150 souls and the next rank in Unbreakable Will cost exactly 300 souls to purchase. Although I figured I would probably regret this decision when it came time for more equipment/rune stuff, I spent 12,500 ore and aether for the fifth Strange Transaction, converting them into 150 souls and then purchasing that level of Unbreakable Will. This allowed me to spend 90k gold on the next two Gold Gain levels for a total bonus of +70% gold generation (50% from Gold Gain levels and 20% from two Bounty Runes). Then I still had 117k gold to spend on stats which mostly went into Vitality since it was cheaper than Intelligence or Armor by a good margin. Hopefully this would do the most to help my Mages survive longer.
Once again I cranked up the burdens for NG+2 difficulty. Following the same pattern as my Knight Legacy earlier, I chose to take 14 burdens (instead of the required 4) to make things harder. I was taking max ranks in Burden of Evolution (50% chance for monsters to upgrade to the next tier) and Burden of Adaptation (15% chance for monsters to gain a commander buff) along with all three points in Burden of Scale to make the dungeon 30% larger. For my last burden, I also took the NG+2 option to face the prime version of the Axis Mundi Void Beasts. I knew from my previous experience that having tier 3 monsters everywhere would made things noticeably harder as far as clearing the dungeon.
Mage #15: 103 Vitality, 100 Intelligence, 106 Armor, 7 Focus
This Mage had no traits at all and no starting relics, a blank canvas. The run started out with a bang as I ran across a cursed relic in the second or third room of the Citadel. My Mage had found Pandora's Trial which causes the player to die instantly upon taking damage until they kill 10 monsters, at which time the relic is purified and grants 50 additional resolve. With this being the very start of the run, I figured that was worth the risk and very carefully downed ten enemies to purify the relic. The irony was that I couldn't find any useful relics for ages and ages afterwards therefore leaving all of that extra resolve sitting around unused! As usual I headed into the Study in search of the guaranteed Blessing of Life up there, eventually finding it along with a second non-guaranteed one. This was a tough area to progress through thanks to so many tier 3 monsters appearing with additional health, damage, and more dangerous AI scripting patterns. I found myself having to go through multiple spell rotations against the high HP foes like knights and flying hammers, hitting them with a Wand attack and Searing Shot followed by doing the same thing a second time after the burn had ticked all the way through. This was tough work but I'd gotten very good at playing the Mage class by now and never had to retreat for additional health recovery. I even cleared out Murmur and the Gonghead Twins along the way, with the latter miniboss only hitting my character a single time and the former serving as form of health recovery thanks to all the breakables in Murmur's chamber. (It was a good thing that I'd gotten so much practice against the Gonghead Twins since they would have killed this Mage in a mere five hits.)
Once the Study was cleared, I initiated the long process of pushing through the subterranean basement of the Dry Lake. This biome is just massive when cranking up the size of the dungeon with the maximum Burden of Scale setting and I spent a long time down there fighting through the dozens and dozens of rooms. I did surprisingly well with this first Mage and managed to clear just about everything, making frequent retreats back into the Citadel as needed for healing. These retreats were essentially mandatory since the tier 3 monsters in the Dry Lake could often deal 250-300 damage per hit and my character could only survive a handful of those before running out of health. I was able to use all of that extra resolve to pick up both of the Onyx and Pearl Keys to unlock both of the miniboss portals though I avoided going through them for the moment. I was able to cover a ton of ground in this area and unlock a bunch of additional equipment/runes; sadly a bunch of the new items were Leather +2 or Warden +2 stuff that was basically useless.

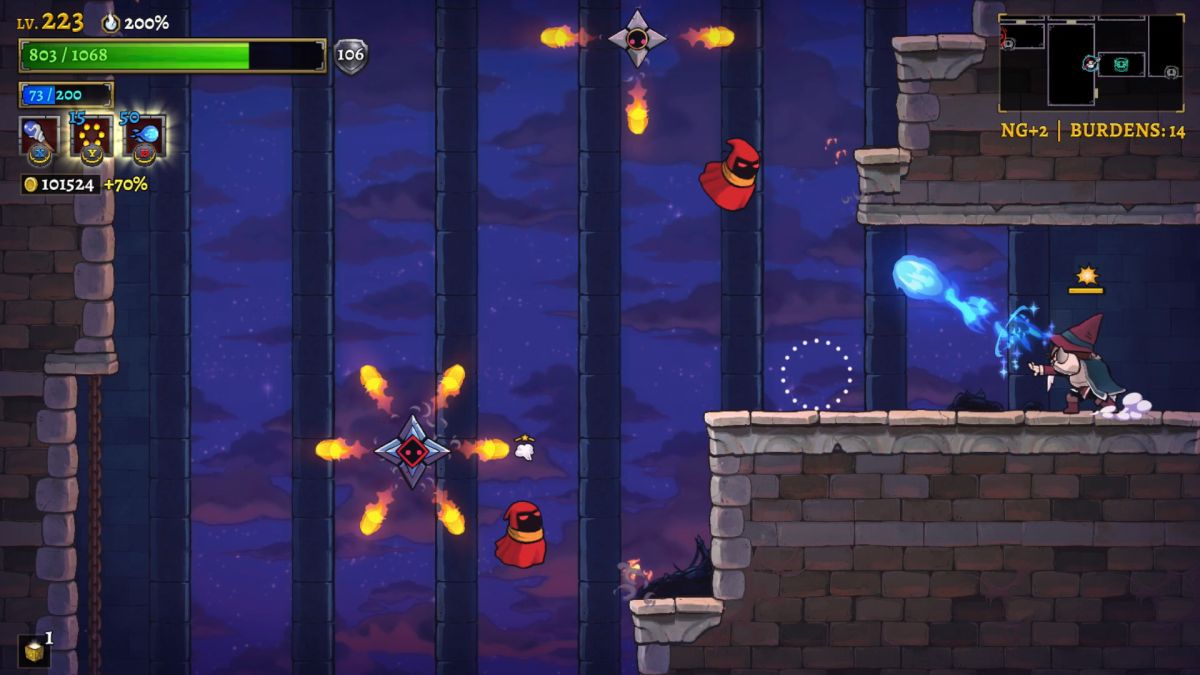
On one of those retreats from the Dry Lake I hopped into the boss room with Lamech for the full HP/MP refill (I had enough upgrades at this point to get 80% of both replenished). Lamech himself was as easy as ever and I only took a single hit from the fireball swarm that he tosses out upon dropping to half health, with this Mage not having enough defensive spells to block them. However, I noticed that Lamech's overall health was enormous and it took ages to cut through that accumulated life. This was a sign that I definitely needed to increase damage via more Intelligence before facing too many of the other estuaries. Afterwards, I found myself rebuilding health from a low point in the tail end of the Citadel and the beginning of Axis Mundi. I fell as low as the pictured 2 HP at one point when I messed up against a lowly tier 1 knight enemy that did almost 200 damage, ouch! I finally came across a useful relic in the form of Freon's Reward (opening chests restores HP equal to Intelligence) which was great for this character and his 100 Intelligence. Unfortunately I messed up against a commander shortly thereafter and foolishly died before I could put the health restoration from that relic to good use. This was a REALLY frustrating death as I had 75 resolve unused and tons of dungeon left to explore. If only I had found Freon's Reward slightly sooner which would have kept me topped up on life instead of falling all the way down to almost zero! Sigh.
392 monsters slain, 224701 gold, 10271 ore, 3410 aether, 100 souls

I was annoyed enough at the failure of the previous Mage that I decided to try my hand against the Automatons scar challenge. I found this to be very difficult for the Mage class; I've mentioned before how this class fares poorly in red portals where the characters can get swarmed by opponents, and that was essentially the whole obstacle that Automatons present for the player to overcome. I found myself desperately trying to keep the flying creatures from crowding my character as she threw out Wand attacks and Searing Shots everywhere; this was a situation where the Fireball spell might have been a better choice for its area of effect properties. I ran this challenge a number of times and was never able to make it too far into the second half of the scar, when the giant versions of the dagger/shield/axe/hammer show up together. I discovered that five hits without any empathy assist aid would kill my Mage and fail the challenge - not much room for error. I was doing poorly enough that I didn't even have the recording software running because I didn't think I had any chance of winning. And then suddenly it all came together and I managed to defeat the scar to my own shock, with the second half of the fight going far better than it ever had before. On the winning attempt, I was able to burst down the giant dagger quickly and reduce the odds to only 1 vs 3 which gave me just barely enough space to dodge everything while killing the shield, axe, and hammer. It was a very nervous ending as I worked through the remaining lifebar of the shield and hammer a single hit away from death. But I was able to get it done and earn the S+ rating for the Bronze Trophy, woohoo! Gimme that 500 souls reward! 
Those souls went into two more ranks of Unbreakable Will (at 300 souls apiece) which allowed me to convert 110k gold into two more levels of Gold Gain. I was now up to 80% gold in total with all of the various bonuses stacked up; I held off on buying the other two potential levels of Gold Gain so that I could spend some money on real stats. These would probably be the last souls invested into Unbreakable Will since I was hitting the point at which the Gold Gain levels wouldn't pay for themselves any longer. Despite finding a lot of runes and equipment, there was nothing that I wanted to swap over and equip and therefore I could put the rest of my money into more Vitality and Intelligence. I didn't want to spend much more in Armor because I could get 60 Armor from the second Ammonite set unity bonus - that and Armor is ungodly expensive to purchase in Rogue Legacy 2. It's better to get it free from equipment while spending for Vitality, Intelligence, and Strength.
Mage #16: 114 Vitality, 103 Intelligence, 109 Armor, 7 Focus
This Mage also had no traits and no starting relics to continue the trend of mostly blank characters. This wound up being a failed character as I was doing a routine clear of the Study when I took 500 damage in a single room and perished. It was a tough room to be sure but I failed to realize that three hits would kill me and that was that. These Mages are fragile characters and it's easy to forget that sometimes. I decided to put the minimal gold into a series of Intelligence upgrades that cost about 9500 gold apiece. No new equipment or runes to add at this point. By the way, would you believe that I still hadn't discovered the Leviathan Sword or Obsidian Sword, or anything beyond the base Ammonite Sword? My luck in finding using stuff in the Sword slot had been terrible thus far.
125 monsters slain, 57078 gold, 2778 ore, 557 aether

Mage #17: 114 Vitality, 109 Intelligence, 111 Armor, 7 Focus
This Mage started with the Antikythera relic: gain 10% more magic damage for each enemy defeated (maximum 50%), bonus lost when hit. This greatly increased the damage output of this character without doing anything to improve survivability. It was easy to stack up five monster kills in succession (every Mage was plowing through hundreds and hundreds of them while clearing the dungeon) and the increased damage was very noticeable when the relic was fully stacked. Lots of enemies went from needing two spell rotations to dying in a single Wand attack plus Searing Shot fireball, speeding up the clear pace and making everything safer in the process. As far as the run itself went, I came across three different Blessings of Life in the Citadel (two of them right on top of one another) and spent a lot of time refilling the HP meter in the opening area and the Study. I had a massive find when the third Soulsteal Rune appeared in the Study, only the fourth tier 3 rune that I'd come across thus far. This was a marked contrast from my Knight Legacy playthrough where the Lifesteal Runes had been nearly impossible to find, I'd had excellent luck in turning up the Soulsteal Runes quickly with these Mage characters. Now I'd be able to take advantage of even more health recovery on the next character run in addition to the meats providing 200+ HP thanks to pumping Intelligence as a stat.
I full cleared the Study while spending a lot of time in the Citadel as well thanks to needing to heal up from those Blessings of Life. I hit some nasty rooms in the Dry Lake when I entered and decided to stay out of there for the moment in the hopes of exploring more of the dungeon elsewhere. After reaching the halfway point of Axis Mundi, I headed up into the Sun Tower instead for a change of pace. It was a tough climb heading up the tower and I had to retreat twice to recover HP back on the bridge. I really didn't want to leave the second time because I was so close to the top but it was leave for an easier area or almost certainly die by sticking around on less than 200 HP remaining. I was trying to avoid running my character down to a sliver of health remaining because even the "easy" areas in the NG+2 dungeon could pose a serious threat if they rolled a bunch of commander enemies. For instance, I fell as low as 7 HP in the Plateau (out of 1572 max HP!) on this run when I faced a set of double tier 3 flying shield commanders and had to run screaming out of there to break more of the saved up pots at the teleporters. There were enough meats and flasks in there to get me back to safety and allow the run to continue. I even had my second huge break of luck in the Plateau where I found the third Bounty Rune hiding in a fairy chest - excellent! 

With the Citadel, Study, Axis Mundi, and the Sun Tower all finished, I went back to working my way through the Plateau. I collected the two Lillies and then searched around until finding Naamah's boss room, followed by clearing more rooms in the Dry Lake until I was low on HP again. That allowed me to pop back over to the Plateau and use the boss doors for a health refill, followed by what turned into my best Naamah fight ever. I avoided taking any damage at all despite lacking any defensive spells on this Mage. I simply managed to dodge everything while slowly burning down Naamah with Wand attacks and lots of Searing Shot spells. Believe me, this was very much a surprise to me as well! Fortunately I was recording the boss fight at the time and was able to put the footage up on YouTube for anyone interested to watch.
Afterwards I continued with the Dry Lake and the Plateau which were not easy at all and kept draining away my remaining health. I went and faced estuary Enoch when my Mage was about to run out and fought a mediocre battle where I took quite a few more hits than necessary. It got the job done at the cost of about 1000 HP - not great, definitely room for improvement. I was running low on resources by now and prioritized completing the Plateau which had one completely absurd room with double Shield Banner Commanders to make all of the other monsters invincible, plus a Cursed commander shooting out its little spirits, plus a Shredder commander in there too for good measure. Sometimes the dungeon can get really ridiculous when it happens to roll a bunch of extra commander traits on random monsters. I was glad that I cleared that room though because one of the two treasure chests that it contained held the Ammonite Sword +1, something I'd been trying to find for some time. I did manage to get the Plateau completely finished and went back to the Dry Lake as the only remaining biome. I was completely out of breakables at this point and finally fell to a packed room with something like 5-10% of the basement still unfinished. It was an amazing run that brought back more than 400k worth of money to spend.
647 monsters slain, 418778 gold, 13561 ore, 8857 aether, 200 souls

I had 200 souls to spend but needed 250 or 300 of them for additional ranks of Master Smith or Infinite Knowledge, argh. I knew that this was going to be a big trip back to the town for rune purchases as there was a lot of stuff that I wanted from the Enchantress. First up was that third Soulsteal Rune at a hefty cost of 8000 aether, sheesh! I took off one of the mostly-useless Lifesteal Runes to wear it since the Strength-based rune was only providing 1 HP per monster kill. Next up was that third Bounty Rune for the additional gold income which was a slightly cheaper 5000 aether to purchase. Then I added two entirely new runes that I hadn't used before: double Amplification Runes. Equipping two of them adds an extra tick to burn effects, from six up to seven, with the extra burning instance also being a skill crit. Or at least that's what I had read on the Internet - when I tested this out in town, it didn't end up working in practice! Double Amplification Runes did not grant me an extra burning tick from Searing Shot, directly contradicting what I had read online. Argh, I spent more aether and FOUR rune weight upgrades on them!  At least that rune weight could be used on other runes - I swapped the old Lifesteal Rune back in again in annoyed fashion.
Meanwhile, over at the Blacksmith I purchased that Ammonite Sword +1 which provided some useful stats in the otherwise useless Sword slot. This put me at 40 points of Ammonite set unity and so I sadly swapped off the Kin Helm over to the Ammonite Helm +2, which cost me 15 points of Vitality (!) in exchange for 12 Armor plus the additional 60 Armor from the Ammonite unity bonus. I didn't even need to purchase more equipment weight because the Kin Helm is so darned heavy that I was already over the needed amount. I was hoping to turn up the Ammonite Chest +2 or the Ammonite Trinket +2 so that I could swap out the Helmet slot for something better. On the normal "castle" upgrade tree, I purchased the two remaining Gold Gain levels to take my Mages up to a total gold bonus of +100% (when adding the three Bounty Runes). This felt like the last worthwhile expenditures in that category as the game would end before any further Gold Gain levels could pay for themselves. I concentrated on Vitality upgrades with the remaining 166k gold to spend since I had lost some Vitality when dropping that Kin Helmet. At least I was picking up 100 extra points of Armor and more Soulsteal sustain to compensate.

Mage #18: 106 Vitality, 118 Intelligence, 193 Armor, 7 Focus
This Mage had the Ectomorph trait (taking damage knocks you far away) which wasn't much of a drawback and granted 25% additional gold, for a grand total of +125% gold generation. Unfortunately she also rolled the Clownanthrophy trait which decreases maximum HP by 30% in exchange for, uh, being able to spin kick off terrain. That's a terrible tradeoff and it was made even worse by the low base health of the Mage class, plus the fact that I'd actually decreased my overall Vitality by removing the Kin Helmet. I was starting out with only 590 HP, yikes! At least I now had 193 Armor to cushion the blows that this character was taking. She was also gaining back 17 HP per monster kill thanks to that third Soulsteal Rune which was absolutely awesome. Killing any bosses seemed unlikely with this setup so I resolved to focus on clearing as much of the dungeon as possible to take advantage of that massive bonus to gold income.
I started out in the Study as usual in the hopes of finding some additional HP via Blessings of Life. It was tricky at times having such a small pool of health to work with but the extra sustain from the new Soulsteal Rune helped keep this character out of the danger zone. I did have decent success finding several Blessings of Life and used the Citadel and Axis Mundi to heal up the damage they caused while clearing these easier areas. I stayed out of the Dry Lake for the moment in the hopes of clearing more total biomes and hopefully bringing back more gold with that big +125% modifier. This led me into the Sun Tower where I slowly managed the climb up to the top. In terms of relics, I didn't love the options that I'd been finding and eventually backtracked to pick up the Gnawed Bone in the hopes of gaining more total life. I was able to get the full three stacks by raiding saved up breakables in the teleporter rooms and this definitely helped overcome the penalty of the Clownanthrophy trait. I found the "spin kick off terrain" ability to be more trouble than it was worth as I often found myself bouncing off walls that I didn't intend by accident. For the last 25 resolve, I grabbed Hector's Helm for 20% additional damage when below half health. I figured that was the best of the available options while staying above 100% resolve.

After the Sun Tower was finished, I dedicated myself to the long process of working through the Dry Lake. I find the basement to be the hardest biome by a wide margin, between the poor visibility and the more dangerous monster types that appear inside. Everything down there is a tier 2 monster by default and with the Burden of Evolution turned up to max setting they all had 50% odds to transform into their tier 3 varieties. It's very common to roll rooms where everything shows up as a tier 3 monster and fighting through them is a real pain. Enemies often deal 200-300 damage per hit and it requires truly excellent performance to keep chugging along without losing too much health. The Dry Lake is also absolutely enormous with the Burden of Scale dialed up to full and it took me well over an hour of real-world time to make it through the whole place. I had to retreat a couple of times to Axis Mundi and then the Plateau to restore health but I did get it all done eventually. I even cleared out the second miniboss that I hadn't done previously and was able to take a couple more Blessings of Life to keep stacking more HP. Then I finished up with the remainder of the Plateau and could finally lay claim to a full dungeon clear for the first time on NG+2 difficulty. This was far better than I'd been expecting to do and resulted in 550k gold sitting in this Mage's pockets - excellent!
With the dungeon cleared it was time to go into boss rush mode. I started out with the Axis Mundi Void Beasts who were much more difficult than usual by virtue of having the "prime" version of the battle turned on. This version of the fight shifts the setting to a ship floating at sea and introduces new boss attacks in the form of cannonballs that rain down from the sky and the cursed ghost projectiles that follow your character's movement. The other big twist is that the two main Void Beasts will start spawning little miniature skeletons as they take damage. Two skeletons appear when each of them hit half health and another three minions show up when the main Void Beasts die. Therefore it's extremely important to take out one target at a time to avoid getting swarmed, concentrating on one of the Void Beasts at first, then killing the skeleton minions, and only then finishing off the boss followed by doing the same thing to the other boss. I had a shaky start to the battle and it looked like this was going to be another boss failure, then recovered after the first Void Beast was defeated and rallied from there to secure a narrow victory. This is one encounter that does get easier over the course of the fighting, a bit like how Herodotus in the original Rogue Legacy would become easier over time if the player was careful to manage the blobs correctly.

Estuary Irad was next, the site of so many defeated Mages from back in NG+1 difficulty. I had been improving at this boss through repetition, however, and I was determined to give a better showing this time around. One of the great things about doing a single-class playthrough is that you can visibly see yourself improving with that class over time thanks to continued practice with its specific abilities. That was fully on display this time around with Irad as I made beautiful use of the Wand auto + Searing Shot fireball combo, having the timing down perfectly to get the pair of them off instantly. I had even figured out that I could use a Wand auto + fireball combo to pause in midair for a split second while their dual animations were playing, almost like getting an additional mini jump to dodge projectiles. This wasn't a flawless fight as it's nearly impossible for a Mage character with no defensive abilities to dodge everything during the second half of the encounter. However, I was able to get the job done with plenty of room to spare and avoid a nail-biting conclusion. This is my favorite estuary from a visual standpoint as the boss fight always looks awesome to watch.
Tubal has been another nightmare for so many of my characters and he's probably resulted in more deaths than any of the other estuaries across all of my various playthroughs. This time the fight started out well enough as I was able to clear the first round of minions without taking much damage. They are easier to handle after the recent patch change that granted them a longer invulnerability window but require fewer hits afterwards to kill; then again, with Searing Shot fireballs on hand the old system might have been better for these Mages. I took a few sloppy hits during the middle portion of the boss fight but was still in good shape when Tubal hit the 1/3 mark on his lifebar and shrunk the size of the chamber by adding the flaming gears on either side. This was when things started to get really rough, as Tubal summoned three flying hammers and they managed to corner me on the right side of the room where there was no room to maneuver. I desperately wished that I had the Knight's shield or the Duelist's dash roll for an escape move here! Instead I took several hits and dropped down to near-death status with only 162 HP remaining. Tubal's attacks did... 167 damage, eep! I had a couple of sick dodges of attacks that would have killed this Mage and landed the last few fireball spells to down the boss. Whew, what a wild ride that had been! 

This left only the two final bosses waiting behind the Golden Doors. I was so low on health that even the 80% HP/MP refill wouldn't take me back to full and therefore tried to raid the remaining breakables for meat or flask items. None of them appeared and therefore I had to face Jonah at less than max health. Now I wasn't worried about Jonah himself who I've had little trouble defeating with past characters. No, the issue was finishing the Jonah battle with enough health remaining so that this Mage would be at 100% when taking on Cain in the final duel afterwards. This wasn't my best Jonah fight and I think he hit this Mage three or four times, fortunately that was sufficient to be healed back to full when entering the last boss doors. Jonah is one of the coolest-looking and most fun to play opponents in Rogue Legacy but he's not very difficult once the player is able to memorize his various weapon patterns.
And then there was Cain, a fittingly tough last obstacle to end the game. Cain has an awful lot of health and it always takes a long time to cut through his fat lifebar in order to land the kill. The key to this battle is reading the various flashy attacks that Cain throws out and knowing what's coming ahead of time to be able to take the proper evasive maneuvers. Everything can be dodged if played correctly but failing to recognize the attack or acting too slowly when it appears leads very quickly to disaster. The first half of the duel went OK while clearly being insufficient to result in a victory. I wasn't playing poorly, just not well enough to tank my way through to a win. I was flubbing some dodges and misrecognizing some of Cain's attacks which resulted in taking damage. Cain's abilities were dealing 170 damage apiece which meant that I could survive exactly ten hits with the eleventh one spelling death. Unfortunately I found myself down to 41 HP remaining while Cain still had a third of his lifebar left. One more hit would be the end, I'd have to execute perfectly down the stretch or else spend hours and hours playing through the whole dungeon again. I didn't think it was possible but gritted my teeth and kept on going. One ability dodged, two abilities dodged, three... I kept avoid them while pelting Cain with fireballs and Wand attacks. He skipped out on doing the attack that I have the most trouble dodging, the Naamah projectiles with void spiked balls inside, while sticking to less dangerous attacks. Cain's health kept dropping and it was clear this was coming down to the wire. I dodged eight different attacks in total at the end without taking a hit and landed the final Searing Shot spell for the victory!

Absolutely amazing stuff, I could not believe that this Mage managed to defeat all of those bosses and finish off NG+2 difficulty.  She was down to her final hit against both Tubal and Cain and I managed to pull it off anyway through a mixture of skill and pure luck. What made this even sweeter was that absolutely everything from the final run ended up mattering in the eventual outcome. Every single Blessing of Life mattered and with even one fewer this would have been a defeat. I also needed the extra health from the fully-stacked Gnawed Bone and the extra damage from Hector's Helm (I was getting that 20% bonus an awful lot in these last boss fights). Imagine how much easier this would have been without the 30% health penalty from that stupid Clownanthrophy trait! It's amusing in restrospect that I wrote "killing any bosses seemed unlikely with this setup"; I write these reports as I go and usually add some initial thoughts about each heir before starting their playthrough. I wan anticipating needing one or two more Mage characters to finish the difficulty and never thought that this individual would be the character to achieve victory. Lady Pepper would not be denied though!
The advantage of running the recording software while playing is that I can grab particularly interesting footage and toss it on YouTube for others to watch. I recorded commentary for the final boss rush and turned it into a video which can be watched here. Trust me, it's way more interesting to SEE these final boss fights in action as opposed to just reading about them!

715 monsters slain, 649170 gold, 33016 ore, 25622 aether, 500 souls
The only bad thing about this run is that I wasn't able to spend any of the 650k gold that it brought back. I'll take it though! No need to spend hours and hours of more time going through that massive dungeon again. This last Mage took about three hours of real-world time for the whole playthrough and again I have to emphasize how much bigger the world is in comparison to the original Rogue Legacy (where a full clear took about an hour at most). As for the Mage class, it took me 18 total characters to finish NG+2 difficulty. While that was significantly worse than the Knight class, I was pleasantly surprised overall at how well Mages performed when given a dedicated Intelligence-based build. This class has very good offensive output and if it had some kind of defensive ability (rather than the not-very-useful second spell) it would rate a lot higher in my estimation. Mages are a lot of fun to play and definitely change up the gameplay in comparison to the melee-oriented classes. This is a vastly better designed class than the poor Archmage from the original Rogue Legacy and well worth trying for a change of pace.
Thanks as always for reading, I hope you enjoyed following along with these bearded Mages!