544 monsters slain, 73864 gold, 7643 ore, 3708 aether, 100 souls
The Mage journey continued as I picked up after finishing Normal difficulty with the last heir. For this between-difficulties excursion into the "town" area, I only had 150 souls on hand since Cain was the only boss that had been defeated by the last character. However, I had loads of ore and aether burning a hole in my pocket and therefore used the second Strange Transaction to turn 5000 of each of them into another 150 souls. This took me up to 300 souls and enough to purchase another rank of Unbreakable Will whereupon I spent 30k gold on one of the two new ranks of Gold Gain for 5% more gold income. It would have cost me everything that I had to get both of them and I wanted to save some money for runes and equipment. In that rune department, I purchased the Quenching Rune and the three rune weight upgrades needed to use it. No more paralyzing fear of commanders with the Shredder trait! In the equipment field, the big purchase was the Ammonite Trinket (requiring FIVE equipment weight upgrades to use!) and that cleaned out the rest of my money. I'd have to wait for the next character to shuffle some gear over to the Crescent set or whatever else might drop in NG+1 difficulty.
Defeating the game on Normal difficulty opens up the "Threads of Fate" and the chance to reach New Game Plus difficulty for the first time. I followed the same pattern as I did with my initial Knight Legacy challenge, turning on the burden transforming normal Lamech into the more dangerous Lamech Prime boss refight and then adding two points in Burden of Evolution (monsters have 20% chance to transform into the next tier up) and Burden of Adaptation (monsters have 6% chance to gain a commander buff) along with one point in Burden of Scale to make the dungeon 10% larger. This was significantly more burdens than needed, as the player only needs to pick two of them and I'd selected six, with my goal being to recreate the feeling of increasing the difficulty level from the original Rogue Legacy. From my previous playthrough, I knew that these additional burders made the random monsters across the dungeon significantly tougher opponents.
Mage #11: 53 Vitality, 54 Intelligence, 89 Armor, 7 Focus
This Mage started the game with the Gnawed Bone relic: eating health drops at full HP increases max health by 10% (stacks up to three times). This is an awesome relic for the first character to have on a difficulty level because you can find meat drops in the starting Tutorial area which count for the increased HP benefit - which happened to me again on this very playthrough!  I was able to get the other two meat drops without too much difficulty in the Citadel to max out the benefit from the Gnawed Bone relic, not a bad way to spend 25 resolve. I was struck as always by the vastly increased gold produced by the Citadel on NG+1 difficulty, far higher than when starting out where chests will drop as little as 70 or 80 gold. I collected almost 10,000 gold in the Citadel alone without even clearing it fully. On the other hand, the monsters weren't always dying in a single Searing Shot fireball and they did quite a bit of damage when they hit my Mage character so the danger level had increased commensurately along with the gold income.
Speaking of damage, I found that the much higher health totals of the monsters in the Study posed real problems for my Searing Shots. The fact that enemies took multiple fireballs to die (or the full duration of the ticking fire damage from a single spellcast) meant that it was noticeably more difficult to progress through the dungeon. The flying hammer enemies in particular had enough HP that they were refusing to die as they kept flying towards my character. Multiple times my Mage took an unexpected hit because the automotons took too long to die - I was going to need to fix this by pumping the Intelligence stat further. I went ahead and grabbed the Incandescent Telescope relic to help with this problem (deals 12% more damage to enemies further away) and ended up with mixed results. The extra damage kicked in for some of my spellcasts but the Mage's auto attacks with the Wand weren't quite far enough away to get the benefit. Furthermore, the white circle added to the screen by the Telescope to indicate its range added unwanted visual clutter that made it harder to see what was happening. This was a problem I frequently encountered while playing Mages: too much stuff on the screen at once, between the Siphon effect of the Wand auto attacks and the burning graphics when a Searing Shot hit. Anything adding to that visual clutter had to be worth it and the Incandescent Telescope probably wasn't worth the extra hassle.

In any case, I was having good success with this character as I full cleared both the Citadel and the Study without any serious problems arising. I found the guaranteed Blessing of Life in the Study and then I discovered two more of them in Axis Mundi which combined together with the Gnawed Bone relic to run this Mage's total HP up over 800. I also had a huge stroke of fortune in finding a Soulsteal Rune in one of the fairy chest rooms along the bridge - excellent! This was only my fourth tier 2 rune and now I'd have access to the increased healing geared to the Intelligence stat. My character was close enough to full HP to reach the max upon entering a boss door and that was the green light to take on the Axis Mundi Void Beasts. I've gotten much better at fighting those two and smoked them once again with a series of Searing Shot projectiles, only getting hit a single time in the process. The Telescope relic was pretty helpful here since the bosses had such a large hit box that they apparently were always outside of close range. Afterwards, I headed into the Sun Tower and did my best to climb up to the top. I was nearing the very top when I started to run out of health and didn't want to retreat back to the Plateau and have to climb all the way back up again. This backfired when I was unable to dodge the blue projectiles from one of the tier 3 ghost enemies and died short of reaching the end of the Tower.
308 monsters slain, 84998 gold, 3891 ore, 2726 aether, 100 souls
I had exactly 150 souls in inventory and spent them on another rank of Master Smith to cusion the gold cost of the rune and equipment upgrades that I knew I was about to purchase. In the rune category that was the second Soulsteal Rune which cost an additional three rune weight levels in addition to the 3200 aether for the rune itself. Over at the Blacksmith, I dropped the Ammonite gear with weaker stats (in the Helmet and Cape slots) for Crescent items of the same type. This cost me a few points of Armor while increasing Vitality and Intelligence by a good bit. Hopefully I'd start finding some of the Ammonite and Crescent +1 equipment which both have the possibility to appear in NG+1 difficulty (whereas the Drowned stuff needs NG+2 difficulty for the second tier). I could have purchased the next Gold Gain level since I was at an odd amount (7/8 ranks) but this next Mage had a trait that added 25% extra gold gain and I wouldn't have seen much of a benefit. Thus I opted to sink gold into more Intelligence instead, trying to hit the 75 Intelligence mark for the extra Soulsteal Rune value. I didn't quite make it there which should be achievable for the next character's run.

Mage #12: 59 Vitality, 71 Intelligence, 81 Armor, 7 Focus
This Mage had the Dwarfism trait for the aforementioned +25% additional gold which added up to an overall total of 70% extra gold income. I found that Dwarfism trait didn't affect the size of the Searing Shot fireballs or the Wand's default projectile which meant that the trait wasn't really a penalty at all. If anything it was a benefit since my Mage had a smaller hit box - a real contrast to how difficult this trait can be when playing melee classes! The extra damage on this Mage was immediately noticeable after sinking those additional levels into the Intelligence stat, I was back to "one shot, one kill" range against most opponents again. I haven't mentioned this so far but the Mage's class mastery bonus is the Intelligence stat and I had nearly maxed that out for 14% additional Intelligence over the base value (max is 15% before investing souls to increase the cap). That Mastery bonus was helping to pull the damage of the Mage class even higher than it would have been otherwise. This character was also up to 8 HP restored per monster kill which was extremely helpful when taking damage. Along with getting 140 HP back per meat (!) I could restore health pretty easily despite having a small HP pool from Vitality.
It took some time to find the entrance to the Study in the Citadel although this was compensated by finding a Blessing of Life along the way. I was also able to grab a useful relic when Catalyst showed up again for 20% additional damage after applying burn with Searing Shot's projectiles. Then I found a separate, second Catalyst relic in a different room in the Study - well, if you say so!  I was quite happy to double up on that power for 40% extra damage. There proved to be three more Blessings of Life in the Study (including the always-present one) and this run was off and rolling. I full cleared the Study and Citadel while recovering HP from all those Blessings of Life, then faced the Gonghead Twins minibosses and absolutely torched them. They failed to hit my Mage a single time as I roasted them with wave after wave of Scorching Shots. I could only hope that I'd keep this pace going since this Mage was having an awesome run thus far.

I went into the basement next and cleared it out in methodical fashion, one room after another following in long sequence. There was one point where I had to retreat briefly to Axis Mundi because a whole bunch of monsters had randomly been upgraded into their tier 3 versions in a single room, but otherwise this was a clean pass through the whole Dry Lake. I made sure to unlock both of the miniboss doors after I had the full clear, and yes, this knocked 300 HP off my healthbar thanks to having to spend 45 resolve (temporarily) on the stupid keys. Really hate that part of the gameplay. The only major find in the Dry Lake was the Kin Helm which could be worth using if the equipment weight penalty wasn't too bad. Afterwards, I decided to try my hand at climbing the Sun Tower and that biome went even better than the Dry Lake. I made it straight to the top with no issues and no need to leave for health restoration at any point in time. I followed this up by returning to the Dry Lake and defeating both of the miniboss pairs which went as smoothly as expected. The only suboptimal part of these areas was the lack of any new Blessings of Life to further increase maximum health.
This Mage was starting to run out of dungeon to clear and I thought I'd get Enoch out of the way next while saving the second half of Axis Mundi for health restoration. The spellcasting estuary made himself extra annoying by repeatedly summoning his little ghosts which I find to be the toughest attack to dodge for the Mage class. The Wand's hitbox simply doesn't clear them that well. This boss fight went well enough and I emerged victorious although there was still room for improvement, a few hits taken against both forms of the estuary. Obviously double Catalyst relics were doing immense work against all of these various bosses and minibosses that I was confronting. I finished up with the rest of Axis Mundi (claiming one more Blessing of Life in the process) and then started working on the Plateau.

I was trying to find Naamah's boss doors quickly in the hopes that I could save some of her biome for HP restoration afterwards. That didn't work as the estuary's chamber was one of the very last places that I found in the Plateau, oh well. I tore through Naamah in the boss fight, nearly achieving a flawless victory and failing only because I jumped into one of her projectiles at the last minute for no reason. The Shockwave spell on this Mage's alternate cast worked beautifully at popping Nammah's projectiles on demand. Then I headed over to estuary Irad for the next boss fight in order and ran into an unusual problem: the Dwarfism Mage's tiny character model had a lot of trouble spin kicking off Irad's yellow projectiles to pop them. This was probably my fault but I couldn't get the timing down right and struggled more than usual. I also found it difficult once again trying to squeeze in the minimal time needed for the spell casting animation while trying to dodge Irad's shots. Long story short, I almost killed the boss but came up a bit short in a fight that was far from my best. In most cases the Dwarfism trait had been a positive but I do think it hurt me against this opponent.
571 monsters slain, 206982 gold, 14923 ore, 7569 aether, 200 souls
There were a ton of resources to spend after that lengthy excursion from the last character, increased even further when I briefly played a Knight character to knock out the last 2000 points needed for the Bronze Trophy at the Bladed Rose scar. I decided to spend 450 souls for double levels in Infinite Knowledge which would bring it even with Unbreakable Will at 4 ranks apiece. Over at the vendors, I had a second Quenching Rune to pick up which cost two rune weight upgrades, then a tougher set of decisions to make over at the Blacksmith. The biggest potential upgrade was in the Helmet slot where I could swap to the Kin Helm for 15 (!) extra points of Vitality at the cost of seven equipment weight levels. That seemed like a good trade because I was always going to need those equipment levels at some point regardless and made the change. I kept everything else the same since the very minor stat gains I could make weren't worth the costs. Elsewhere, I belatedly picked up the eighth Gold Gain level that I had delayed on the last character, made sure to hit the 75 Intelligence breakpoint for Soulsteal Rune use, and then sank a ton of upgrades into Vitality which I had delayed on the last Mage. Along with that new Kin Helm, my Mages were going to have MUCH more health to play around with going forward.

Mage #13: 87 Vitality, 78 Intelligence, 81 Armor, 7 Focus
This Mage had the Glowing Ember relic (extra damage on every 6th auto attack) which was not terribly useful for a Mage and essentially wasted 25 resolve. However, she started out with 709 HP which was pretty much where my last few characters had finished their journeys after claiming a whole bunch of Blessings of Life - it made a real difference! I had more or less reached the point where the dungeon wasn't causing much of an issue on NG+1 difficulty and proceeded through a routine clear. There were a couple of big finds from a gear perspective, with the second Bounty Rune appearing down in the Dry Lake along with the Leviathan Cape. That item was worth 24 Intelligence, a massive increase over my current 10 Intelligence on the Crescent Cape if I could afford the equipment weight (and didn't prefer something else for the unity set bonus). Earlier I had picked up the good old Catalyst relic for 20% increased damage from the burning effect on Searing Shot - hard to go wrong with that choice given the setup I was running on these Mages. And yes, I did clear out some red portals despite all of my bad experiences with them using the Mage class. I just can't stop myself from going in them. 
One other observation from this character: double Soulsteal (or Lifesteal) Runes function a bit differently than I thought. One of those runes adds +1 HP per monster kill for every 4% of Strength/Intelligence, i.e. at the 25 point breakpoints that I've been mentioning. However, stacking two of them grants +1 HP per monster kill for every 8% of Strength/Intelligence which translates into every 12.5 stat points. Thus I was only getting 9 HP per monster kill and not 10 HP as I'd been expecting (7 HP via 78 Intelligence from the double Soulsteal Runes and 2 HP via 20 Strength from the double Lifesteal Runes - fortunately the game does round up on all fractional numbers). This makes perfect sense based on how the text description of the runes is listed, it simply wasn't something that I'd looked at in any detail previously. Good to know.

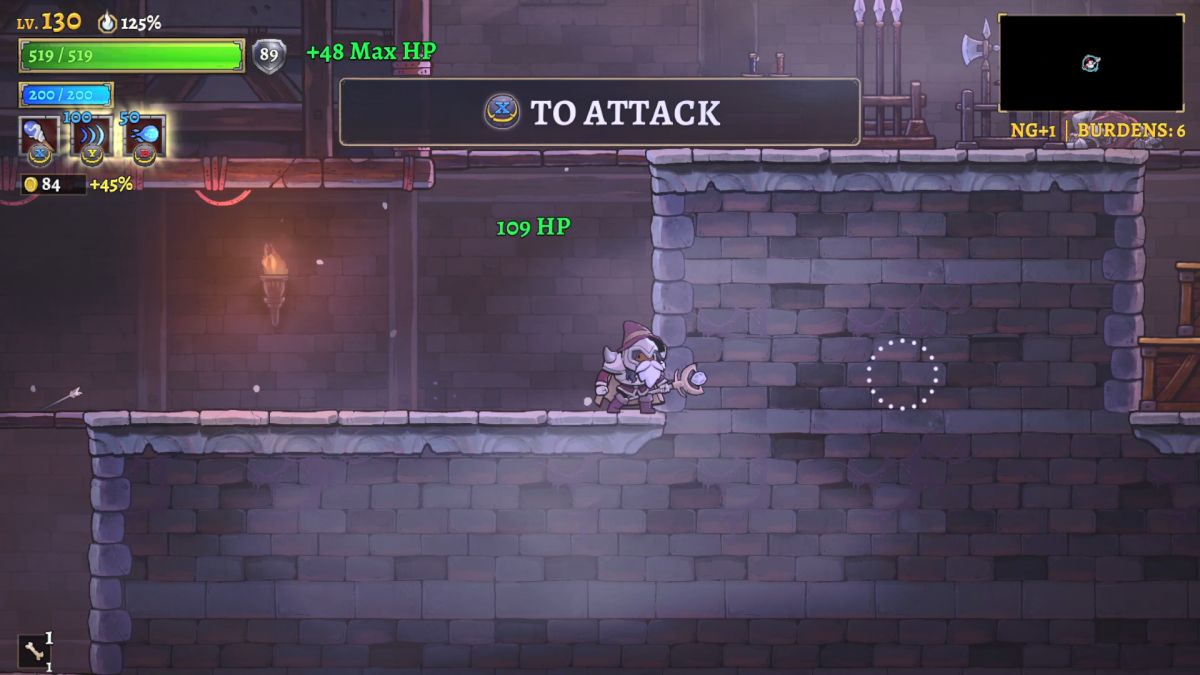
I cleared everything except the Plateau which I wanted to save for potential HP recovery and therefore headed inside estuary Irad's boss chamber. I was handling the fight with no problems and from the screenshot above you would think that this was a routine victory, my Mage still in great shape on health while Irad was down near the 1/4 mark. However, I had a bad sequence where I was hit three or four times in succession before I could recover properly and that was all that it took to send this character to a loss with Irad on death's door. The big weakness of the Mage class reared its head here as I simply didn't have the beefy health bar of the Knight to cover for potential mistakes. Even though this had been a good run with some helpful items acquired (including a Folding Rune at the tail end of the run), it wound up being a failure because I messed up against Irad. Now I would need to spend another two hours running the full dungeon before I could try again, sigh.
486 monsters slain, 145536 gold, 6458 ore, 2193 aether
I had a lot of ore and aether saved up and therefore started out in the town with the third Strange Transaction, converting 7500 ore/aether into another 150 souls. I used them to buy another rank of Master Smith because I was carrying a lot of equipment/rune weight and didn't have the Knight/Valkyrie Mastery bonuses to help out. I picked up the second tier of both the Folded Rune and Bounty Rune at the Enchantress requiring four more rune weight levels; to give you an idea of how expensive this was getting, the last two rune weight levels cost about 8500 gold apiece. Over at the Blacksmith, I couldn't unlock any more unity bonuses and instead decided to make use of that Leviathan Cape which was a massive upgrade over the current Crescent Cape (10 Intelligence to 24 Intelligence). It required seven additional levels of equipment weight though, yikes! Again I would need to get these upgrades eventually anyway but sheesh, they were not cheap. I spent 70k gold just on equipment/rune levels even with the extra rank in Master Smith! The rest went into basic stats as usual, including just enough to nudge Intelligence past the 100 point mark for the extra point of Soulsteal value.

Mage #14: 88 Vitality, 100 Intelligence, 89 Armor, 7 Focus
This mage started with the Soul Tether relic which I'd had once before: every 5 seconds your next auto attack deals 150% magic damage to all nearby enemies. This basicall turns the Wand attacks into a real damage threat in their own right and it's quite good on Mages. As nice as this relic was, however, I found Hyperion's Ring almost immediately in the Citadel which I would have greatly preferred as a relic. Oh well, dungeon randomness and all that, I had to make the best of the hand I was dealt. This was a run where I finally encountered Demeter's Trial relic for the first time in this entire variant - 14 Mages and this was the first time I'd seen it! I was starting to wonder if one of the patches had removed it from the game but no, it seems that I was only going through a long RNG streak of the relic not appearing. Demeter's Trial is a cursed relic that kills your character instantly upon taking damage unless it can be cleansed by finding a healing item of some kind (meat, flask, or pizza). This is easy to do by saving up the breakables in the teleporter rooms and I was happily able to cleanse the relic for another 200 max HP and 50 additional max mana. That last bit was very handy while playing a Mage character as it took this individual up to 250 max mana. I also found some very useful equipment down in the Dry Lake: the +1 versions of the Ammonite Helmet, Chest, and Trinket. I was already equipping the Chest and Trinket so those would be straight upgrades and the combination of all three would be enough to unlock the second tier of Ammonite set unity. That might not be worth it until I could find the Ammonite Sword +1 but at least it was an option.
The dungeon wasn't challenging by this point and therefore the success or failure of this Mage was going to come down to the boss fights. I started out with Lamech Prime after clearing the Dry Lake and discovered once again that I had overestimated him. Lamech Prime's various abilities are stronger than the base version of the estuary but they're still relatively easy to avoid and he simply doesn't deal that much damage in comparison to the later estuaries in the dungeon. I took a few hits and won the battle with about 1000 HP remaining to spare. After making my way to the top of the Sun Tower, I prepared for another showdown with Irad who had killed the last two Mages in highly annoying fashion. This heir had the Soul Tether relic for additional damage on auto attacks, plus the extra HP/MP from Demeter's Trial, plus the benefits of about six different Blessings of Life that I'd found throughout the dungeon. All of them proved to be highly unnecessary as I blasted my way right through the boss fight, barely taking any damage at all while doding the various projectiles from the big eyeballs. This Mage won the battle with almost 1200 HP still remaining - why couldn't I have been that clean with the previous heirs?! At least this obstacle was out of the way now.

I mopped up the remaining portion of the dungeon by clearing the Plateau and was rewarded by finding another two Blessings of Life in there. They brought my Mage all the way up to 1683 HP after starting out with 716 HP; the rewards for taking the time to explore the whole dungeon are significant in Rogue Legacy 2. That meant it was time to take on estuary Tubal and I was helped here by a patch change to the boss which had taken place since I last faced him back in Normal difficulty. The RL2 designers adjusted Tubal's flying minions by increasing their invulnerability period upon spawning but decreasing the number of hits needed to kill them after it wears off, knocking the requirement down from 5 hits to 1 hit before they can be slain. This was a good change because previously it was extremely difficult to kill the automatons without some kind of damage over time effect (burning or poison or whatever) to get through those five hits. And while these Mages did have a damage over time effect via the Searing Shot spell, I was still happy to see that patch change take place. This changed the gameplay of the Tubal fight such that the player now wants to avoid the flying minions for about seven seconds after they spawn, letting the invulnerability wear off, and then it's pretty easy to kill them. Tubal himself is not very dangerous without his creations and therefore I emphasized removing them from the battle as quickly as possible. This worked perfectly and I was able to win the battle with more than 1000 health remaining. Perhaps this will stop being by far the hardest of the estuaries to defeat with that new patch change (?)

Jonah doesn't seem to cause problems for my characters and I was able to tear through him again without any problems. I think that my character took three total hits over the course of the fight and the whole thing was never remotely close. I was much more worried about Cain as I really didn't want to have to play through the whole NG+1 dungeon yet again, and I was right to be worried as this boss encounter was significantly harder. Cain has a ton of health to cut through and the Mage class lacks any defensive abilities to help avoid his attacks. I didn't even have semi-defensive spells in the utility slot like the Freeze Strike, instead rolling the Flame Barrier which I didn't find to be useful. I was running out of mana with just the Searing Shot and couldn't afford to waste more of it on another attack spell. The two of us clashed over the course of several long minutes of gameplay, with me playing the fight pretty well while still taking hits here and there when I flubbed the proper dodging sequence. Our healthbars were dropping at virtually an identical pace and I could only pray that I would be able to land enough spells to finish the job before running out of life. Fortunately I succeeded by a narrow margin, 231 HP remaining out of that 1683 HP total. Cain was doing 121 damage per hit so I could have survived two more mistakes before dying. It was closer than I wanted but I'd take it - thank goodness for all those Blessings of Life and the purified Demeter's Trial!
After taking ten Mages to venture through Normal difficulty (including the hopeless Pacifist character), I only needed four Mages to clear the second difficulty level of NG+1. That matched the experience of my Knights where it was faster to get through the second clear as opposed to beating the game for the first time. This ran on long enough that I'll separate NG+2 difficulty onto its own separate page rather than trying to cram everything into a very lengthy report. These Mages still had to tackle the cranked-up difficulty of NG+2 with all of those extra burdens added to make the dungeon more vicious - stay tuned.