
We were approaching the finish line for Tressa's solo journey throughout Octopath Traveler at this point, with only the Chapter 4 stories remaining to be completed. Despite what I may have written on the initial page of Tressa's report, it was still unclear to me at this point if it would be possible to finish the game with a solo character. Octopath Traveler makes this significantly harder for a solo run in several different ways as compared to the classic Final Fantasy games. The need to boost attacks to full (4x) damage status means that major attacks can typically only be launched once every few turns, as opposed to older games where the most powerful move for each character could generally be used every round. It's inherently more difficult needing to manage HP, SP, and BP as opposed to just HP and MP. Enemy bosses don't limit themselves to attacking one per turn in this game either, often attacking twice or even three times per round, while also layering nasty statuses and debuffs into the mix. It can be very tough to keep a solo character alive at all under those circumstances, much less in position to return damage themselves. The gameplay also frequently assumes that the party will be breaking opposing bosses with regularity, which may not even be possible sometimes for a solo character.
It all added up to quite a difficult environment, even for Tressa who I had chosen out as the strongest possible character to use for a solo game. I remembered when I had played a solo Samurai in Final Fantasy 5 early on in my character runs for that game, marvelling at how incredibly easy everything proved to be. Well, Tressa may have had her own version of the GilToss ability in the form of Hired Help, but she was still having a very rough time against some of these bosses - this was no walk in the park at all! It was going to take careful planning (and more ongoing discovery of Octopath's gameplay mechanics / boss AI scripting) to reach the end of this journey.

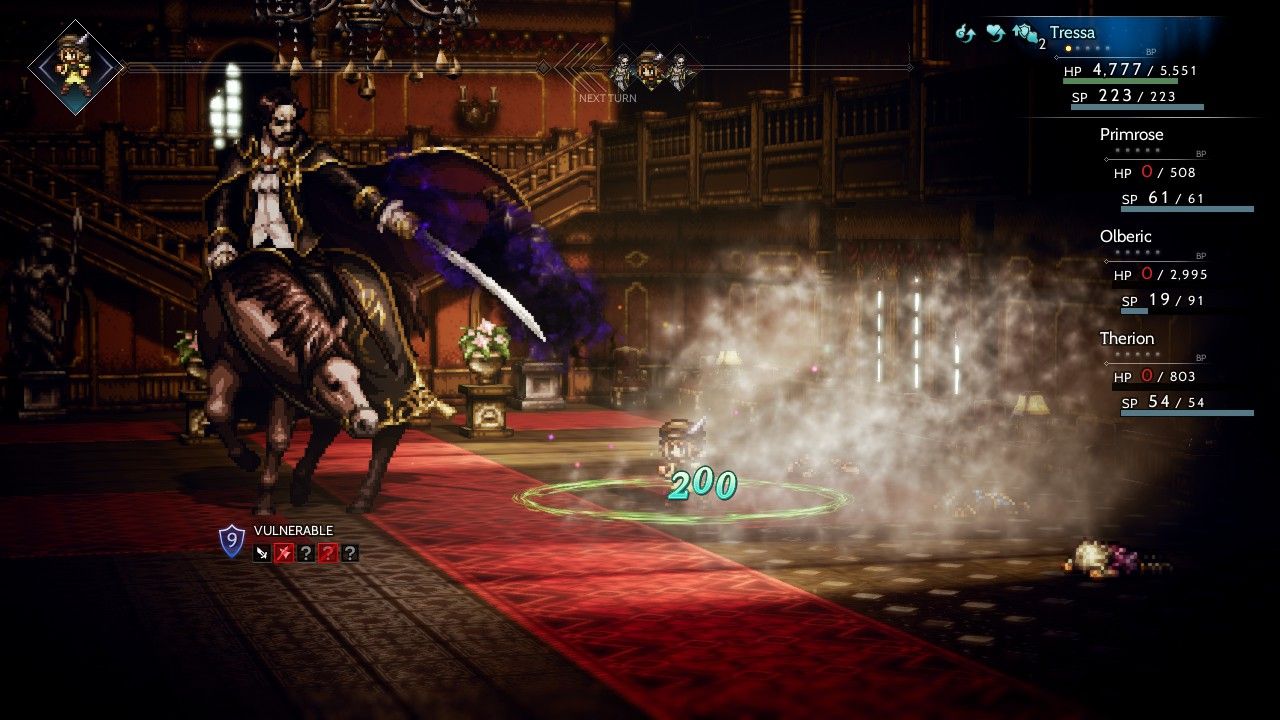
I had spent some time thinking about the different bosses at the end of the Chapter 4 stories and settled on Ophilia as the one to tackle first. She confronts a cult leader named Mattias in the town of Wispermill, an enemy who relies on repeatedly summoning more of his minions to the battlefield as they are subsequently defeated. Mattias starts out with two Senior Cultists, then summons two Black Matters, and then two Augmented Remnants as his health total continues to drop lower and lower. I had picked out Mattias because I was confident that Tressa's Veteran Soldiers could blast away his various minions and get them off the battlefield quickly, with Mattias himself being a bit weaker than the other Chapter 4 endgame bosses. The minions were also the only ones using physical attacks, with Mattias himself relying on different elemental spells for damage. The developers really went to town on some of his graphical effects, like the swirling dark tornado depicted above in the "Black Gale" attack.
According to the online Octopath Traveler wiki, the elemental attacks used by Mattias all had the dark element property. As such, I realized that the Void Amulet accessory ("greatly reduces dark element damage") would be the perfect choice for this battle. There was one available in the Ruins of Eld, the Chapter 4 endgame dungeon for Cyrus, and therefore I had Tressa leave Wispermill and warp over to Duskbarrow, triggering Cyrus' story in the process. I hadn't known whether or not it was even possible to have multiple active storylines at once in Octopath Traveler, and fortunately yes, it is. You can even remove characters with an active storyline from your party if desired, with the ability to pick up and resume an interrupted story later. (The one exception seems to be the Chapter 1 stories when initially recruiting characters, as I discovered to my chagrin with the Guardian of the First Flame much earlier.) Anyway, with the Void Amulet equipped on Tressa, it was time to return back to Mattias again:

That was more like it! The Void Amulet completely neutered the dark elemental forms of damage, dropping them down to the minimum 1-10 damage that failed attacks always deal in Octopath Traveler. (They never do zero damage except on a missed attack.) All of the Consuming Darkness attacks from Mattias were now rendered irrelevant along with the Shadow Strike and Black Magic moves (also dark element) employed by some of his minions. To my surprise, I found that the damage was not reduced in any way from the Black Gale pictured earlier, which is apparently a wind element attack and not dark element. I've been updating my documentation accordingly to fix places where the online wiki for this game has the wrong information. I think for future solo characters it might be better to equip both the Void Amulet (dark) and the Tempest Amulet (wind) to remove both sources of elemental damage from the battlefield. Then the rest of the gear setup could be used for physical defense to help block the attacks launched by the minions.
In any case, the Void Amulet was a true game-changer and greatly reduced the danger coming from Mattias himself. That wasn't to say that the boss was a pushover though, in part simply due to his life total of 97k HP. All of the Chapter 4 bosses have a ton of health to work through and become more dangerous as they drop lower on their hidden lifebars. Mattias started using "Infernal Prayer" (physical attack/elemental attack/speed up) when he fell below 50% HP remaining, and he broke out his most powerful attack when he dropped below 25% HP remaining. This was "Black Thunder": very heavy lightning elemental damage to the entire party with a chance to inflict unconsciousness status. Tressa actually did fall unconscious for two turns from this attack, yet fortunately she was at full HP at the time and lived through those two rounds while continuing to accumulate more boost points. I was not tracking Mattias' health but some rough math in my head suggested that he was near death, prompting a max boosted Veteran Soldiers usage that did 30% additional damage due to the swords weakness of the boss. That dealt about 11,000 damage in total and it was enough to achieve victory with Tressa having a mere 648 HP remaining. Whew, that was not easy at all.

There were several different items that would open up for Purchase if Tressa could defeat the boss at the end of Olberic's Chapter 4 storyline, and as a result I decided to tackle this part of the gameplay next. Olberic's tale concludes in the Riverlands town of Riverford (not the most creative name) where the party attempts to overthrow a brutal dictator named Werner. Olberic had to use his Challenge path action against a seven star opponent, and while that might have sounded impossible for a level 10 character, it actually proved to be quite easy once I had loaded Olberic with all the best defensive gear and a good sword. No need for soulstone usage here, just a lot of stabbing with Olberic's "Abide" ability (physical attack up) in place. Unfortunately Olberic proved to be a bit of a poor leader and walked right into a plot-mandated trap that saw most of the resistance fighters in town slaughtered. Whoops, sorry about that!  But at least he gets to spout off stock heroic phrases like the one above, complete with fancy text bubbles attached. (Just to be clear, Olberic and Cyrus are my favorite characters in Octopath Traveler, even if their stories are full of anime clichés.)

Tressa had to equip a Conscious Stone while proceeding through the Lord's Manse dungeon since some of the enemies in there could inflict unconscious status, otherwise it was pretty smooth sailing. The boss at the end was the aforementioned Werner, a physical-only opponent who I was hoping would be relatively straightforward to defeat. I had to equip a Calming Stone to prevent terror since Werner could inflict it with nearly every one of his moves, then loaded up Tressa with as much physical defense as possible from her equipment. That took her up to 945 points in total, which surely would be enough for this battle, right? Uh, not so much as it turned out. Werner hit hard when he attacked - really, really hard. His "Sweep" attack pictured dealt nearly 1000 damage to Tressa and he also had a Double Strike multiattack that ruled out any countering with the Sidestep ability. Of course Tressa could counter with her Mercenaries for the physical defense up property... except that Werner could counter that as well with his "Oppression" ability that served as a physical defense down debuff. This made it virtually impossible to keep the physical defense up buff in play; in fact, I had to waste rounds using the Mercenaries just to prevent Werner from debuffing Tressa's physical defense, which was a total disaster any time it happened. Using Healing Grapes for health restoration was totally out of the question here. It looked like Tressa would have to guzzle down lots of Refreshing Jams to hang in this fight, and with them being so rare I wasn't sure that I wanted to head down that route just yet.
So Werner was another version of the same problem that Tressa had encountered earlier with Miguel, a strong physical attacker who was hitting harder than she could handle at the moment. I already knew the solution to that particular problem: add more physical defense to reduce the damage that Tressa was taking in battle, in the same way that loading up on physical defense gear had solved the problem of Miguel's spears raining down. However, this overlooked the fact that Tressa was *ALREADY* wearing most of the game's best defensive equipment and there was very little that she could do to increase it further. Remember, she went into the aforementioned duel with Werner packing 945 points of physical defense. What exactly was I supposed to do next? I had no answer for the moment. After a series of failed attempts where Tressa was spending all of her rounds doing nothing more than healing herself, making no progress against Werner, I realized that this wasn't looking particularly doable at the moment. I figured I would go elsewhere and return back to Werner after getting stronger and finding more equipment. This was one of those times where it was nice to have the open-ended nature of Octopath Traveler's gameplay, which allowed me to send Tressa to another part of the map instead of banging her head endlessly against a roadblock boss.

I decided to travel to the town of Orewell to investigate Alfyn's Chapter 4 storyline. It sends the apothecary into the Forest of Rubeh in search of the missing ingredient for a curative potion. The dungeon itself was fairly easy aside from one evil deer creature that could deal as much as 2000 damage on its attacks after buffing its physical strength, ouch! I had picked out Alfyn's story next because the boss at the end uses the same maneuver as the Dragon in H'aanit's Chapter 3 story, an ability named "Swept Away" that temporarily removes individuals from the party. The Dragon had never pulled out that move when Tressa fought it as a solo character, and I correctly gussed that the Ogre Eagle in Alfyn's story wouldn't use it either. Thankfully the biggest danger in these fights can be skipped by a solo character.
Leaving aside the Swept Away issue, the Ogre Eagle was also an easier opponent because all of its elemental damage was wind-based in nature. The creature had two different such attacks, Wind Slash and Storm Slash, and equipping a Tempest Amulet completely neutralized these abilities. Tressa simply ignored them and otherwise itemized as much physical defense as possible against the Ogre Eagle's other forms of attack. The one potentially dangerous ability on this boss was named "Double Rend" and it had a chance to inflict poison, darkness, and physical/elemental attack down on Tressa. Fortunately all of those were things that Tressa could largely ignore, as Hired Help always hit the target regardless of darkness status and its damage was independent of physical/elemental attack being buffed or debuffed. Poison was the only issue out of this group and Tressa could remove it with her Rest ability. The net effect was that Tressa could keep herself healed with medium Healing Grapes for the most part and rely on Veteran Soldiers for dealing damage.

When the Ogre Eagle drops below 50% HP, it breaks out a new and deadly ability named "Toxic Rainbow". This is unrelated to poison status despite the name, instead causing maximum HP reduction for the entire party at the end of every turn. If a party member has above maximum HP at the end of the turn, current HP will be reduced to match the new maximum value. From what I could see, it looked like maximum HP was reduced by 10% at the end of each round. Obviously this put a ticking clock on the remainder of the battle, as it wouldn't be long before Tressa's total lifebar would be reduced low enough that she would simply be one-shotted by the Ogre Eagle's abilities. Since the Ogre Eagle has a massive 110k lifebar in total, I'm concerned that some solo characters may not be able to damage race through the final 55k HP fast enough to achieve victory. I'd cross that bridge when I reached it, however. Tressa fell back on using Veteran Soldiers or a Refreshing Jam for full HP/SP restoration on every turn, boosting the Veteran Soldiers when the meter was full and otherwise using the base version of the ability. Fortunately the Ogre Eagle had a weakness to swords for 30% additional damage even when it wasn't broken. This was one solo character that did have damage to spare, and Tressa emerged victorious when reduced to 2719 HP as her max total. She could have survived a few more rounds but not too many more, if that makes sense.
I took a short break from these difficult boss fights after completing Alfyn's tale. Tressa visited the Undertow Cave back near her starting town of Rippletide, an optional side dungeon that inexplicably has a difficulty rating of 45 despite being located in the first ring of towns. (I don't know if the designers placed this here as a bit of a joke designed to punish the inattentive or arrogant player who ignores the difficulty rating of each area.) There wasn't anything too interesting inside, although Tressa did have a chance to Purchase the best dagger in the game from former boss Vanessa Hysel. (I passed on the option since Tressa could never use daggers in any way.) Then she traveled around to a number of different towns to pick up some of the stat-boosting nuts that she'd missed earlier. This would help a bit although Tressa had already Purchased most of the ones that were allowable by variant rule. Every bit counted.

I thought that the next character's story who would be most doable was Primrose. Her final chapter takes place in a fancy theatre (the designers really loved using that "mansion" tileset) against Simeon, the character revealed to be the head of the group that assassinated her father. The most notable thing about the dungeon leading up to this boss was the need to equip a Conscious Stone accessory again since some of the random encounters could stunlock Tressa and force a game over otherwise. For Simeon himself, Tressa went with the familiar Void Amulet to block the damage from dark element spells and then an Articulate Stone to prevent the silence status condition. The Void Amulet proved its worth immediately, as Simeon had multiple different attacks that were keyed to that particular element. For some reason the names of these abilities randomly capitalized different letters, making them appear like something out of a bad Internet chatroom. It had no effect otherwise and I'm not quite sure that the designers were going for here. Just trying to be creepy, I guess?
This battle had three opponents in total: Simeon the Puppet Master and two actual puppets named the Dancer Marionette and the Father Marionette. The whole thing is bizarre from a plot perspective, with Simeon staging some kind of weird performance about Primrose's life involving these puppets. When the marionettes drop below half health, Simeon powers them up with extra abilities and they gain an extra action per turn. As a result, there's a huge incentive to try and finish them off before they fall below half health, and I was able to manuever this outcome with some careful planning. I had Tressa hit both of the puppets with one use of Bifelgan's Bounty to damage them without cutting their health below half, then I used their shared axe weakness to break them both at the same time and kill them with a max boosted Veteran Soldiers. Once Simeon was alone, he was an easy target since almost all of his damage was dark element in nature. Tressa was able to use Bifelgan's Bounty and raise some extra cash since the danger was low.

Of course it wasn't quite that simple. Simeon is the only one of the 28 main chapter bosses in Octopath Traveler to require two separate fights. There's a poorly-written story segment in between them during which Primrose, who up until this point in time has shown little hesitation in murdering all of her opponents, suddenly freezes up and doubts herself and her mission. While I don't want to spend too much time here on the story aspects of Octopath Traveler, nothing about this scene makes any sense at all to me. Simeon's plan is completely illogical and can only be explained under the cop-out of "the villain is insane!" while Primrose continues to be treated horribly by the game's plot for no reason whatsoever. Some basic questions: why did Primrose need to take a job as an escort when she could have listened for information equally well in a dozen other positions? Why does she continue to wear a ridiculous dancer bikini long after traveling to other towns in other climates? Why does she fall to pieces the moment that Simeon makes a series of transparently stupid accusations about her motives for revenge? Argh!  This is a plot that could have been done really well with better writing, and after a promising start the game's designers just fell back on a series of anime clichés and badly outdated Japanese notions of proper gender roles. I'm definitely going to be skipping these scenes on future playthroughs.

In any case, Tressa still had Simeon part two to contend with. Simeon begins the battle with all but one weakness locked, and after each break, he unlocks another weakness until finally unlocking his weakness to dark element last. Simeon also has three different sets of weaknesses that he shifts between on each break (this is another one of those times where it's really nice having documentation on them ahead of time). The initial weakness to daggers meant that Tressa made good use out of the Dancers from Hired Help, appropriately enough, with the darkness status that they could inflict being particularly useful when it popped up. Simeon uses a lot of dark elemental attacks and abilities that inflict the silence status ailment, both of which were effectively blocked by Tressa's prebattle accessory choices. This was easy enough that Tressa was able to continue using Bifelgan's Bounty for the first half of the battle.

Like pretty much every other boss in Octopath Traveler, Simeon changed up his AI routine and became more dangerous after falling below 50% HP remaining. He increased his actions per turn up from 2 to 3 and began using an ability called "Shredded Fortunes": inflicts physical and elemental defense down on the entire party for 4 turns. This was a counter to the physical defense up property that I'd been running out of Tressa's Mercenaries for most of the battle thus far and increased the danger level significantly. Simeon also started using a strong physical attack named "Act of Impulse", which dealt the pictured 1000 damage with the physical defense up buff in place. Finally, he also had an odd move that causes your character's portraits to be grayed out on the action bar at the top of the screen, making it impossible to tell which character will act in which order. Fortunately that wasn't something that mattered for a solo game though, heh. I kicked Tressa into high gear at this point and started using Veteran Soldiers much more aggressively, seeking to cut through the remaining ~45k health out of Simeon's starting 96k lifebar before anything too bad could happen. It helped enormously that Simeon was wasting at least one and sometimes two actions per turn trying to inflict silence and use dark element spells that bounced off Tressa's Void Amulet harmlessly. She needed to use one Refreshing Jam for a full HP/SP restore but otherwise managed to win on my first serious try at this battle. Considering the length of this encounter, I was very happy to have it in the rearview mirror.

I decided to try Tressa's own Chapter 4 storyline next, which led eventually to a boss fight against the pictured Esmeralda. Her gimmick is that she uses three different blade attacks that each lock out different abilities: "Red Blade" prevents the target from using normal attacks, "Blue Blade" prevents the target from using physical skills, and "Violet Blade" prevents the target from using magical skills. This sounded really bad but in practice it seems as though only the first one of these blades applies its effect, and Red Blade would always go first to lock out the other two blades. Losing the ability to make a normal physical attack fortunately wasn't an issue for Tressa. What was an issue was the damage caused by these blades, each of which did around 2000 damage - yikes! I did some testing and found out that they were actually elemental in nature, not physical, keyed to fire (Red Blade), ice (Blue Blade), and dark (Violet Blade) respectively. Unfortunately this made it impossible to equip one elemental accessory and lock out all of the damage types; the best that Tressa could do was stop two of the three.
An even larger problem came in the form of Esmeralda's physical attacks. Her "Raven’s Flight" ability would debuff Tressa's physical defense and force me to waste rounds using Mercenaries to counter, or else suffer increased damage from Esmeralda's attacks. The worst of these was a five strike ability that hit, well, five times in a row for very heavy damage. If Tressa's physical defense had been debuffed ahead of time with Raven's Flight, each one of those five strikes could deal as much as 1000 damage for a 5000+ damage total. It wasn't a situation that Tressa was well prepared to handle. What she needed was more physical defense, and there was a piece of equipment (the Crystal Armor) which would unlock after defeating Werner which would help out. Therefore it didn't make much sense to try and defeat Esmeralda right now; better to finish Werner first and then return to deal with this threat afterwards.

Alright then, back to Werner again. Tressa needed to equip a Calming Stone in one of her accessory slots to block the terror status that Werner would otherwise be inflicting on each attack, and I decided to pair that with the Empowering Necklace for +1000 HP over any of the other options. Tressa was going to need to burn through at least some portion of her Refreshing Jam stockpile to make it through this battle, and it was better to be restoring 5000 HP per item as opposed to 4000 HP per item. (This was in contrast to relying on Healing Grapes for health recovery as I'd done earlier, where the item's 1750 HP restoration meant that it was better to equip the Protective Necklace for +80 physical/elemental defense at a lower max HP total.) My new setup was working well from a tactical standpoint, with Tressa getting good use out of her Dancers again for breaking Werner's dagger weakness and applying darkness/poison statuses. At least, it was working well from a tactical standpoint until Werner dropped under 50% HP remaining, at which time he went up to 3 actions and broke out a new ability. This was the awesomely-named "Boot To The Head" which had a chance to unflict unconsciousness, and which immediately caused Tressa to get stunlocked and killed. Great, just great.  This meant that Tressa was going to be forced to use both of her accessory slots on status-blocking items, therefore having no chance to add more health or physical defense to the mix. I was back to being stumped again for the moment.

Well, what about some of the remaining bosses then? There were still several that I hadn't attempted yet with Tressa. H'aanit's final storyline led Tressa into the Grimsand Ruins, a desert maze filled with different reptilian critters. There turned out to be nothing especially dangerous here, and Tressa mostly used Trade Tempest to wipe out waves of monsters in a single blow. I haven't been discussing Trade Tempest much because it didn't see use in boss fights, but it was a handy tool to have for powering through random encounters. Broken enemies would take somewhere around 4000 damage from a maxed out Trade Tempest while unbroken ones suffered a little over 2000 damage. This was enough to eliminate the weaker opponents although many of the stronger ones had well over 5000 HP and needed to be Bifelgun-ed to death.

The boss at the end of this dungeon was Redeye, the villain motivating H'aanit's journey since the beginning of the game. Redeye turned out to be a creature of shadowy flames, and there's an interesting backstory to this monster for anyone who manages to make it to the optional hidden endgame sequence. I had been avoiding Redeye because the storyline constantly mentions how the beast can turn opponents to stone, even granting an in-game item to cure petrification at the end of H'aanit's Chapter 3, and any such action taken against Tressa would have spelled instant defeat. However, when I faced Redeye with my non-variant party I never had anyone turned to stone, and I wondered if that would be the case again here. Much to my delight I found that this was true: Redeye never used its Evil Eye ability to turn Tressa to stone, and the battle lasted more than enough rounds that I would have seen this show up if it had been part of Redeye's AI routine. Perhaps the designers took this out of the game at some point because players could easily end up in a situation where it was impossible to defeat the boss if they accidentally used their Herb-of-Grace Potions? Regardless of the rationale, I was exceedingly happy that Tressa wouldn't have to face this perilous threat.
Shorn of the petrification ability, Redeye turned out to be a fairly easy opponent. The other gimmick of the boss is that it switches its weaknesses every single round, rotating between three different sets in the same pattern over and over again. This can be bad news for a normal mixed party playing through the game for the first time but it was easy for Tressa to plan around, especially while having a spreadsheet with all three weakness sets in front of me. Redeye turned out to be all physical damage in nature, with several different attacks that can inflict unconscious status and darkness status. Tressa grabbed a Conscious Stone to block the first and didn't need to care about the second. That allowed the second accessory slot to be used on the Protective Necklace for +80 physical/elemental defense, and with no physical defense debuffs in Redeye's move list, Tressa kept her physical armor buffed via Mercenaries the whole battle. This kept damage low enough that Tressa could use medium Healing Grapes for almost the whole encounter. Although Redeye did increase up to 3 actions after falling below 50% HP, it wasn't enough to change the outcome of this fight. Tressa won without any real trouble to cross off the fourth Chapter 4 boss from her list. Halfway there.

I'd already tried and failed against Werner and Esmeralda, which meant that the remaining two bosses were the next ones to attempt. Lucia was the boss at the end of Cyrus' story, and she brought the unusual aspect of a massive 30 shields (!) to start out the battle. All of her initial weaknesses were physical in nature which at least made it relatively easy to chip away at those shields using Mercenaries. Lucia's abilities unfortunately included both physical and elemental damage (of dark and fire types), plus silence and unconsciousness as potential status ailments. This made it tough to itemize against her wide set of potential threats. Lucia also had attacks that drained SP and BP along with the standard health, and while Tressa didn't particularly need SP to be able to use Hired Help, loosing boost points was a real problem. Tressa was able to cut through those 30 shields and break Lucia for the first time, only to see her switch over to an all-elemental setup for her second set of weaknesses: fire, ice, thunder, wind, and light. This coincided with Lucia becoming more dangerous in terms of her abilities, gaining a 1600 damage dark elemental ability named Shadow Slash. I needed more time to think my way through this encounter which looked problematic at the moment; time to try a different storyline.

That left only Darius as the final boss I hadn't tried yet, the opponent waiting at the end of Therion's storyline. Darius is a souped-up version of Gareth, the boss at the end of Therion's Chapter 3 storyline, who can steal HP, SP, or BP with various different abilities. The worst move from Darius is unquestionably his "Steal Item" gimmick though, which locks out all use of the item command. Since most solo characters have no other way to heal themselves, items are pretty important to have available! At least the use of items is restored on a break of Darius, something that I would keep in mind while fighting this boss. If there was a silver lining here, it was that all of his elemental attacks were fire-based in nature. Tressa could equip an Inferno Amulet along with the by-now common Conscious Stone to block unconsciousness status and leave herself in relatively good shape.
Darius did not have a weakness to swords, unfortunately, and he randomly blocked off different weaknesses each time that he recovered from being broken. The only weakness that remained constant throughout the battle was daggers, no doubt due to the fact that this was Therion's storyline. I made full use of that daggers weakness, hitting Darius again and again with Dancers via Hired Help. They had great success at inflicting darkness status and I managed to keep him blinded for most of this battle. For the first time in forever, a boss was swinging at Tressa and missing the target on occasion. As far as dealing with the stolen items, I hit on a plan there as well:

The AI scripting in Octopath Traveler is much more predictable than in Final Fantasy 5. Instead of picking between one of three different actions at a time, the Octopath bosses always seem to use the same abilities in the same order over and over again. (The tradeoff is that they don't seem to have SP and can therefore never be run out of magic.) I'm still in the process of writing down the EXACT pattern in my notes, which can be tricky because the order will shift up after recovering from breaks and as boss health drops lower. Anyway, my point here is that Darius didn't use his Steal Items ability randomly. He would rotate through his different actions and it would come up about once every ten or so total rounds. I deliberately left Darius with 1 shield remaining when I knew that he was about to use Steal Items, thus allowing Tressa to break him and instantly restore the items afterwards. Pretty clever, right? In the above picture, Tressa lost her items for all of exactly one turn before getting them back again. This was working well enough that it looked like victory would soon be in hand.
And then I ran into a crippling obstacle for a solo character game. When Darius dropped below 25% HP remaining, he used a new ability named "Call Comrade" which temporarily removed all of Therion's allies from battle. Since Tressa was the only one alive, this instantly resulted in a defeat. Argh, what a stupid way to lose the battle! I'd have to do more planning to try to come up with a way to work around this. Could the action be interrupted by breaking him before he could get the move off? That might be possible to set up with careful HP tracking. Or it might be necessary to revive Therion and use him to finish off the battle, something that I'd be willing to do if the game forced me into it. It would be like the brief solo Galuf obstacle from my Final Fantasy 5 games, albeit in a much more dangerous situation. In either case, I was going to need more experimentation to figure it out.

So that was all eight of the Chapter 4 bosses, four defeated and four still remaining. Tressa could easily make her way through each of their respective dungeons without any trouble at this point, and therefore the only remaining challenge came in the form of conquering those last four bosses. She needed to get stronger in order to beat them, but unfortunately there weren't many options left for improving her setup. I could purchase the best bow in the game, the Battle-tested Bow, thanks to finishing H'aanit's storyline, but what did that do for me really? It wasn't like Tressa was using her physical attacks against these bosses. Her damage was all coming from Hired Help and that ability's results were not influence by her physical/elemental attack in any way. I had determined by this point that Hired Help and the damage from soulstone usage didn't seem to be affected by Tressa's gear at all, part of the reason why I was emphasizing defensive itemization so much. Tressa was also above Level 70 by now and future gains from leveling would have only a minimal effect on her stats. She seemed to have reached her effective limits and still come up a bit short against these bosses.
The situation got me to thinking about the restrictions that I had placed on this variant when I was putting it together initially. In retrospect, it seemed clear that I had underestimated how difficult the Chapter 4 bosses would prove to be for Tressa. The only reason that she had progressed this far had been due to the overpowered nature of Hired Help together with Purchasing a whole bunch of stat-boosting nuts, options that wouldn't be available to most of the other solo characters. The truth was that I was locking myself out of too much of the gameplay by eliminating the abilities of the other characters. Tressa couldn't finish something like 85% of the game's sidequests, she couldn't make use of Challenge/Provoke or Scrutinize/Inquire or Guide/Allure, she couldn't even open up any of the many purple treasure chests scattered around the world! A huge portion of the best equipment in the game is either locked in one of those chests or only available for Purchase/Stealing. Future solo characters would be locked out of all of these options and that would leave them totally crippled against the Chapter 4 bosses. That didn't seem like it would be much fun.
My ultimate conclusion was therefore that I had set the wrong parameters for a solo game: there is a need after all to use the Path Actions of the other characters. It's simply too hard to close out the final challenges otherwise... and beyond that, it's just a lot more fun to be able to open purple chests and finish the various side quests. And that was the whole point of the Tressa solo game, figuring out what would work and what wouldn't work in Octopath Traveler. This was a classic case of growing pains, with me learning from the experience as I went along. I decided that I would open up the use of the Path Actions of all of the other characters, see what additional new advantages that would unlock, and hopefully not need to make any further changes from there.

The first objective that I chased after was the shield with the highest physical defense value in the game, the Battle-tested Shield. While this item doesn't have any elemental defense, it has a much lower evasion penalty than the other top shields along with a bonus extra property of regenerating HP and SP at the end of each action. All of this sounded fantastic for use against Werner and I was eager to have Tressa give it a try. The Battle-test Shield can be obtained by challenging the Muttering Codger in Flamesgrace, an opponent with a 10 star difficulty rating. There are actually about half a dozen of these various old people scattered across the towns in Octopath Traveler, each one with a 10 star Challenge/Provoke rating and each one dropping a Battle-tested piece of equipment upon defeat. I was pretty confident that Olberic could defeat this opponent despite the maximum difficulty rating, only to find an obstacle in the way: the game wouldn't even let Olberic use his Challenge ability against a 10 star foe until he was Level 40! What a pain in the butt. I think he was Level 12 at the time and that was a bit short of the game's mandated requirement. (So much for using this Path Action on a low level run. Why not let players decide for themselves if they're strong enough to defeat these opponents?)
As a result, I had Tressa run around looting some of the remaining optional side dungeons with Olberic in tow, reviving him at the end of each battle to pick up the associated experience. Tressa cleaned out the four shrines with the endgame super jobs (Archmage, Runeblade, Starseer, and Warbringer) along with other deadly optional areas like the Everhold Tunnels and the Forest of Purgation. This was somewhat tedious but Olberic did level very quickly with these encounters paying out 500-1000 XP with each victory. Eventually he hit Level 40 and could Challenge the Muttering Codger for the Battle-tested Shield. Olberic had to use a bunch of Healing Grapes but had no trouble winning once I'd given him all of Tressa's best defensive equipment. Then I ran into another problem: no Battle-tested Shield. What gives - where was my shield?
It turns out that the designers were absolute jerks in this regard. Players can Challenge/Provoke this group of old NPCs in the hopes of getting access to the Battle-tested gear, but even if they win, the odds are not guaranteed that the items will show up. It's a percentage based chance for the items to appear and the encounter has to be repeated each time for another shot at the prize. What's the actual drop rate in this battles? Terrible odds: TWO PERCENT!!!  It's hard for me to overstate what a dick move this is on the part of the designers. Winning against a 10 star opponent in a solo fight is difficult enough, and for some twisted reason they decided that they wanted their fans to do it over and over and over again until this priceless endgame equipment showed up at miniscule odds? Come on, that's textbook bad game design there. This is supposed to be a Single Player RPG, not some loot box pay-to-win iPhone trash. Sigh. Fortunately Olberic could win these fights quickly once he unlocked his Divine Skill and could start exceeding the 9999 damage cap. And in full disclosure, I also found a third party form of software that allowed me to run Steam at a faster emulated speed; I tested and settled on 3x speed as something that moved the animations along to a much brisker pace. If I needed to do this battle repeatedly, at least this way I could speed it up a bit. Then through dumb luck Olberic actually did land the Battle-tested Shield on his fifth victory, with the item drop only having 10% odds to show up that quickly. Very lucky. Tressa now had her coveted item with higher physical defense, better evasion, and innate HP/SP regeneration.

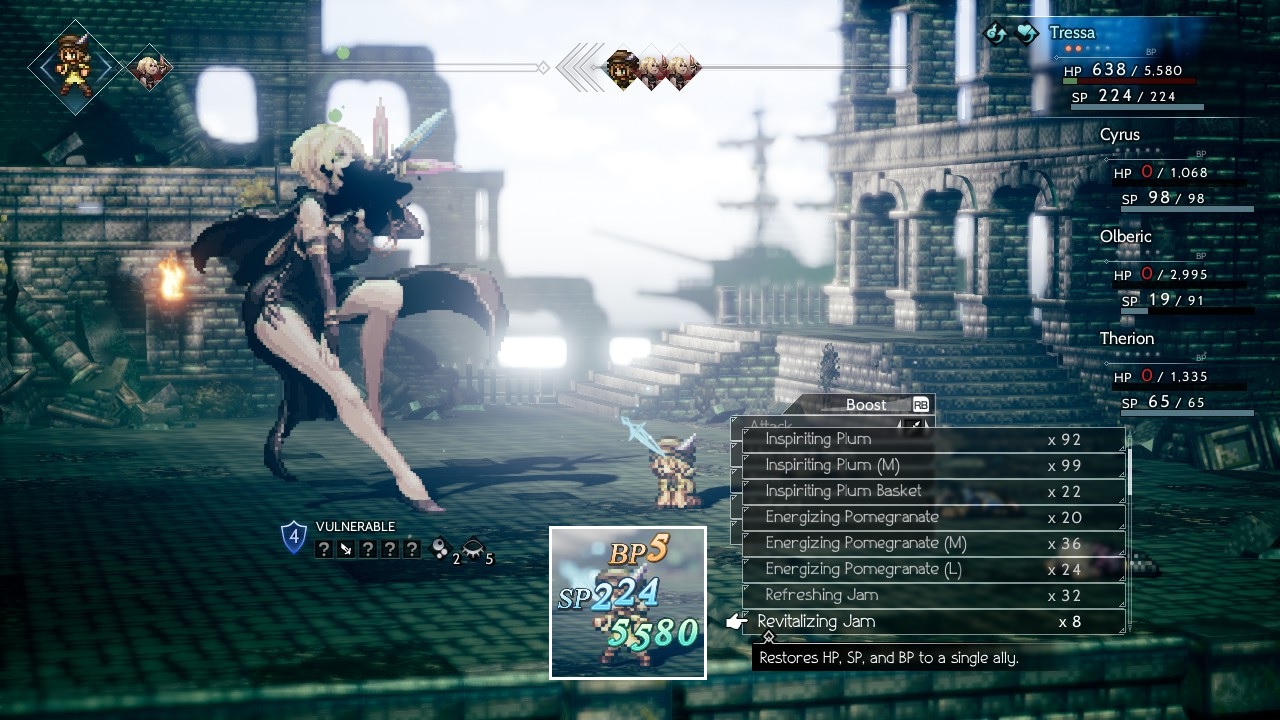
Then I took Tressa on a lengthy tour across the whole world, fulfilling dozens of side quests in order to unlock all of the remaining stat-boosting nuts. There were quite a few of them that been locked behind the Path Actions of other characters, or required fulfilling an earlier quest that required another character's Path Action, or simply happened to be contain inside a purple chest. I took "before" and "after" pictures of Tressa's stats to compare the effect of downing so many of the nuts at once; here were the total effects:

That was with no equipment shifting between images, only the stats gained from swallowing a whole bunch of different nuts. The biggest effect was most likely in Tressa's total health, where she increased by roughly 750 HP over her former total. This was almost equivalent to equipping an extra Empowering Necklace at all times and would be very handy in the upcoming boss fights where the accessory slots had to be used for status-defending items. The biggest total increase took place in physical attack where Tressa went up by almost 150 points, which would have been handy if Tressa ever needed to use a physical attack. She did not though and the more limited gains to elemental attack were far more useful in practice. Most of the other stats went up by roughly 50 points, and even if their effects were hard to notice, it surely didn't hurt having more speed and accuracy and critical chance under the hood.
I was disappointed and surprised to find that the stats maxed out at 999 without going on to four digits. Since it was possible to reach 1000 physical defense without too much difficulty, and because there was plenty of room for more digits on the interface, I couldn't understand why the designers put this limitation in place. Surely it wouldn't have been hard to treat the other stats the same way as HP and let them go up to 9999? Anyway, this was bad news because even with a maxed-out physical defense of 999 these Chapter 4 bosses were still hitting like a truck. It felt profoundly unfair that I'd managed to scrounge up close to 1100 total points of physical defense and the last hundred or so points would be completely wasted by this limitation. I would end up shifting gear around slightly because there was no point itemizing stats that went over the three digit cap and were wasted in the process.
With better equipment and higher stats from those additional nuts, it was time to return back to the last four bosses again. My ongoing nemesis Werner was up first and it was time to see the Battle-tested Shield in action. The extra physical defense from this shield was nice, but the real stat of the show was the HP regeneration. Tressa gained back 200 HP and 8 SP every time that she took an action, and while that might not seem like much, the constant slow ticking of additional health added up to a lot over time. I have no doubt that her battle with Werner lasted 50 rounds which translated into 10k or more HP restored. For lengthy battles this sort of thing really, really helped.
Aside from the slow trickle of health regeneration, the biggest difference against Werner this time around came from Tressa having a higher total life pool. There was just a lot more room for error with 5500 HP as opposed to a little over 4000 HP, not to mention each use of a Refreshing Jam added back more total health. Werner did not have a swords weakness to exploit and therefore the Dancers were the star of the show:

They had pretty good success at inflicting poison and darkness statuses on Werner throughout the battle, and the poison ticks (each doing 1% of Werner's maximum health) ended up contributing a lot of the overall damage needed. Darkness status was the real prize though, dropping Werner's accuracy down to about 50% for each attack. Combined with the health regen from the Battle-tested Shield, this meant that Tressa spent fewer turns needing to heal herself and had more time available for attacking or countering Werner's debuffs. I repeatedly used Mercenaries to offset Werner's Oppression debuff and I was able to get the timing down well enough to predict when he was about to use it ahead of time, thus blocking any chance of suffering from reduced physical defense. The other big tactical innovation was saving Tressa's boost points for use on the Dancers and not the Veteran Soldiers. Because Hired Help has a poor boost modifier, Veteran Soldiers would do similar damage with or without boost points invested. However, boosting the Dancers would add to their number of attacks, therefore resulting in more shields broken and more status ailments applied to Werner. This worked well enough that Tressa was often able to use Healing Grapes for the first half of the battle. After Werner dropped below 50% HP and went up to three actions per turn, Tressa had to be more aggressive in using Refreshing Jams but the overall math of the battle didn't change. Patient, careful tactics and a lot of help from poison ticks were eventually enough to seal this encounter with a victory.
Werner had been my main target for some time because defeating him and finishing Olberic's quest unlocked a number of nice prizes. One of them was a chance to Purchase the Battle-tested Shield, the same thing that I'd just scrounged up the hard way, and I went ahead and picked up a second copy in case I'd need it for some reason. Finishing Olberic's Chapter 4 also unlocked the game's strongest armor in terms of physical defense: the Crystal Armor has 300 physical defense and zero elemental defense. That was obviously another must-have piece of gear. Finally there was even another Tough Nut that appeared for Purchase as a form of yet more physical defense. That sounded good even if Tressa was running up against that 999 physical defense cap.

I went after Lucia for the next boss as I tried to conclude Cyrus' Chapter 4 story. Lucia was causing me all kinds of problems as I tried to figure out how to approach her AI pattern. She starts out with a massive 30 shields and with weaknesses to the physical damage types: swords, spears, daggers, axes, and bows (everything except staves). During this first part of the battle, all of her damage is physical in nature. After breaking Lucia once, she drops down to 15 shields and shifts over to all elemental weaknesses: fire, ice, lightning, wind, and light (everything except dark). For this second phase, all of her damage is elemental in nature. It was exceedingly difficult to itemize against these dual threats while also blocking Lucia's chance to inflict unconsciousness in the first phase and silence in the second phase. There was a third phase afterwards which gained health regeneration and supposedly added an attack that dropped the party down to 1 HP, but I hadn't even seen that form yet since the second phase kept killing me. I thought that maybe it would be ideal to try and reach the third form without dealing any actual damage to the boss, to prevent any new abilities that triggered at less than 50% HP, only to find that Lucia didn't seem to gain any abilities as she fell lower in health. She only gained new abilities after recovering from a break. And that was when I suddenly knew what I had to do.
I couldn't find any path to itemize against both the first and second forms, let alone the third form. What was the solution? Never reach the second or third forms! Since Lucia only changes her abilities after being broken, the answer was never to break her in the first place and win the battle without punching through those initial 30 shields. I saw that Tressa could keep using Veteran Soldiers with no boost points invested and deal just under 4000 damage per ability. If she could do this about 22-23 times without dying, she would deal enough damage to defeat Lucia without ever breaking through those initial shields. Weirdly enough, I wanted the shields on the boss to be higher than 30 here - that would have let Tressa use Mercenaries! As it was, she had to refrain from Mercenaries or Dancers because they would have quickly popped those shields and triggered the second phase. So the battle mostly consisted of calling on the unboosted Veteran Soldiers again and again, then using a Refreshing Jam when health dropped low. It ended up costing Tressa more than 700,000 money but the whole thing worked just as planned, Lucia never gained any new abilities and died without ever having her shields broken. Now I know the pattern of what to do for future characters: DON'T break the shields against this boss. 

Darius was next on the revenge tour. I already knew exactly how to beat this opponent: equip the Conscious Stone and Inferno Amulet to block his stunning/fire element attacks respectively, counter his Nighthawk debuff with Mercenaries to keep physical defense from being lowered, use boosted Dancers for breaking and to inflict status ailments, followed by Veteran Soldiers when broken for damage. Most importantly, make sure to leave Darius one hit away from being broken and wait to break until he employs "Steal Items" to get access to items back immediately thereafter. I essentially had him solved as an opponent for Tressa. The only reason that Darius hadn't been defeated already was his "Call Comrade" cheese move that had removed Tressa from the battlefield and caused an instant defeat. The only possible solution for that was to have Therion present on the screen when he used that move, then break Darius to end the effect, followed by finishing the job with solo Tressa again. I loaded up Therion with the best defensive equipment that I could find and killed him before the battle started. When Darius was about to fall below 25% HP, I had Tressa revive Therion as pictured above, with the Thief standing around using the Defend command to avoid contributing to the fight. OK, here it comes:

Darius went to steal away Therion's allies, he used the "Call Comrade" ability and... THERION disappeared from the battlefield, leaving a solo Tressa remaining! I was so stunned that I didn't even capture the moment with a proper screenshot, only getting the announcement that it was about to take place above. What the heck happened here? Does "Call Comrare" leave a random character present instead of a guaranteed Therion? This definitely didn't seem to match what was written in the online Octopath Traveler wiki. I'll need to do more testing in the future to find out what's really going on. In any case, I certainly wasn't about to complain. I had solo Tressa at my command which is all that I ever wanted anyway, and she had no trouble finishing off a Darius who was suffering from Dancer-inflicted poison and darkness statuses. Darius did not repeat his "Call Comrade" move a second time and I'm hoping that it's a one-time scripted event.
Before taking on the final boss, I sent Tressa into the Maw of the Ice Dragon side dungeon to pick up the Adamantine Hat that I'd wanted earlier. This allowed Tressa to reach an elemental attack of 870 with her Rune Glaive spear while also itemizing 984 points of physical defense. Yeah, that seemed like it would work. For her last confrontation, she also brought along the Battle-tested Bow, the Battle-tested Shield, and the Crystal Armor. I filled out her two accessory slots with the Inferno Amulet and Void Amulet to protect against fire/dark elemental damage. This final boss was fortunately one where Tressa didn't have to worry about a status ailment.

Appropriately enough, the last boss that Tressa needed to defeat was Esmeralda from her own Chapter 4 story. Esmeralda is a nasty customer with a physical armor debuff, very heavy physical damage in the form of attacks that hit three times and five times, plus crushing fire/ice/dark elemental damage abilities that also disable physical attacks, physical skills, and elemental skills respectively. Tressa could ignore that last aspect because Hired Help didn't count for any of these categories but that still didn't make Esmeralda an easy opponent. The Inferno and Void Amulets at least blocked the damage from the fire and dark skills, leaving only the ice version ("Blue Blade") as a threat. Still, the most serious danger in this battle came from Esmeralda's physical attacks; her Five Strikes would deal 5 x 600 = 3000 damage under normal circumstances and 5 x 1000 = 5000 damage if Raven's Flight had debuffed Tressa's physical defenses ahead of time. I tried to use Mercenaries to counter this proactively ahead of time and became pretty good about predicting when Raven's Flight would appear. I actually welcomed the "Black Blade" that put a ticking death clock over Tressa's head, as it was easy to stop that by breaking Esmeralda. A round where Black Blade showed up was a lot less dangerous than one where Five Strikes appeared.
The best part about this being Tressa's final opponent was the freedom to run wild with item usage. I had been exceedingly cautious with Tressa's Refreshing/Revitalizing Jams over the course of the game because it's so difficult to get more of these items via enemy drops. There are roughly 50 Refreshing Jams in the game and about 10 Revitalizing Jams, and that's pretty much it. There are only a handful of monsters that drop these items in repeatable random encounters, mostly the super-rare Cait enemies, and I'd found exactly one of them the whole game from a non-scripted drop. I had been terrified the whole game that Tressa would run out of jams and find herself in a position where it was basically impossible to finish the game. (This is one of the biggest differences from Final Fantasy 5 where Elixirs are relatively easy to farm up.)
But this was it for Tressa: defeating Esmeralda would complete the last Chapter 4 story and finish her variant journey. Tressa still had 32 Refreshing Jams and a further 8 Revitalizing Jams, with the latter item constituting a souped-up version of the Refreshing Jam that also set BP as well as HP and SP to maximum. This was the main reason why I was never worried about Black Blade, as it was easy to break Esmeralda as needed with Tressa refilling all her boost points alongside her health. I continued to use Dancers or Mercenaries or Bandits (depending on Esmeralda's shifting weaknesses) for breaking, then an unboosted Veteran Soldiers for 9500 damage while broken, healing as needed with Refreshing or Revitalizing Jams. I tried to keep HP above 3000 at all times to prevent against one unlucky Five Strikes barrage wiping out Tressa. This was less of a clever tactical plan and more of a brute force solution with Tressa downing a bunch of jams to keep herself healthy enough to survive. Esmeralda ended up dying to a poison tick in humorous fashion at the end of this long fight. Hah, served her right!

Octopath Traveler rolls its credits after you finish the Chapter 4 story of the character that you selected at the beginning of the game. (You actually can't take your initial starting character out of the party until this happens.) The credits are spruced up with animations showcasing how your party defeated all of the 28 chapter bosses throughout the game, played out in the order that they were defeated. What you see in the credits exactly matches with how these battles ended originally, which meant seeing all of the dead party members accompanying Tressa throughout her journey along with some amusing endings. Apparently several of the early bosses were killed with normal physical attacks, there was a whole lot of Bifelgan's Bounty and Veteran Soldiers along the way, and it all capped off with Esmeralda dying without even being touched due to that final posion tick. Great stuff and a fun way to close out the Octopath experience.

But wait, there was one more thing that I still wanted to do with Tressa! Her best weapon didn't become available until after finishing her Chapter 4 story. I had to Allure the father of Tressa's merchant frenemy Ali to have a pep talk with his son, which resulted in the Tradewinds Spear appearing for no particular reason. (Some of the side quest rewards make sense from a plot perspective but most of them are totally random like this.) The Tradewinds Spear had slightly higher physical and elemental attack as compared to Tressa's long-serving Rune Glaive, but the real benefit was its secondary property: increases wind damage dealt. I believe that this increases damage of the associated elemental type by 33% based on the quick experiment that I did, although it's something that I'd like to test further since the mechanics guide doesn't explicitly state the size of the bonus. For funsies, Tressa equipped an Elemental Augmentor to take her elemental attack up to the cap of 999 and tested out a max boosted Trade Tempest against some random enemies:

Oh yeah, that'll do nicely! A max boosted Trade Tempest fell just short of maxing out at 9999 damage against broken opponents, and it would have similarly fallen just short of 5000 damage against non-broken enemies that lacked a weakness to wind element. This boded well for characters like Cyrus who would need to max out their elemental attack stat to have any hope of surviving against the Chapter 4 bosses. I expect that will be a wild ride if I ever decide to try it out.

As for Tressa herself, this was the conclusion of her journey. I had no desire to take on any of the optional superbosses and I knew that Tressa stood little chance of defeating extremely powerful opponents with hundreds of thousands of HP. She had her hands full just dealing with the main Chapter 4 bosses, all of whom my non-variant group had flattened like roadkill and then gone on to struggle against the optional endgame superbosses. This was the perfect place to finish her quests, with the game even agreeing by rolling its credits after completing her storyline.
Thanks for coming along on this quest of discovery with Tressa. You never learn as much about one of these games as you do from the first full variant playthrough. That makes it a special experience, and I'll be able to save massive amounts of time in the future thanks to the hard lessons that Tressa figured out along the way. I hope that you enjoyed reading about her journey and hopefully in time we'll see some other solo characters walk down the same path. Thanks for reading!


