
Primrose was about to begin the Chapter 4 stories which meant that we were reaching the final stages of her journey. As one of the weaker characters for a solo game, I knew that Primrose stood little chance of defeating the optional superbosses and I didn't plan to try her hand against them. Her goal was overcoming the last story sequence for all eight of the main characters, after which she would be able to take a deserved rest. I continued from the conclusion of the previous Chapter 3 stories by taking Primrose to visit the remaining towns in the outer ring, most of which she hadn't reached prior to this. There were more side stories to complete and stat-boosting nuts to find out there, assuming she could make her way past the monsters guarding the paths through the wilderness.

Primrose had gained enough strength and durability that she wasn't overly threatened by most of the random encounters along the way. Once in a while she came across something unusual like this Chubby Cait monster found near Everhold while hiking through the remote southern wilds. These are the enemies that provide huge payouts of experience and job points if they can be defeated and Primrose was able to kill this one before it could flee. Then I used the remainder of the battle to fish for an experience bonus with the Bewildering Grace skill; if she could hit the 1 in 1000 odds to get EXP x100, Primrose would be rewarded with hundreds of thousands of XP and a dozen levels. Unsurprisingly she failed to land that but I did get the much more common EXP x2 result for a cool 4400 payout worth about half a level. Every now and then I would try to use Bewildering Grace at the tail end of a battle in the hopes of getting lucky. The EXP x2 and x5 results were relatively common while the gigantic EXP x100 result failed to appear no matter how often Primrose rolled the slot machine.
Wandering around to all of the outer ring towns and fulfilling their side quests took some time to complete. I didn't take screenshots of any of this while playing since it wasn't terribly dangerous or interesting but collecting more of the stat-boosting nuts definitely helped strengthen Primrose for the challenges ahead. I also needed to raise Olberic to Level 30 so that he could Challenge an enemy NPC in Dragonsong Fane for the "Kaia, Mother of Dragons III" side story so I kept him alive for much of this journey to gain some experience. This actually made the battles harder, not easier, since I had to waste a bunch of combat rounds healing or reviving Olberic to make sure that he picked up the requisite experience. It was a relief when the taciturn swordsman companion finally dinged Level 30 and Primrose could drop him from the party again.

This was also a good time to clear out some of the optional side dungeons located out in the third ring. A couple of them didn't have bosses inside like the Moldering Ruins and Dragonsong Fane. Others did have story-related opponents to defeat like the Leviathan in the Captain's Bane dungeon. This boss can both poison and stun the party which required bringing an Antidote Stone and a Conscious Stone to counter. Although I didn't love the fact that Primrose had to give up the Empowering Necklace and its +1000 HP, that was better than having to spend the whole battle removing poison. All of the damage from these underwater creatures was physical in nature and Primrose's evade setup worked well here as a result. Inevitably some of the attacks would get through her dodging, with the Leviathan getting three actions per round plus one apiece from its minions, however the damage was minimal enough that it could be fixed through Healing Grapes and not Refreshing Jams. Primrose exercised patience, made care to keep up her HP at all times, and wore down these opponents with repeated castings of Night Ode. She was wiping out the minions pretty much exactly as they were resummoned back to the battlefield in an amusing cycle. This was one of those fights that took a fair bit of time without being dangerous.

By way of contrast, the Giant Python had real potential to kill Primrose if I wasn't careful. She equipped the Wakeful Stone as always to prevent being put to sleep and brought along the Knight Ardante NPC one final time since the big snake had an ice element weakness to attack. I tried to have the Knight Ardante in play at all times to block some of the incoming attacks and provide additional damage even if I couldn't control which of the two enemies the NPC would target. When the Giant Python was broken and I could time it such that Primrose had Peacock Strut in place, Moonlight Waltz hit for massive damage that came close to reaching the 9999 cap. More commonly, Primrose had to cast Moonlight Waltz without Peacock Strut in place because it was too dangerous to spend a round buffing ahead of time. The Giant Python was much more accurate with its strikes than the Leviathan had been, with Primrose dodging about half of them and tanking the rest. I found over time that Primrose needed to keep Mole Dance's physical defense buff in play to cut down on the damage from the Giant Python. With the protection in place, she could eat Healing Grapes and stay safe; without it, their attacks would eventually overwhelm her. I wouldn't say that this ever rose the level of being a true crisis but it wasn't the easiest fight either. The Giant Python eventually went down with the Snake Charmer sitting in the red on health, just the way that I wanted even if I hadn't been able to control everything that the Knight Ardante had been doing.
With those optional parts of the gameplay finished, it was time to begin the Chapter 4 stories in earnest. I had been thinking carefully about the order in which to take them on and decided to begin with Alfyn's tale. There are a bunch of very powerful items which unlock after completing certain stories and Alfyn's chapter contained one of the most important weapons for Primrose. The Forest of Rubeh dungeon stretches out for a good while and has some dangerous monsters inside. In particular, there are evil deer creatures which charge up their physical attack and then use a "Boar Rush" move which can hit for thousands of damage. Primrose was exceedingly good at dodging those blows (which must have lowered accuracy) and avoided them at something like 90% odds. Of course there was also the one battle where two of them landed back to back and knocked her to zero health - classic RNG at work. Fortunately Primrose's Encore passive triggered and she still won the battle, avoiding the need to reload from the most recent save point. Eventually she reached the Ogre Eagle boss at the end:

The Ogre Eagle has very high health (110k HP) and likes to strike with a Double Rend ability that can inflict three different status conditions (poison, darkness, confusion) as well as potentially inflicting debuffs to physical and elemental attack or defense. The Ogre Eagle also uses lots of wind element spells which mandated bringing a Tempest Amulet to block them. For the other accessory slot, I followed the pattern of some of my other recent solo characters by sticking with the Empowering Necklace and its +1000 HP over trying to block poison or darkness as a status condition. Primrose really needed the extra health for the second half of the fight and it was much safer being at 5000 max HP as opposed to 4000 max HP. My goal was to try and save as many of Primrose's resources as possible for the more dangerous second half of the battle; the Ogre Eagle will use its Toxic Rainbow ability when it falls under 55k health and that would put the remainder of the fight on a timer. Thus I did not make use of her allured NPC ally while trying to chip away at that initial 55,000 HP during the less dangerous first stage of the battle.
I've written in a number of solo reports how Octopath Traveler tends to be more deterministic in its combat than a game like Final Fantasy 5. There's much less variation in the boss abilities which tend to be repeated in the same patterns over and over again without much in the way of randomness. One of the few exceptions to that rule was this particular boss fight against the Ogre Eagle due to the different effects that could pop out of Double Rend. This began with Primrose's evasion chance whereby she dodged roughly half of the incoming attacks. This was always the best outcome since it avoided any possibility of getting hit with a status condition or being debuffed. When Primrose did get hit, there was a wide range of possible outcomes: any of the three status conditions listed above or alternately she could have any of four different debuffs applied (physical or elemental attack or defense). Poison and debuffs to Primrose's physical defense tended to be the worst outcomes with the other stuff having lesser severity. I loved getting hit by the wind element spells from the Ogre Eagle since they did no damage and often knocked Primrose out of confusion. Thanks buddy!
There was so much variation in the battle depending on what happened with Double Rend that it was impossible to make any kind of plans. I had to react on the fly, doing my best to keep Primrose alive while also damaging the boss whenever it was safe. I made sure to knock the Ogre Eagle down to one shield remaining with Ice Soulstones and otherwise hit with Moonlight Waltz for rather unimpressive damage. Primrose's Eye for an Eye counterattacks were dealing a good chunk of the damage since they did add up over time even at only 300-400 damage apiece. I tried to use Healing Grapes for health restoration but often had to fall back on Refreshing Jams. Despite their help, Primrose was killed several times when a streak of bad RNG kept her from dodging or kept her locked up in confusion/poison statuses.

Once the Ogre Eagle fell below half health, the creature would use its Toxic Rainbow ability to start slowly draining away Primrose's max HP total. This was my signal to break the last shield and start pushing offense as fast as possible since time would soon run out for Primrose's max HP. My ace in the hole here was the presence of another 10 star NPC to add their damage to Primrose's own efforts. The Ogre Eagle unlocked a swords weakness after recovering from the initial break which made a swordsman of some kind the perfect choice here. Initially I recruited Swordsman Yuri from Marsalim but that proved to be a mistake. This NPC spent about half the time buffing Primrose and that wasn't what I needed here. I wanted an NPC who would attack on every round of combat and I was able to find that by Alluring the same 10 star Townsperson from the blocked house in Bolderfall once again. This mustached old man always attacked and contributed excellent damage to the fight, with his Guillotine blow dealing as much as 3000 damage. I nearly won this battle using Swordsman Yuri, with the Ogre Eagle down to its last 10,000 HP before Toxic Rainbow finally drained Primrose down to zero. After realizing that this was the wrong NPC, I fast-traveled back to Bolderfall to pick up the Townsperson NPC and walked back through the whole Forest of Rubeh dungeon, this time winning out successfully. Note that in the above screenshot Primrose did not have her Encore passive icon as it had been triggered earlier. This was a long, tough fight and Primrose went through a full dozen Refreshing Jams before she was able to prevail.

Alfyn's Chapter 4 story had been my first choice to undertake because it unlocked a massive weapon upgrade for Primrose in the form of the Battle-tested Dagger. This weapon can be Purchased from former enemy Vanessa Hysel in the depths of Undertow Cove but only after Alfyn's storyline has been completed. I've used the Battle-tested Dagger with several of my previous solo characters and it holds the highest physical damage rating of any dagger along with a massive boost to evade. In fact, Primrose could nearly max out the evade stat with this item which would be sorely needed against some of the upcoming bosses. Even the random accuracy debuff that the Battle-tested Dagger sometimes applied was a helpful side benefit making Primrose that much more difficult to hit. Now the one downside to the Battle-tested Dagger was a total lack of any bonus to elemental attack and therefore equipping this weapon decreased the damage from Moonlight Waltz and Night Ode considerably. I decided to keep using the Soul Knife for random encounters since multitargeted damage with Night Ode was the fastest way to clear out opponents, then look to switch over to the Battle-tested Dagger for bosses where the evade would be more necessary.
I'll also mention here that Vanessa Hysel can be Allured as an NPC which was pretty amusing. She wasn't particularly useful and basically just poisoned random enemies but the novelty of the whole thing had me laughing. 

The Ogre Eagle had been a tough opponent that drained Primrose's stock of Refreshing Jams. I needed to replenish these items and detoured to several of the shrines for the secret endgame classes, the home of the Starseer and Warmaster and such. There are a bunch of Refreshing/Revitalizing Jams located in treasure chests in these areas along with the presence of Animated Armors as common monster encounters. The Animated Armors always hold Refreshing Jams as a Steal target and fortunately the success of the in-combat Steal ability is only based on the health of the enemy, not the level of the user. Level 1 Therion could steal things just as easily as Level 50 Therion... as long as he could survive long enough to get a turn, anyway. I revived Therion in these battles whenever an Animated Armor appeared, long enough for him to swipe a Refreshing Jam (and some Large Soulstones off the elemental remnants that always showed up with them) followed by letting Therion die before winning the combat. Along with completing some random side stories this was enough to fill up the stockpile of Refreshing Jams once again.
There was another endgame weapon that I was targeting which required Primrose to complete H'aanit's Chapter 4 story as well as her own tale. H'aanit's story felt like the easier of those two and so she went to Marsalim to finish the search for Redeye. The monsters in the Grimsand Ruins were heavy on poison once again and this time they were accurate enough that I eventually equipped an Antidote Stone to block their venom. Perhaps Primrose could have dodged them if she'd been using the Battle-tested Dagger but it took too long to kill everything if she didn't run her elemental setup for random encounters. Soon enough she reached the bottom of the dungeon and engaged the boss:

Redeye is an all-physical boss that shifts between three different sets of weaknesses after every round of combat. Redeye is always weak against light element though which meant bringing along the Kindly Cleric from Saintsbridge again for help in breaking the boss. I made sure to have Primrose equip her evade gear along with the Battle-tested Dagger since Redeye has a hefty physical attack, especially when it uses its Rend ability which can also cause blindness. Primrose had reasonable success at dodging Redeye's attacks, avoiding about half of the Rend attacks and more than that against the lower-accuracy normal attacks and Sweep blows. This battle was dangerous enough that I made sure to keep Mole Dance's protection running at all times. Fortunately this was pretty easy to do since Redeye never tried to counter it by debuffing Primrose's physical defenses. I could sink full boost points into Mole Dance and renew the status for the next nine turns of combat which was usually more than enough to be safe.
The novel aspect of this battle was Primrose's offensive strategy. Since she didn't have the Soul Knife equipped and Redeye never has a weakness to dark element, there was little point in trying to attack with Moonlight Waltz. Instead, the better option was relying on physical strikes with the Battle-tested Dagger to deal damage. Primrose could buff up with Lion Dance, an ability which had seen zero use up to this point in the solo run, and time it so that she attacked when Redeye was showing its weakness to daggers. Lion Dance also buffed up the damage from Primrose's Eye for an Eye counterattacks which contributed a good bit of damage throughout the fight. Auto attacks dealt about 1800 damage against Redeye when the beast was broken and 1800 x 4 = 7200 damage wasn't bad at all. Thus this boss fight turned into a long sequence of turns spent buffing with Mole Dance and Lion Dance for physical defense/attack up and then striking when Redeye was vulnerable against daggers, recovering with Healing Grapes as needed. It was a slow battle but not terribly dangerous. Even after Redeye went up to three actions each turn I found that Primrose was still able to rely on Healing Grapes and not dip into her Refreshing Jams. This ended up being a helpful tutorial boss battle that provided a blueprint for how many of the other Chapter 4 bosses would have to be fought.

The other story that I needed to complete was Primrose's own Chapter 4 and thus it was time to visit the theatre in Everhold. The staging of this sequence is creative even though it doesn't make a lot of sense if the player stops to think about it. Primrose finds Simeon sitting in one of the luxury boxes at a theatre as a performance gets underway. The show is one that Simeon has written himself and it's a blatant retelling of Primrose's own life story with actors on stage portraying her and her father and Simeon. This is profoundly weird stuff and it definitely reinforces the notion that Simeon is a deranged lunatic. (One wonders how he could have run a successful criminal enterprise for so long given his insane and nonsensical behavior.) Primrose has to fight her way through this gigantic theatre up to Simeon's box at the top, facing monsters all the while, as an audience of theatre-goers continues watching the show as though nothing was happening. Like I said, the scenery is pretty neat to look at even though nothing about this holds up to scrutiny.
When Primrose reaches the top, Simeon launches into another long speech and he and Primrose are transposed in their imagination onto the big stage below. This is the only time that we get something resembling an explanation for Simeon's motivations and it appears to be that he's a sadist. That is, Simeon savors the tragedy of someone's downfall and this is the sole thing that brings him happiness. This is supposed to be the reason why he's spent year and years of his life carrying out this elaborate plot to screw with Primrose and specifically Primrose because he delights in causing misery. I guess that's kind of a motivation for the villain? It's still really bizarre though and best explained under the whole "Simeon's actions don't make sense because he's insane" theory mentioned before. Oh, and he mentions again that he's in love with Primrose so, uh, that's a thing. He fell in love with her "so many years ago" when she was a child and he was an adult?  I do not understand what the writers were going for with this character. When do we get to murder him?

The good news is that eventually the talking stops and the stabbing could get underway. I equipped Primrose with the standard Articulate Stone and Void Amulet accessories and then loaded her up with the Battle-tested Dagger and as much physical evade as possible. The first Simeon battle takes place against him and two puppets representing Primrose and her father. Simeon is completely irrelevant in this phase and the danger comes from the two puppets, especially the Father Marionette which can debuff physical defense and inflict unconsciousness with its attack after falling under half health. I focused on the Dancer Marionette first since it's the easiest target to kill. The false imitation of Primrose tried to buff its allies but didn't do much before succumbing to dagger strikes. The Father Marionette needed to be handled with more respect and I wasn't fully able to control when its health would fall below the halfway mark due to Primrose's Eye for an Eye counterattacks. I basically just tried to burst down the Father Marionette as quickly as possible once the other puppet was gone and it worked out OK. Primrose managed to dodge the one attack that would have stunned her and that was that. I kept the Mole/Lion Dance buffs in place for the whole fight and then carved up Simeon with dagger slashes once the two puppets were out of the way. So far, so good.
This is the only boss fight in any of the chapters that has two phases. Regrettably, this means that Simeon has the opportunity to continue monologuing as he starts questioning Primrose's motivations. Simeon accuses Primrose of lying to herself, claiming that Primrose's father would never have wanted her to head down this path of revenge and that she's twisted her memory of her father into something that he never would have supported. This leads to my least favorite part of Primrose's whole story:

Out of nowhere, Primrose has an emotional breakdown in response to Simeon's speech. I cannot put in words how much I hate this writing that suddenly turns Primrose into a delicate emotional flower in a way that we've never seen at any point in time previously. Simeon is spouting obvious bullshit here and it's completely out of character for the Primrose we've seen throughout the game to fall apart at the last minute here. It's true that we don't know enough about Primrose's father to have any idea about what he would or wouldn't have wanted her to do so it's not possible to state definitively that Simeon is lying (though it certainly feels that he's not being honest). However, Simeon murdered Primrose's beloved family a decade earlier and then literally STABBED HER at the end of the previous chapter. Why would she listen to anything that he has to say, especially about her father?! I could understand that reaction from kind-hearted Ophilia who sees the best in everyone but it makes no sense from the Primrose we've been with the whole game. And sure, she gets over this moment of weakness soon enough and we hear again that faith will be her shield but it never should have happened in the first place. This is "Game of Thrones Season Eight" quality of poor writing here - Primrose again deserved better. 

Anyway, on to the second phase of the Simeon boss fight. There's no chance to change equipment before facing this additional boss and I had itemized Primrose with protection against silence status and dark element specifically for this encounter. Simeon's most dangerous ability is Act of Impulse, a physical attack that hits for very heavy damage but luckily can be dodged fairly easily. This is a boss that evasion works well against. Simeon frequently uses an ability named Shredded Fortunes which debuffs the player's physical and elemental defense which Primrose needed to counter with her Mole Dance. This meant that I couldn't invest max boost points into Mole Dance and get nine turns of protection (it would simply get countered and the boost points would be wasted) which meant a lot of turns spent reapplying Mole Dance as it was shredded away. Lion Dance was helpful here as well and I tried to keep it running as much as possible when turns weren't needed for healing or rebuffing with Mole Dance instead. Auto attacks against a broken Simeon with Lion Dance in place were dealing about 2000 damage apiece, not bad at all.
Simeon is one of the hardest bosses in the game to break since he is weak against daggers and nothing else at the start of the fight. Many solo characters are helpless here since soulstones won't work and they lack daggers as a damage type. By contrast, Primrose broke Simeon immediately thanks to her Eye for an Eye counterattacks which then cycled Simeon over to his second set of vulnerabilities. Simeon starts out with lots of his weaknesses blocked and then gradually unlocks more of them after he recovers from each shield break. His second set of vulnerabilities dropped daggers in favor of swords and fire element, and I decided to attack that fire weakness by hitting Simeon with a bunch of soulstones. I didn't want to deal too much damage too quickly here and therefore used medium rather than large soulstones. The picture above comes from Simeon's second break when Primrose managed to get in some choice slashes with her dagger. This was right about the time when Simeon fell below half health and the more dangerous second half of the battle got underway:

Simeon goes up to three actions per turn once he drops below the 50% mark on HP and he starts using Act of Impulse much more often in his AI routine. He likes to buff his physical attack with Boiling Blood while simultaneously debuffing the party's physical defense with Shredded Fortunes, and it's all too easy for him to overwhelm a solo character with repeated Act of Impluse attacks with those buffs/debuffs in place. Primrose only had 4200 max HP to work with and she absolutely could not afford to tank hits from Act of Impulse; when one of them hit her, she took over 2000 damage from the enemy attack. The big saving grace in this fight was the poor accuracy rating on Act of Impulse which Primrose dodged something like 80-90% of the time. I kept Mole Dancing to counter Shredded Fortunes and otherwise relied on Primrose's evasion to carry the day.
On the offensive side of things, Simeon's third set of weaknesses kept daggers locked out while revealing vulnerabilities to axes, bows, and ice element. I had planned for this by bringing H'aanit's mentor Z'aanta as her Allured NPC ally. Z'aanta was only available to be recruited thanks to having finished H'aanit's Chapter 4 story and I'd been saving him throughout the whole boss fight specifically for this moment. Z'aanta makes for a great Summon choice because he only uses bows as a damage type and always attacks, never wasting turns on some kind of secondary ability. The player can know with certainly that he'll always deal damage and break a shield if the target has a bows weakness. Z'aanta therefore added a good bit of damage and helped break through Simeon's latest set of shields while Primrose kept defending with Mole Dance and counterattacking with Eye for an Eye. Primrose didn't have spare rounds to renew Lion Dance very often so this was another case of chipping away at the boss and only attacking when it was safe to do so. All told, this went about as smoothly as possible and Primrose was able to win on the first attempt without any truly dangerous moments. This can be an exceedingly dangerous battle for a solo character and I was glad that I knew exactly how to prepare ahead of time to achieve success.

Primrose's story concludes with Simeon getting his just desserts; he even begs for Primrose to kill him at the end and she obliges as the curtain falls. (In one last bizarre moment, the Primose stand-in actor confesses her love and marries the Simeon stand-in figure down below in the play that Simeon wrote. Yuck... I've given up trying to understand Simeon as a character by this point.) Primrose's tale concludes as she returns to Noblecourt and finally visits the grave of her father. In a welcome change, the writing does something here that I truly like: Primrose reflects on what Simeon said about her father not supporting her actions and having twisted her own memories in order to lie to herself. Primrose looks back and thinks about where her path will take her moving forward... and she doesn't have an answer. That's genuinely good writing! Primrose needs time to find out where her life will take her from this point and she shouldn't have all the answers right away. I really like the fact that Primrose's story ends on an open note, indicating that this is a new beginning for her and not a finishing point. In fact, I enjoy most aspects of Primrose's story aside from the treatment of women and the character of Simeon. If the writers could have given her a better villain and understood better how to write female characters, this could have been a strong narrative. At least we end with Primrose escaping this cycle of abuse and having the opportunity to write her own story freed from the shackles of her past.

Primrose's story may have been completed but there were still other characters remaining that needed to be wrapped up. I mentioned before that Primrose would unlock another new weapon after completing both her story and H'aanit's story and she headed off to claim her reward. This was a two part side story that involved Alluring Ariana (from Primrose's Chapter 2 story) and the coachman Oren to start a new life in Stonegard. I wished these NPCs good luck in their new home but mostly cared about the quest reward, the Adamantine Dagger. This weapon had much lower physical attack than the Battle-tested Dagger and lacked its additional evasion while instead providing a huge boost to elemental attack, the second-best in the game after Heathcote's Dagger at +346 elemental attack. The Adamantine Dagger was much better for Primrose though because it increased damage from dark element spells which of course were exactly what she used. The in-game text unhelpfully never states the bonus to dark element but I knew it was the same as the other items that have this property at +30% damage, much like the Absolute Zero Staff used by Cyrus (ice) and the Bishop's Staff used by Ophilia (light). The Adamantine Dagger became the must-have weapon any time that Primrose would be using elemental damage.
In practical terms, this largely meant any time that Primrose found herself facing random monster encounters. She would buff herself with Peacock Strut and then hit everything with a max boosted Night Ode for huge damage. Of course Primrose had already been doing this for much of the game but the higher elemental attack rating on the Adamantine Dagger plus the bonus to dark element damage had swung the math of these random battles heavily in her favor. Whereas before it typically took multiple castings of Night Ode to win, now Primrose was hitting for 6000 damage and wiping everything on the first cast. Monsters weak to dark element took another 30% damage on top of what was pictured above and were starting to near the 9999 damage cap. Primrose now had two complementary weapon setups which befitted her nature as a dual physical/elemental damage hybrid class.

The previous picture was taken in the Ebony Grotto which meant that Primrose was heading after Mattias. Ophilia's Chapter 4 story tends to be one of the easier ones to complete and finishing it would unlock a couple of additional stat-boosting nuts which would be helpful against more difficult later challenges. Mattias spends most of the battle casting Consuming Darkness and Black Gale spells which can be blocked by equipping a Void Amulet and Tempest Amulet respectively. For his physical attacks, Primrose had her usual evasion to rely upon and she did a good job of dodging many of them. I probably should have brough the Battle-tested Dagger to this fight for additional evade and relied on physical attacks, however I went with the Adamantine Dagger instead to power up Moonlight Waltz. I think that it was the novelty of the new weapon that I wanted to play around with. Mattias never summoned any of his minions for unclear reasons, perhaps because Primrose didn't break his shields (?) She kept her Mole Dance protection in place, hit with Peacock Strut-enhanced spells whenever the boost meter was full, and otherwise enjoyed a relaxing boss fight. Mattias stunned Primrose a couple of times with Black Thunder when he dropped low on health but Primrose simply tanked through the rounds where she was unconscious without missing a beat. This opponent didn't put up much of a fight.

Cyrus looked like the next-easiest story sequence to tackle. Primrose had dipped into the Ruins of Eld briefly to grab the Void Amulet for use against Simeon and that allowed her to fly through this dungeon in short order. She was hitting noticeably harder against the random enemies now that she had the Adamantine Dagger at hand as compared to the earlier foray into this area. To deal with Lucia, I turned off Primrose's Eye for an Eye passive so that she wouldn't hit the dagger weakness on the boss. The counterattacks would inevitably break through Lucia's 30 shields by hitting her daggers weakness and that wasn't something that I wanted. Better to have Lucia permanently stuck in her first phase and hit with elemental damage instead. This cut down on Primrose's damage output by a good margin since Eye for an Eye contributes quite a bit of damage over the course of a long boss fight. Better safe than sorry and all that though.
I opted to keep the Adamantine Dagger over the Battle-tested Dagger since Primrose would be relying on Moonlight Waltz for her damage and then equipped all of her other evasion gear. This worked out well enough and Primrose had reasonably good luck dodging Lucia's attacks. Pulverize was the most dangerous of Lucia's abilities since it would drain BP if it hit; Wallop has the ability to stun though naturally Primrose had blocked that with a Conscious Stone. I thought that this might be a place where an Allured ally could contribute some elemental damage that wouldn't break Lucia's shields and thus brought the Kindly Cleric along again. This failed in amusing fashion when his Lux Congerere hit and did less than 100 damage - whoops! I guess that Lucia has high elemental defense, heh. As a result, this turned into a long and rather tedious fight where Primrose spent many rounds healing and refreshing her Mole Dance protection while waiting for a chance to attack. There was one point where I ran into a bad RNG streak with Pulverize hitting three times in a row and Primrose was stuck in place doing nothing but healing endlessly. I could have sped this up significantly by using Refreshing/Revitalizing Jams but held them in reserve for more difficult future bosses. Slow and steady and something like 35 Medium Healing Grapes eventually resulted in victory on the first attempt.

Unfortunately the remaining bosses were the ones that I had been most concerned about and I knew that they wouldn't be easy customers. I held off on facing Darius and Werner for the moment by tackling Tressa's Chapter 4 story and Esmeralda next. The dungeons were a complete afterthought for Primrose by this point and I'll skip right ahead to the boss fight itself. Esmeralda likes to launch multiple physical attacks with her Five Strikes and will debuff the party's physical defense with her Raven's Flight ability. She also will lock out the player's attacks/physical abilities/magical abilities with her Red/Blue/Violet Blade abilities respectively. Despite the names, these are elemental attacks that can't be dodged and they were highly painful for Primrose's weak elemental defense, dealing roughly 2000 damage whenever they showed up. My best solution was equipping double Empowering Necklaces in the two accessory slots for +2000 HP to give Primrose a larger total HP pool to work with. I think that this was better than equipping Inferno and Blizzard Amulets to stop the damage from Red/Blue Blades (since that still wouldn't have done anything to stop Violet Blade) but it wasn't a great option either way.
Those blades often stopped Primrose from auto attacking as they rotated throughout the battle. That wasn't really the problem though, the various blades were largely an issue just based on how much damage they were dealing. Esmeralda's physical attacks were no joke either despite Primrose bringing the Battle-tested Dagger and plenty of physical evade. Even with Mole Dance to help counter the physical defense debuff from Raven's Flight, those Five Strikes could deal thousands of points of damage if RNG wasn't kind on the dodges. I couldn't seem to come up with an elegant plan for this boss and Primrose largely slugged her way through with Eye for an Eye counter attacks and the occasional Lion Dance-boosted physical strikes when her HP was in a safe place. I also made sure to tag Esmeralda with Wind Soulstones throughout the first portion of the fight to leave her one shield away from a break. That was because I knew this was coming:

Esmeralda starts using Black Blade after dropping under half HP and places a ticking death timer on the player. The only way to remove it is to break through her shields which is why it helps to prepare ahead of time. Sadly, I couldn't even hit Esmeralda with a big attack on the turn when she was broken because this boss always uses Five Strikes when recovering from a shield break and Primrose needed to heal in order to survive that. Esmeralda's second set of vulnerabilities after recovering from a break includes bows as a weakness and therefore I brought Z'aanta back again for help in this phase of the battle. Z'aanta was my strategy to break this second set of shields to stop the second Black Blade and then Esmeralda had daggers as a weakness in her third set of vulnerabilities. If Primrose couldn't win the battle by the time of the fourth Black Blade then the whole fight would simply be lost.
With this boss duel very much a battle against the clock, I was aggressive in using Refreshing Jams to keep up Primrose's health and enable more rounds of offense. Z'aanta was able to secure the second shield break and kick in additional damage to complement Primrose's own attacks with the Battle-tested Dagger. This was a slugfest though as Esmeralda kept using Red/Blue/Violet Blade repeatedly and I had to keep pausing to heal. I don't remember her using those blades quite so often with other characters, maybe Primrose had bad luck here. I was able to fight to a victory eventually after a sloppy, dangerous boss battle that saw Primrose get wiped out several times. She went through a full dozen Refreshing Jams on the winning attempt, argh! I still don't see a way to have defeated this boss more cleanly given the tools that Primrose had on hand. There's no easy trick here as with some of the other story-based opponents.
There were no good options left in the remaining dungeons as Primrose headed off to face arguably the worst roadblock opponent for solo games: Darius.

Primrose did have one big advantage working in her favor against Darius by having access to daggers as a damage type. Darius blocks and unblocks his other weaknesses while always remaining vulnerable to daggers at all times. This is a big deal since Darius will steal away the items of the player and breaking him is the only way to get them back again. I gave Primrose the mandatory Conscious Stone to prevent stunning and decided to equip an Inferno Amulet in the other slot to block Darius' fire element abilities. This left Primrose with only 4600 max HP but it covered up her weakness to elemental damage. Darius would have to rely on his physical attacks to deal damage and Primrose was very good at dodging those. She had outstanding luck at avoiding the Steal HP/SP/BP attacks from Darius which have tormented other characters of mine. I'd estimate that she was dodging somewhere between 80-90% of them and it turns out the Darius is much, much weaker when he isn't constantly taking away your health and spirit points and boost points. Therion experienced much the same thing when I played his solo game since he had the same combination of daggers damage and excellent evade. While Primrose lacked the ability to leech health via Therion's HP Leech attack, she was able to counter Darius' Nighthawk debuff via Mole Dance and Lion Dance, both of which saw heavy use against this boss.
I wasn't certain whether to bring Primrose's Eye for an Eye passive along for this fight. Eye for an Eye would greatly increase Primrose's damage at the cost of making it impossible to control when Darius was broken. I decided that I would start out by keeping the support skill in place and I could always drop it later if needed. Eye for an Eye proved to be immensely valuable since it could potentially kick in twice every time that Darius launched one of his Steal HP/SP/BP attacks. At times all that I had to do was keep Lion Dance in place and let counterattacks do all the work. Each attack from the Battle-tested Dagger had a chance to apply an accuracy debuff to the boss (including the counterattacks) and that only made it harder for Darius to hit Primrose. Even after Darius dropped under half HP and went up to three actions per round, Primrose was still hanging in there just fine with the occasional Refreshing Jam used for safety. Whenever Darius stole her items away, she simply hit him with more dagger attacks and broke through the shields to retrieve them again. Honestly Primrose was kind of kicking his butt thanks to her evasion and her counterattacks!
That left only Darius' insta-kill "Call Comrade" ability when he dropped below 25% health. Would Primrose's Encore passive revive her after the instant death attack hit?

Sadly it did not, blargh.  I guess her reviving support skill only worked against actual defeats, not story-included deaths. What a bunch of nonsense! This meant that I had no choice but to turn off the Eye for an Eye passive so that Primrose could control when Darius had his shields broken. I noticed right away that Primrose's damage went down considerably without those counterattacks available. The extra attacks had been breaking Darius on a steady basis and applying the Battle-tested Dagger's accuracy debuff regularly. Now Primrose had to wait and hold Darius one shield away from a break for safety's sake, hitting him with weaker soulstones or a non-Adamantine Dagger casting of Moonlight Waltz that barely cracked 3000 damage. This was a slower and more dangerous version of the Darius fight where Primrose had to survive for long rounds as she chipped away at his health bar. Over time I whittled him down below half health and approached the 25% HP threshold. This is where the luck of fight sequencing comes in: a solo character has to set up a situation where Darius falls below 25% HP on the same turn where they get to act first on the next round and can initiate a shield break. This is the only way to dodge the Call Comrade unblockable death when playing a non-Therion solo character.
As luck would have it, I was able to hit the correct fight sequence on the very first try after turning off Eye for an Eye:

This is the exact situation that has to be engineered, Darius shouting out the "I'll steal yer prized treasure" line with Primrose set to act first in the next turn order. For all of my careful planning in these battles, it takes a good bit of luck to get everything to line up exactly like this. The fact that I landed it on the first try was largely the product of fortunate RNG in the fight sequencing. Now that the big roadblock was out of the way, Primrose could bust out the 10 star Townsperson NPC from Bolderfall to kick in additional damage and block the occasional attack that she failed to dodge herself. I was confident that Primrose would have no trouble finishing off the last quarter of Darius' lifebar and she indeed succeeded with flying colors. Victory on the first attempt after she turned off her Eye for an Eye support skill. This whole episode revealed that Darius is a total cheese boss that relies on cheap tricks to be dangerous. Faced with an opponent who could dodge his attacks and break him at will, his only threat was the nonsensical Call Comrade insta-death move. As soon as Primrose bypassed that it was all over.

I had been saving Werner for last both because he's a difficult boss to defeat and also because the reward for finishing off Tressa and Therion's stories would be directly helpful against Werner. This came in the form of Mikk and Makk's Shield, by far the best option for any character running an evade setup and a close competitor with the Battle-tested Shield for the overall best shield in the game. Mikk and Makk's Shield represented a massive upgrade over the venerable Gustav's Shield and stacked even more evasion onto Primrose's build. It also allowed me to run the far superior Adamantine Hat over the Silent Bandana in the helmet slot while still keeping evasion near the maximum cap. This was the perfect item for use against Werner's all-physical attacks and I felt much safer with Primrose having this available for the final Chapter 4 boss. She equipped Calming and Conscious Stones in the two accessory slots to block Werner's terror/unconsciousness statuses and I resolved to do my best despite having only 4600 HP available. I certainly would have preferred Olberic's massive HP total here!
Primrose was running her full physical setup here with the Battle-tested Dagger (absolutely needed for its evade) in hand and relying on dagger attacks as opposed to dark element spells. Werner's basic attacks missed about 75% of the time while he had better odds to hit on his specialty moves which must have had higher accuracy. Werner frequently used his Oppression ability which debuffed both physical attack and physical defense. Primrose could counter both of these with Lion Dance and Mole Dance respectively, and we spent a lot of turns trading debuffs and counterbuffs back and forth. I tried to keep Mole Dance's protection in place at all times since there was a massive difference between when she had her physical defense buffed versus when it was debuffed (a swing of 9/4 on the math or more than double damage if she was hit while debuffed). It was harder to keep Lion Dance in place and I mostly enabled it when getting ready to spend a round attacking. Primrose could not sink a bunch of boost points into either skill for nine turns of duration since they would both be countered the next time that Oppression appeared.

The first half of the boss fight was relatively routine, as much as things ever get against Werner anyway. The boss started out with a daggers weakness which Primrose's counterattacks broke through immediately. Werner's second set of weaknesses locked out daggers and I tagged him with wind and light soulstones to knock off some of the shields in case Primrose needed an emergency break later for safety. Mostly though she was attacking when she had a clear opportunity and otherwise spending a lot of time refreshing the Lion and Mole Dances. Things became more dangerous when Werner picked up his third action per round at half health since the math of the fight started to swing in his favor with so many additional total actions. This was where Primrose unleashed the same 10 star Townsperson NPC again who was helpful in blocking some of the incoming damage. She actually went through all four Summon charges since the Townsperson was taking such a pounding and retreating from battle quickly. There weren't enough free rounds anymore to use Lion Dance so I concentrated instead of using Mole Dance for protection and healing with Refreshing Jams as needed. It was a tense but controlled fight that saw Primrose win on the first try at the cost of four or five Refreshing Jams.
That wrapped up all of the Chapter 4 bosses. There was still one more thing that I wanted to try though: seeing if I could land the big XP payout from Bewildering Grace which had failed to show up over the course of the whole game. With all of the Chapter 4 stories now complete, Primrose picked up the Captain's Badge accessory which grants 50% additional experience gain while equipped. The Everhold Tunnels were one of the few optional side areas that she hadn't completed yet and I sent Primrose in there in the hopes of getting lucky from her most random skill.

In particular, I was hoping to get a big Bewildering Grace result from this battle against three goats. They are a common encounter in the Everhold Tunnels and have a very high XP payout, a little over 1000 XP under normal circumstances and boosted to about 1500 XP thanks to the Captain's Badge. I had Primrose kill two of the three enemies and then roll Bewildering Grace repeatedly against the third while praying that the EXP x100 result would appear. The odds of this were only 1 in 1000 although Bewildering Grace does roll four results in succession when used at max boost points so more like (0.999)^4 = 99.6% odds not to get lucky, or conversely 0.4% odds to have it appear. This was hardly likely and Primrose went through a bunch of random encounters as she tried to hit her desired result. She used Bewildering Grace enough times that I was able to see just about everything that could come out of the skill, including the weird stuff like hitting the monsters with three wind element attacks, summoning a big monster to hit for 6000 damage, or the 0.5% odds for Primrose to kill herself with fire damage. Thankfully when the latter happened her Encore passive would trigger and then I could simply end the battle with a victory and try again in the next encounter.
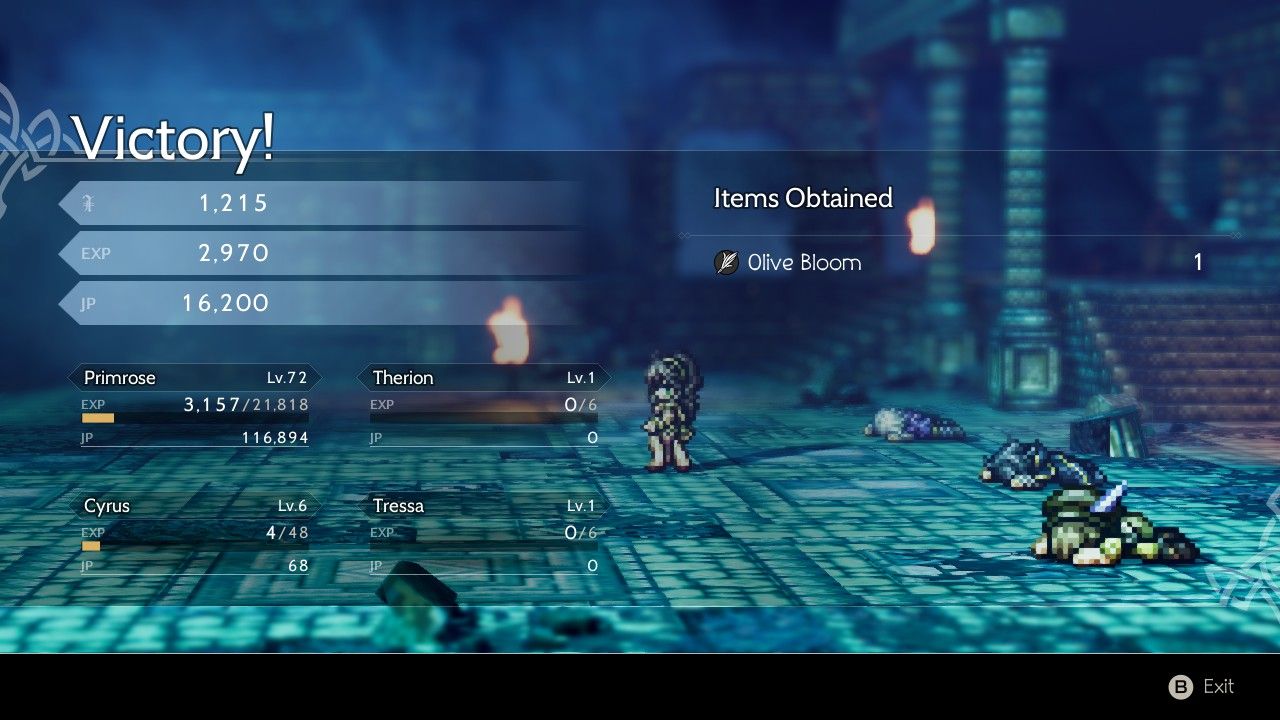
Primrose cleaned out the whole dungeon without hitting on the EXP x100 result, including defeating the Devourer of Dreams miniboss at the end. She did manage to hit the JP x100 result for an incredible 16,000 job points payout, enough that she could master an entire job solely from the result of that battle. At this point I stopped using Bewildering Grace only against the goats encounter and began using it in every random battle. Come on, sooner or later Primrose was bound to hit! And it didn't take too much longer until she did:

I was running the random encounter combats at triple gameplay speed as usual so I wasn't able to react quickly enough to get the screenshot of the effect itself, only the enormous XP gain afterwards. This battle had taken place against three Ratkings who weren't worth as much experience and therefore "only" resulted in 57,000 XP with the break bonus, enough to be worth about two full levels. I had been hoping to top the 100k mark and simply didn't get the big payout from the desired random encounters. I certainly wasn't going to keep fighting more meaningless combats now that I had seen this result for myself. Interestingly, this experience gain did not appear to stack with the Captain's Badge; this battle was normally worth about 520 XP and increased to about 800 XP with the Captain's Badge so I had been expecting roughly 80k experience. Instead only the base experience appeared to get the x100 multiplier. I could be wrong though, I wasn't testing this in a systematic fashion and I try to avoid grinding in games like this whenever possible.

Thus Primrose's journey of revenge finally came to its conclusion. She was a unique character to try thanks to her hybrid physical/elemental damage approach and the role played by her counterattacks. Primrose didn't have particularly good stats for a solo game and she was always lacking in raw damage but largely compensated through her versatility and excellent support skills. Primrose truly shines when she can be given another job other than Dancer and pick up some more straightforward damage; for example, she works really well as a Scholar which lets her equip staffs to increase her elemental damage more than what knives allow. Or she also picks up Warrior and Hunter well which let her use better weapons and access some skills that deal physical damage, something she completely lacks in her own Dancer abilities. Primrose was on the weaker side of solo characters and I didn't feel any desire to test her against the optional superbosses. It was time to let the poor girl take a well-deserved rest.
As always, thanks for reading and I hope you enjoyed Primrose's story!


