
I picked up with Olberic's journey at the start of the Chapter 3 storylines. Before diving into them, however, I wanted to take the time to acquire the best weapon in the game for Olberic. The use of the Divine Skill Brand's Thunder was keyed to the specific use of a sword, and I had the chance to find the top sword in Octopath Traveler right now. This weapon was the Battle-tested Blade, which has a physical attack value of +400 (90 points higher than the +310 attack value on the Forbidden Blade that Olberic was currently using) along with a massive increase of 150 points to the critical stat. Best of all, the Battle-tested Blade has a unique property named "Augment Physical"; what this means is not documented anywhere in-game, but a search online revealed that it increases damage from physical skills by 30%. The weapon actually grants that physical damage bonus even if a sword isn't the weapon used - it would also apply to spear-based abilities like Thousand Spears. And just to avoid any confusion, the 30% bonus only applied to physical skills and not basic auto attacks. This was still ridiculously useful though: if Brand's Thunder was already dealing 20k damage right now, how much better would it be with another 30% extra damage applied on top of that? I was eager to find out!

There are two ways to find the Battle-tested Blade in Octopath Traveler. The simple method is to Purchase/Steal it from Wellspring after finishing Olberic's storyline completely, all four chapters. Obviously that wouldn't help me at the moment since Olberic still had a long way to go before finishing up his whole quest. The harder method is to defeat this Townsperson in Bolderfall via Challenge or Provoke, just as I had picked up the Battle-tested Shield for Tressa via the same mechanic. The only requirement to find the Battle-tested Blade through this method is that Olberic (or H'aanit if going via the Provoke route) must be at least Level 40, as otherwise the game won't allow the Challenge/Provoke to take place. The Townsperson in question had the maximum 10 star rating and would be difficult to defeat before reaching that point anyway. (As a side note, I loved the text bubble when talking to this person about how dumb it would be to challenge this guy.) I had decided that I would attempt to pick up the Battle-tested Blade after Olberic finished the Chapter 2 stories and before starting the Chapter 3 stories, for no particular reason other than feeling that it was an appropriate moment.
Unfortunately, the designers of Octopath Traveler were absolute jerks in terms of how they set up this mechanic. There are half a dozen of these 10 star NPCs scattered across the early towns in the inner ring, each of them holding one of the different Battle-tested pieces of equipment. While all of them are difficult opponents to defeat, they can be taken down without too much trouble once Olberic reaches the mandated Level 40 and has good defensive gear. The truly obnoxious thing is the appearance rate of the Battle-tested gear: each item only has 2% odds to drop after each victory. Two percent!!!  This is a massive asshole maneuver for no reason at all. If the player is strong enough to defeat the NPCs in question, then they deserve to have access to the high-end gear, end of story. Forcing the player to fight battles over and over and over again serves absolutely no purpose at all. This isn't an online MMO or even a Diablo-type treasure hunting game. It's a Single Player game, for crying out loud! And yet the designers have locked the best items in the game behind a laughably low drop rate to torture their most devoted fans for sadistic reasons. This is the biggest flaw in the Octopath Traveler gameplay that I've found to date in a game that otherwise I have little to complain about.

The Townsperson in Bolderfall is particularly obnoxious to defeat. He makes for a tough fight on his own merits, debuffing the player's defenses and then uncorking his massive Guillotine ability after buffing up his own physical attack. Note that Guillotine did 2400 damage after Olberic had countered the defensive debuff with Stout Wall, and then used Stout Wall a second time to have the defensive up property instead of the defensive down property. The attack would have done about 5000 damage without taking those defensive measures. The Townsperson can also inflict unconsciousness with another attack, forcing the need to equip a Conscious Stone in the accessory slot. If the player doesn't know to take these moves, Olberic would get stunned almost immediately and then hit with 5000 damage for an instant game over. (I wouldn't even try this fight with H'aanit's Provoke due to the need to keep catching all those enemies.) The one piece of good news is that the Townsperson has a relatively low HP total. A single Brand's Thunder with Abide in place and the NPC broken was enough to win. It was reaching that point which proved to be difficult.
In addition to the opponent himself, the setup for this fight is also needlessly painful. The 10 star Townsperson is located in the lower section of the town of Bolderfall, which means needing to walk to a second screen from the town entrance every single time that the player wants to engage in this fight. The man in question is also found inside a house guarded by ANOTHER random townie, who must be Challenged and defeated every single time before the main opponent can be fought. It's only a 2 star opponent who melts instantly, but come on, what a needless waste of time! I tried to Guide that individual to get them out of the way permanently, but no, that's not an option. The player must fight and defeat this weakling every single time they want to Challenge the main opponent. In order to try again, the player must leave Bolderfall entirely and come back again: walk down to the lower screen, defeat the first opponent, then fight and defeat the main 10 star Townsperson. Again, all of this is pointless busywork. There's no need to waste the player's time like this. If you can beat the 10 star guy, that's it, you've proven you have accomplished the obstacle. Making the player do the same thing over and over again is utterly meaningless.
So, about that 2 percent drop rate. Tressa was very lucky on her solo run and saw the Battle-tested Shield appear on the fifth victory from one of these 10 star opponents. That was highly unlikely and there was no guarantee it would happen again here. I figured out how to win this encounter with Olberic and started running repeated iterations of it, again and again. A dozen victories, two dozen victories, three dozen victories... On and on it went. Each successful win was worth 1650 XP for Olberic and his level kept climbing rapidly. I wasn't deliberately trying to grind with him here, but if I was going to fight these battles, I might as well get some money and experience out of it. Fifty victories, sixty victories, seventy victories... How many times was I going to have to keep doing this? It was incredibly boring to play out. You can read the short summary of this sequence here on the website but I was experiencing it in real time and it consumed about a week's worth of gaming time. Eighty victories, ninety victories... Oh my god, seriously?! How much longer?  It's not like the odds get higher with more repetitions, it was still exactly 2 percent every single time. I could be at this forever!

Finally the Battle-tested Blade appeared on the one hundredth time running this battle. I'm not rounding there, I was counting and it was the 100th victory exactly. At this point I would take it, I had been starting to wonder if the documentation was wrong and the sword was never going to appear. In a horrific bit of numbers analysis, I have to state here that the odds of the item appearing within 100 battles were only about 87%. There was roughly 1 in 7 odds of the item still not appearing after doing this 100 times. And there was a further chance of roughly 2% that the item would fail to show up even after 200 repetitions of this fight! That was terrifying to think about for the future if I were to get one of those really bad RNG streaks. As bad as this had been, it could have been noticeably worse.
Fighting a hundred repetitions of this battle at 1650 XP apiece had naturally resulted in 165,000 additional experience points. Olberic's level shot up from about 55 to 70 in the process, leaving him at a much higher level than I had wanted. He was already nearly as high as Tressa had been when she finished the game (she had been Level 73). First and foremost this meant a lot more health, with Olberic's max HP increasing from about 4300 to about 5300. This made a real difference in terms of keeping him alive longer. His damage had also increased as a result of those levels, both due to some more points in physical attack and also because the damage formula has a level multiplier component. This causes damage to go up over time as level increases independent of all other factors; the mechanics guide has the full details, but in practical terms Olberic's damage had gone up about 15% solely due to gaining those levels. And he also was switching over to a better weapon with a higher attack value, plus picking up the amazing "Augment Physical" attribute for 30% more damage from physical skills.
Put that all together and this was the result:

Olberic's physical abilities dealt IMMENSELY more damage, an order of magnitude higher than they had been doing previously. This was a test of his Level Slash ability that his all enemies on the screen at the same time. With full boost points invested and Abide in place, it dished out nearly 7000 damage to all opponents simultaneously. That was hugely significant as even the endgame random monsters don't get much above 7000-8000 HP. Olberic potentially had an ability that could instantly clear the screen of opponents whenever he wanted. If there was a downside it was the SP cost, and even that wasn't much of a factor since Olberic could easily stock up on as many Inspirited Plums as he needed by this point. Wow. As painful as it had been to acquire the Battle-tested Blade, I think that it was worth the effort.
One of the huge advantages of playing through a solo game for the second time came in the form of knowing which bosses were tougher and easier for a solo character. This allowed me to begin the Chapter 3 stories with the boss that I considered to be the easiest, the Venomtooth Tiger at the end of Tressa's Chapter 3. The gimmick for this opponent is the use of poison, activating an aura called "Peerless Poison" which causes poison ticks to drain SP and BP as well as HP. This can easily be countered by equipping an Antidote Stone to block the poison status, and afterwards the Venomtooth Tiger finds itself reduced to a physical attacker with no other features of note. The tiger had a weakness to spears so this was another chance to break out Thousand Spears for reducing shields and then follow that up with the usual setup. Olberic powered up with Abide, broke the boss, and then unleashed Brand's Thunder:
Holey moley, look at that damage!!!  I wasn't entirely sure what I'd been expecting but it wasn't that. This was far better than anything I imagined, more than double the roughly 20k damage that Olberic had been outputting against the Chapter 2 bosses earlier. A better sword, higher levels, and the marvellous "Augment Physical" property on the Battle-tested Blade were responsible for the difference. I mean, just to put this in perspective, the Venomtooth Tiger only has 53k maximum health total. Olberic dished out nearly 90% of the boss' health total in a single blow. Thank goodess that his Surpassing Power passive allowed him to exceed the 9999 damage cap or nearly all of this would have gone to waste.
I decided to undertake Olberic's own Chapter 3 storyline next in the southern deserts of Wellspring. The scripted fights against a series of lizardking opponents (which had killed Tressa on several occasions) proved to be easy stuff for Olberic. A single max boosted Level Slash with Abide in place dealt 8000 damage to everyone and cleared the board of all opposition. So much for those poor lizards. I utilized the same tactic against the Lizardman Chief boss at the end of the dungeon:

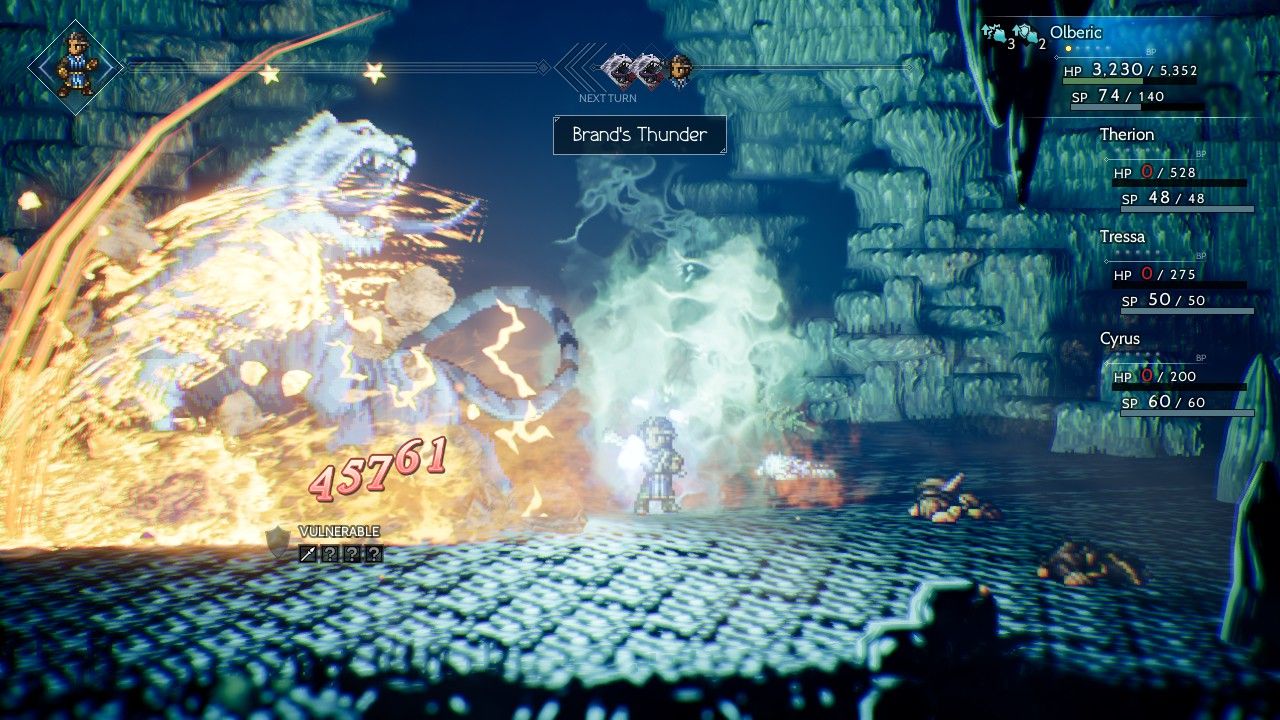
These unfortunate minions only had 3000 HP and were swept away immediately by Olberic's powerful slash. The Lizardman Chief called them back again (at half of their starting health total) only to see them blasted out of the picture by another Level Slash that didn't even need additional boost points invested. As for the boss himself, the Lizardman Chief was a standard physical attacker whose only noteworthy attack was a "Wallop" move which could inflict unconsciousness. With this blocked by the appropriate accessory, there was basically nothing that the boss could do - note how little damage Olberic had taken in the screenshot above. I took advantage of the swords weakness on the boss to break through his remaining shields and Olberic finished things off with another massive 45k damage use of Brand's Thunder. Nice and easy.
Now Olberic had his chance to gain vengeance on Erhardt for betraying and killing his liege lord:

I hadn't had much trouble winning this scripted fight with a Level 10 Olberic on Tressa's playthrough, and for an immensely powerful solo Olberic the whole thing turned into a farce. Olberic had too much armor for Erhardt to have any effect at all: witness his Cross Strike (the same ability that Olberic featured earler in the solo run) bouncing off for 6 damage. Meanwhile, I had equipped a Calming Stone to block the terror attack used by Erhardt and then took savage pleasure in breaking the blond-haired dandy and smashing him with another Brand's Thunder for 45k damage. Given that Erhardt has all of 15k HP, it was a satisfying moment of unneeded overkill. Olberic is willing to forgive this guy within the game's plotline but I'm not as tolerant of his past misdeeds.
I stayed in Wellspring to take on Therion's Chapter 3 storyline next since it was located in the same town. After going through another annoying sequence where Therion had to steal a plot-required item at 3% odds, Olberic was able to get down to business in the Black Market dungeon. Many of the monsters in this underground cave were able to poison Olberic, and the path of least resistance involved equipping an Antidote Stone to keep poison from ever popping up in the first place. Olberic didn't have Tressa's Rest ability to cure it away instantly. With poison out of the way, the denizens of this area went down smoothly to a lot of auto-attacking with sword blows.

The boss at the end of Therion's Chapter 3 story was Gareth and he proved to be a lot more difficult than the first two Chapter 3 bosses that Olberic had seen. I had equipped an Inferno Amulet to block the fire element damage from Gareth's Will o' Wisp ability, and I also eliminated Gareth's minions almost instantly with another Level Slash in the same fashion that Olberic had done against the Lizardman Chief. In retrospect I think that was a mistake, as Gareth increased from 2 actions to 3 actions per turn once his minions were gone. Better to leave one of the fairly weak minions alive to keep his actions down. Gareth had two abilities that I feared: Steal Items (which he can only use when under 50% HP) and Steal Magic, which drained half of maximum SP per appearance. I could keep Steal Items from popping up by never letting Gareth drop below half health, and indeed it would never show up here. Steal Magic was a different story, and Olberic was repeatedly drained of SP despite my best efforts. Without spirit points to power his abilities, Olberic couldn't use Brand's Thunder or any of his other powerful physical attacks. I only needed a single boosted Brand's Thunder to win the battle and I couldn't get it off because Olberic never had enough SP! Eventually I was able to queue up a long period of boosted attack by investing several BP into the Abide skill, then kept using Inspirited Plums until Olberic was able to break the boss and get off Brand's Thunder. This was a pain in the rear to get everything to line up properly, and Olberic was able to win the battle only because Gareth's low HP total (38k) was less than the damage caused by a single Brand's Thunder. This is a boss where I don't feel like I've gotten the tactics correct yet, need to spend some more time experimenting and improving.

I hopped over to Saintsbridge for the next story sequence, this time involving Alfyn. The boss at the end of this dungeon was Miguel, one of the biggest roadblock opponents that Tressa had faced on her journey. The critical insight had been recognizing that Miguel's damage was entirely physical in nature, and that I needed to load up my solo character with the maximum possible physical defense stat to survive the battle. I was sticking to that plan of action with Olberic, equipping the gear with the highest physical defensive stat in each slot. For the accessories, that meant taking both the standard Protective Necklace with its +80 physical/elemental defense along with the rarely-used Guardian Amulet for another +65 physical defense. The sum total of all this equipment came to 943 points of physical defense. The result:

Miguel was rendered completely helpless. Even with Olberic's armor debuffed by Miguel's Twin Spears ability, the spears raining down from the heavens did single digit damage. It was such a contrast from Tressa suffering from the same attack and taking thousands of points of damage. But then again, Tressa had gone into this fight with about 500 physical defense, not 940 physical defense. That was the whole difference in the battle. Miguel was still highly annoying as an opponent though since he constantly debuffed Olberic's physical defenses. I tried to keep Stout Wall in place and it turned out to be impossible, with Twin Spears overriding it twice in a single attack. Miguel also had enough health that a single Brand's Thunder wasn't enough to defeat him, and after recovering from his initial break he shifted his weaknesses and no longer was vulnerable to swords. Although the whole thing was relatively easy because Miguel couldn't get through Olberic's defenses, I could see this being a tricky fight for other solo characters.
At this point halfway through the Chapter 3 storylines, I made a remarkable and critically important discovery. I had been Challenging every single NPC in every town with Olberic, hoping to find some useful information for future Octopath characters. All of those endless fights while trying to find the Battle-tested Blade had also yielded a key insight, and not from the 10 star Townsperson but from his 2 star lackey blocking the door. This weak flunky only dropped a Healing Grape item when defeated, nothing else. The odds weren't guaranteed but the Healing Grape showed up roughly 80% of the time. This confirmed something that I had long suspected: each NPC has a single item associated with their Challenge/Provoke fight and most of these items will drop over and over again from repeated battles. Therefore identifying certain NPCs could theoretically unlock an infinite supply of items rather than buying them, or provide access to items not sold in stores.
That was the background for this crucially important discovery:

I devoted about an hour's worth of time to Challenging and defeating every NPC in Grandport. This is one of the largest towns in terms of NPCs and I counted close to 50 of them in total. In the back corner of the marketplace in Grandport, there's a Bazaar Shopper in fancy clothes hiding behind a woman in aristocratic dress. This man is incredibly easy to miss since he has no distinguishing features at all (he uses a common sprite seen in many other towns), he's located in a packed marketplace, and he's hiding behind this woman. But it turns out that this random shopper is the single most important NPC in the whole game for Challenge/Provoke purposes, because he holds a Refreshing Jam as the prize for victory:

Refreshing Jams are Octopath Traveler's equivalent of the Elixir item from past Final Fantasies, fully restoring HP and SP when consumed. They are extremely rare and almost impossible to find from random encounters against monsters in the wild. As an example, Tressa found a single Refreshing Jam from a random encounter in her entire character run, and Olberic had found zero in random battles up to this point in time. There are about 40 of them scattered in chests and granted as quest rewards throughout the whole game, and I was petrified throughout Tressa's whole journey that I would run out of this limited supply and find myself unable to complete the game.
That's where this random Bazaar Shopper comes into the picture. He grants a Refreshing Jam upon being defeated in a Challenge/Provoke encounter... and this sequence can be infinitely repeated!  Again, the drop rate seems to be about 75-80% so it's not fully guaranteed, but the whole thing can be repeated over and over again as needed. I tested and picked up five Refreshing Jams here so there doesn't appear to be any kind of limit. It was just like the Healing Grapes that I had compiled while searching for the Battle-tested Blade, Olberic could repeat this process as much as he wanted. I had looked online for where to find repeatable Refreshing Jams and no one mentioned this guy. The one thing everyone mentioned was Stealing the items from one enemy type (the Revenants) in Dragonsong Fane, but that involved an ability inaccessible to my solo characters and in a lategame dungeon that wouldn't be practical until hitting the Chapter 4 stories. This NPC was surprisingly easy to defeat (only 5 stars) and Grandport can be accessed much earlier in the game. While Olberic himself probably wouldn't need to farm Refreshing Jams, this discovery would be extremely important for some of the weaker solo characters down the road. Now I had a more realistic path to complete a solo Cyrus or solo Primrose game. As far as I can tell, this appears to be a genuinely new discovery no one else has written about. All of the time spent Challenging random townspeople had finally paid off!

Also, if you ever wanted to see the Grandport marketplace with every single NPC knocked out via Challenge, well, there you go. 

Running through the remaining Chapter 3 bosses, I sent Olberic into the Frostlands next to clear H'aanit's storyline. This was the source of far less anxiety this time around now that I knew the Dragon boss at the end wouldn't Sweep Away my solo character and cause an instant defeat. The Dragon uses a powerful fire-based breath attack which meant that the Inferno Amulet was the order of the day once again. This accessory completely nullified the fire damage and allowed Olberic to itemize for maximum physical defense with the rest of his gear. Although the Dragon was weak against swords, three of its five weaknesses were locked at the start of the fight and unfortunately swords were one of them. Rather than trying to break the creature and hope that its weaknesses shifted after it recovered, I simply opted to kill the Dragon without bothering to break its shields at all. With Abide in place, Brand's Thunder did slightly more than 20k damage against the unbroken boss and three such repetitions were enough to achieve victory. Sometimes it can be easier not trying to break the opponent at all if its weaknesses don't line up well with your character's abilities.
I did Primrose's Chapter 3 story afterwards and there wasn't a whole lot to say about this one. Albus the Right Hand was the boss at the end of this dungeon and all of his attacks were based around inflicting the blindness status. A Bright Stone accessory completely countered these abilities and turned Albus into a simple physical attacker. The boss summoned two minions when he dropped under 50% HP, locking all of his weaknesses in the process, and therefore I had Olberic slay them one at a time with Brand's Thunder, once again not bothering to break the minions since they would die to the Divine Skill regardless. Once they were gone, a final Brand's Thunder dealt 46,000 damage and finished off Albus with tens of thousands of damage to spare. Like the Venomtooth Tiger, Albus is a one-trick pony who can be countered easily with the correct accessories.

Cyrus took the stage next as Olberic proceeded onto his Chapter 3 story. The random monsters inside the associated dungeon were tough enough that I found myself using a lot of Level Slash with Olberic here. It was safer and faster to blast everyone away with a max boosted Level Slash rather than slowly fighting through opponents that could use terror or blindness statuses. Olberic had hundreds of thousands of money at this point and could purchase endless Inspiriting Plums to keep SP topped off. As for Yvon at the conclusion, I brought an Articulate Stone to counter his use of the silence status and otherwise went with heavy physical defense gear again. Yvon started out with two Research Fellow minions and I had Olberic eliminate them first, although I incorrectly tried to remove them at once with Level Slash which fell short of the needed damage. It would have been better to take them out one at a time with Brand's Thunder, although the minions died soon enough regardless.
Yvon had some nasty attacks that he would start using after dropping below half health. These included "Shatter Soul" (drains target of all SP) and "Pulverize" (drains target of all BP). I wanted no part of that and resolved to defeat the boss without him ever dropping below half HP. This was relatively simple to pull off: take the damage from the initial use of Level Slash, add in a single Brand's Thunder when not broken (which would taken Yvon down to about 60% HP), and then break the boss and finish him off with a final Brand's Thunder for the max damage 45,000+ result that I'd been seeing for some time now. Landing a non-broken Brand's Thunder was easily accomplished only to find a new problem: how to break Yvon? His only weaknesses were daggers, staffs, and light element. The solution was to dip into the supply of accumulated soulstones, using several pitiful small Light Soulstones to break through Yvon's shields. Their holy auras removed the remaining shields on the boss and opened a path for Brand's Thunder to finish things off. It was a nice example of a plan coming together and avoiding all of the actual dangerous stuff that Yvon could pull out.

The final Chapter 3 story was the one associated with Ophilia. I had been deliberately skipping this one because the bosses at the end are notably difficult for a solo character; these two opponents and Gareth in Therion's storyline look to be the toughest among the Chapter 3 group. I certainly had no trouble in the dungeon itself, with Olberic tearing right through the Seaside Grotto en route to rescue the latest stupid kid that Ophilia had gotten tied up with. The two bosses at the end of this story are the Mystery Man and the Shady Figure, a well-balanced pair in which the Mystery Man attacks while the Shady Figure buffs and heals. These two are hard for a solo character to deal with because the Shady Figure heals the pair of them for 800 HP at the end of each round (a real struggle for low-offensive variants) and if either one is killed, the other one buffs up and becomes much more dangerous afterwards.
The trick is to defeat both bosses at the same time, at least in theory. This is much more difficult due to the constant healing provided by the Shady Figure and the differing health totals and differing weaknesses on the two bosses. My plan was to use Level Slash against the two in the hopes that they would both perish at the same time. Unfortunately the swords weakness on the Shady Figure caused (him? her?) to take 30% more damage and desynched the two of them in terms of health. I ended up with the Mystery Man being the only one left alive, and that was less than ideal:

When either one of this pair is left alone, they will buff their elemental attack with Channel Energy and then repeatedly use the Arcane Blade ability for huge damage. Note that Olberic was taking 1600 damage here per appearance of Arcane Blade and the Mystery Man could use it twice per turn! I think that the elemental type is dark, and at some point I'll have to get a Void Amulet and test to see if that shuts down this ability. Olberic didn't have that here, and I actually tried the weaker version of the anti-dark element accessory (the Dark Amulet) only to find that it wasn't very effective. Olberic lacked a Void Amulet to do a proper test. Anyway, after experimenting for a bit, I hit on a slightly different strategy: use Level Slash until both enemies were low on health, then kill the Mystery Man with Brand's Thunder followed by immediately killing the Shady Figure with another Brand's Thunder. This looked like it was going to work, only for the Shady Figure to break out an ability called Black Magic which has a chance to inflict terror. The terror status hit, Olberic was unable to use boost points, and he immediately died. Argh! I ran the battle once more, this time with a Calming Stone equipped to block the terror, and finally it was enough. Olberic had to use a Refreshing Jam for the first time in his whole character run, a trade I was happy to make. This was not an easy battle at all.
With victory in hand over that pair of bosses, Olberic was finished with the Chapter 3 portion of the gameplay. The final chapter for each character still remained to be completed, and the toughest challenges for Olberic were rapidly drawing near. His solo game continued onwards towards its exciting conclusion.


