
Livestream Link (for those who would rather watch first before reading)
Ugh.
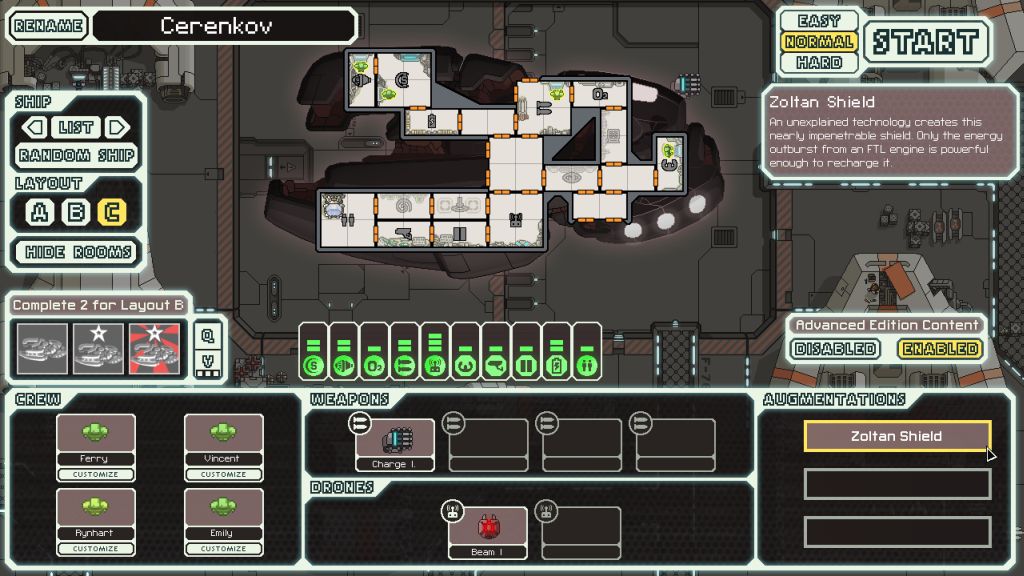
I don't like the Zoltan C Cruiser. This is easily one of my least favorite ships in the game, and it's also unquestionably among the weakest designs as well. What makes this ship so bad? It's a combination of three different things. First of all, and the most glaring issue with the Zoltan C, lies in the power reactor. This ship starts the game with a mere two reactor power. TWO POWER!!!  The default starting power amount is seven for most other ships. Now two power is obviously nowhere near enough to run the ship, so the Zoltan C has a couple of tools to work around this deficiency. You start out with four Zoltan crew members, each of whom will provide extra system power via their passive ability, up to four more power in total. Of course, they have to stay alive for that benefit to kick in, and losing even one frail Zoltan crewmember on this ship can be a complete disaster. In addition, someone has to pilot the ship, and that means wasting the power bonus from one of those four Zoltans. In practice, you will get three extra power at the start of the game, for a grand total of five. Remember though, you only get that power if the Zoltans are standing in their default rooms. Fires, hull breaches, enemy boarders - anything that pulls your crew off their stations will cripple your power setup. Not pleasant.
The other tool for dealing with the power crisis is the Backup Battery. The Zoltan C begins with an upgraded battery system, adding four power to the reactor every time that it's put into use. You absolutely must use the Backup Battery, constantly, in every battle, if you're going to make this ship work. That adds a lot of tedious micromanagement to the run. Generally speaking, so long as the Backup Battery is up and running, the Zoltan C performs pretty decently. The problem comes when 30 seconds are up and the battery goes on cooldown. The Zoltan C is typically screwed whenever that happens. At the start of the run, you do not have enough power to run the ship without the battery in operation. (You get 5 power without the battery, (assuming your three Zoltans are in position!); you need 2 for the shields, 1 for engines to have any dodge chance, and then 4 power to operate the weapons/drones, both of which you need to deal any damage. That's 7 power, and I'm not even including the 1 power needed for oxygen here.) So this ship is screwed without the Backup Battery in operation. Note that a random missile or bomb hitting the Battery system also poses dire peril, adding yet another potential area where things can go wrong.
Yeah, that sounds pretty bad when it comes to reactor power. But wait! There's more! It's actually even worse than that:

The Zoltan C starts out with a "weak reactor", which increases the cost of the starting reactor upgrades. Normally the first column of reactor upgrades cost 15 scrap each (although only in theory because this is the lone ship in the game to start with less than five reactor power), then the second column costs 20 scrap each, and so on until the final column costs 35 scrap. For the Zoltan C, the first three reactor upgrades cost 30 scrap apiece. That's extremely expensive in the early game, especially so on Hard difficulty. In other words, not only is your starting power situation awful, it's going to be awful for quite some time yet to come. On a normal ship, you can spend the first 90 scrap upgrading shields to level 4 (costs 50 scrap), and add on two engine levels (45 scrap). With the Zoltan C, that same investment will allow your ship to avoid being completely crippled when the Backup Battery goes on cooldown. Yay?
Power management is the first and most serious issue with this ship. There's a second glaring fault with the Zoltan C though, one which is almost as bad: the starting weapon setup is complete garbage. You begin with a Charge Ion as the only weapon, and a Beam Drone as the only means to deal damage. The intended setup is to use the ion weapon to take down the shields, and then the drone to deal actual damage once the shields are eliminated. This clunky setup has real problems though. The Charge Ion does reasonably well at getting through one shield layer, but it struggles mightily to deal with the second shield bubble. You will need a weapon upgrade of some kind by the end of Sector Two, or else the run will likely come to a fast end. And of course the Charge Ion deals no direct hull damage; the Beam Drone is the only way to do that, and it's completely useless if shields are up. Assuming that the Zoltan C can get the shields down, the Beam Drone itself is completely untargetable in shooting its little minibeams. You can't tell it to focus enemy weapons or shields or piloting or whatever. Countless times, you will watch that stupid drone fire at empty parts of the enemy hull, or doors/sensors nonsense, while the enemy weapons sit untouched.  This increases the difficulty level by an order of magnitude. You've got crummy weapons and you can't even control where they fire. You also don't have enough power to run both the Ion Charger and the Beam Drone at the same time without the Backup Battery, since they eat up 4 reactor power together. Have fun being unable to deal damage once it goes on cooldown. Oh, and remember, you've got to use a drone part in every single battle. Better hope you get plenty of them from random drops! Yet another issue to worry about.
Finally, there's a third major weakness of this ship as well: it's terrible at dealing with enemy boarders or any kind of system damage. If you're reading this writeup on my website, you probably already know that Zoltans are poor at melee combat. As the economic race of FTL, they will lose 1 vs 1 against everything other than Engis. Four Zoltans does not make for much of a fighting group. The layout of this ship is also poor at dealing with attackers; note that there are no vents anywhere near the engines/shields corner or the cloning bay corner. If rebels teleport into either of those areas, you're in serious danger. It's very hard to get oxygen deprivation into either of those corners. Furthermore, at the start of the game, you absolutely NEED your Zoltans to stay at their normal stations. If they have to run out of their rooms, you do not have enough power to run the ships. The Zoltan C is therefore extremely vulnerable to system damage from missiles and bombs. If the enemies would hit Piloting, or Engines, or Weapons, or Shields, OR Drone Control, OR the Backup Battery, you're up the creek without a paddle. Just pulling Zoltans from their stations to repair these systems can be deadly. It's incredibly easy to fall into a death spiral from one or two unlucky missile hits. I've seen it happen way too many times.
There are a few advantages to this ship, if nowhere near enough to make up for the penalties. The biggest is the Zoltan Shield itself, protecting against 5 damage at the start of each fight. That thing is worth its weight in gold. The ideal scenario for the Zoltan C is winning battles quickly, before the Backup Battery goes on cooldown and before the Zoltan Shield gets broken. Better hope for kind RNG from the Beam Drone to make that happen! The Zoltan Shield will also protect against enemy Teleporters while it's up, which is a very big deal. This ship also begins the game with a Drone Control system, so keep an eye out for a Defensive Drone from a random drop or for sale in a store. And you do get four Zoltan crewmembers, so if you can somehow survive the early game, the free Drone Control and Zoltans put you into a position to be strong in the lategame. Unfortunately, this kind of makes the Zoltan C like the FTL version of the Americans in Civ4. No one cares about how good the Navy SEAL unit might be, since the game will be won or lost long before that ever becomes a factor. Ditto for this game, you'll win or lose before the passive bonus from having four Zoltans ever amounts to much.
T-Hawk said that he believed the Zoltan C to be the weakest ship in the game. I need to get a victory with all of the ships on Hard mode before I can come to a conclusion myself, but this is certainly at the bottom of the tier list. This ship probably has the highest skill cap to use out of the 28 total designs as well, since it requires constant power management to succeed. And even when you do everything right, you'll still get crushed a lot of the time due to random factors beyond your control. I had all kinds of problems getting a winning run with this ship, failing again and again on Livestream. During the early runs, I was investing my initial scrap into upgrading the reactor out of the "weak" zone, and I think that that was a mistake. It was more important to focus on getting better weapons, and getting away from the horrible untargetable starting setup. Some runs might have been winnable if I had saved scrap and pounced on laser weapons or Flak when they showed up in stores. Upgrading the reactor first just seemed to lead to a slow death. Then there was the run where I hit five stores, and NONE of them had weapons for sale. Not one of them had the Weapons tab pop up, just lots and lots of Augments and Systems and Crew. Nor did I get any weapons in random drops. Nothing. I made it to Sector Five on that run, but it was just impossible, and eventually the Zoltan C exploded into fiery death. There wasn't a ton I could have done there...

On the run immediately preceding this one, I had four Humans teleport directly into the Cloning Bay room from a prebattle event. They killed my Zoltan crew and then destroyed the cloning system, and that was the end of that venture. It was my ninth failed voyage with the Zoltan C. The tenth mission started out with an encounter in an asteroid field, which can be very dangerous because the rocks eliminate the Zoltan Shield so quickly. Worse luck, my Beam Drone was immediately hit by an asteroid and killed, sheesh. Fortunately the enemy ship was also pelted by debris once the Charge Ion knocked out the shield unit, and I had my first victory. One encounter down, dozens yet to go.
Two easy auto scout battles were next, and handled without problems. The second one produced all of 8 scrap though - welcome to Hard difficulty. Then a third auto scout followed after that, which fired a missile and hit the Drone Control system, fortunately not doing enough damage to eliminate it completely. That is one minor advantage I haven't mentioned before, your Drone Control system starts at level 3 and not level 2, which means that it takes two points of system damage to knock out your Beam Drone. Thank goodness for that small favor. Sector One finished up with two more battles against auto scouts - that was five straight auto scouts in a row! The last two had no shields at all though, and the Beam Drone always cuts them apart with ease. Final tally for Sector One: 91 scrap earned (none spent thus far) and 3 damage taken. That was my best ever opening sector with this ship, and it put me in a great position.
I picked a Mantis sector for the second area, as the Mantis ships tend to have weaker weapons and shields. They rely on using the Teleporter to beam attackers over to your ship, and if the Zoltan Shield can stay up, that's not an issue. The very first beacon had no ship at all, however, but another prebattle event. Once again, four Humans beamed onto my ship, and directly into the Cloning Bay. Not again! This was the exact same event that had finished the previous run. Fortunately, Zoltans are good at learning from their mistakes, and this time I had a plan:

I could not stop them from destroying the Cloning Bay, so I didn't try. Once it was eliminated, the rebels moved on to my Door and Sensor rooms. I stuck one Zoltan in each room to occupy the enemies, knowing each would die, while the other two Zoltans fixed the Cloning Bay. It came back online just in time to revive the dead crew. Meanwhile, the whole time the ship was being drained of oxygen, as I began opening the doors to every room. With the Cloning Bay working again, the strategy was simple: EVERYONE DIES. My dudes would come back to life, their guys wouldn't. This nasty tactic did indeed work, and I breathed (heh) a sigh of relief. Made it through this difficult situation with minimum damage.
Two easy Mantis ships followed. The first one had an Ion Stunner and a Minibeam, which could never deal damage because I could always stuff two Zoltans into the shield room to power at least one shield layer. The second one relied on a Teleporter to attack, and it was never able to get through the Zoltan Shield with its conventional weapons. It dropped this goody when it was defeated:

An actual weapon, yes!  This was the break that I needed. The two shot version of the Charge Laser is one of the weakest lasers in the game, but beggars can't be choosers. Now I could finally spend that scrap I'd been hoarding. I purchased two levels in Weapons, up to level 4 (total of 60 scrap), and then I had no choice but to get two upgrades to the reactor for more power, costing another 60 scrap at 30 scrap apiece. This would leave me with just barely enough power to run the Charge Laser, the Charge Ion, and the Beam Drone. I was almost past the painful "weak reactor" upgrades now, and I stood an actual chance of fighting the enemy ships in the upcoming sector. Let's be clear though: the Zoltan C was still in a very weak position. I had level 2 shields and level 2 engines, the bare minimum in each, while on the cusp of entering Sector Three. Anytime the Zoltan Shield was broken, or the Backup Battery went on cooldown, I would be in dire peril. As one of the Livestream viewers put it, now I had a butter knife to fight with, but no more than that.
The Charge Laser paired surprisingly well with the Charge Ion, better than I had expected. The Charge Laser stores a laser shot every 6 seconds, up to a maximum of two shots, so I could keep firing rapidly if the Charge Ion managed to drop the shields, and save shots if the ion failed to do its job. The second half of Sector Two proved to be quite easy with the new weapon and yielded up a good amount of rewards. I found a Mantis crewmember in an event, and accumulated enough scrap to upgrade shields to level 4 and engines to level 3 by the end of the sector. There was only one battle that proved to be tricky due to a Fire Bomb, and another beacon that teleported three Mantises into the ship and forced some use of the Cloning Bay. This was the best position that I'd managed to achieve heading into Sector Three on any of my previous runs with this ship.

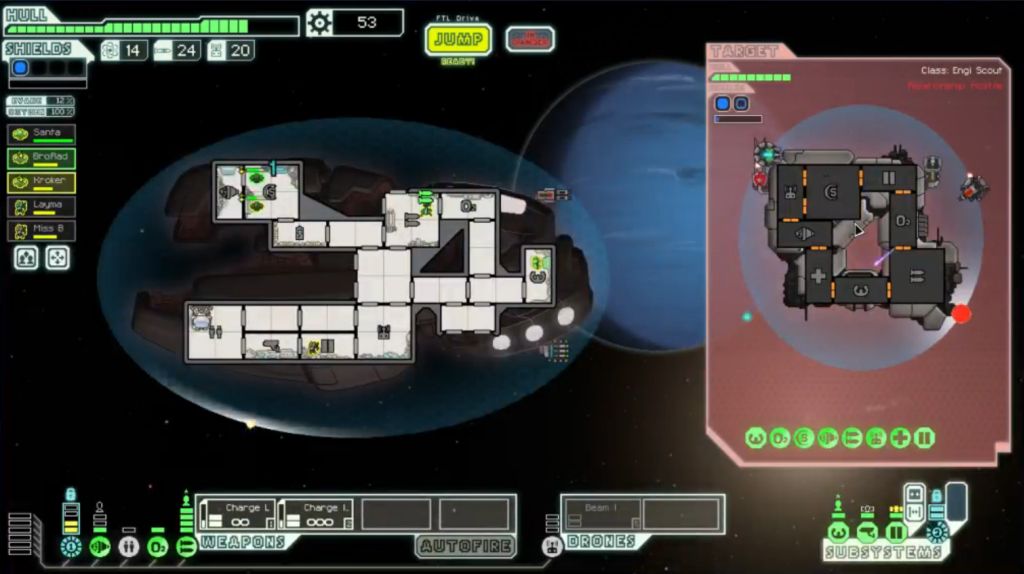
Unfortunately, Sector Three is where things started to get hard. The enemy ships ramp up noticeably in difficulty here, and most of them show up sporting a second shield bubble. The Charge Ion alone would have been almost completely impotent here. Even with the Charge Laser, it was tough to get through the enemy shielding on a regular basis. The auto scout pictured above was the first encounter in this sector, and it was a real nightmare. Two shield layers + decent evade made it very difficult to get any damage through to the hull, and the enemy combat drone paired frighteningly well with the two Heavy Lasers. All of them were fast firing, and the heavy shots dealt massive damage when they got through. One hit the shield unit and breached the hull at the same time, then another shot hit weapons (setting the room on fire and knocking out the Charge Ion), then a third shot hit the Cloning Bay while the weapons Zoltan was in there reviving:

Scratch one Zoltan.  With no Piloting, Weapons, Oxygen, or a functional Cloning Bay, this was the about the time when running from combat began to look attractive. I jumped to a store located next door, and repaired as best as possible from there. Losing the weapons Zoltan was a hard blow though. That guy had maxed out on weapons training, and the loss of the faster charge hurt. I had no choice but to put the Mantis crewmember into the Weapons room now, for at least the 10% faster charge bonus, although that left no one to man the doors. Obviously the loss of the Zoltan passive reactor power bonus was another setback. Not a great start to the new sector.
The next battle was an easy Slug ship with only one shield bubble. In typical Slug fashion, the ship tried to run away when it was low on health... and it escaped because none of my Charge Laser shots hit the piloting room, and the Beam Drone focused on the empty parts of the hull. Great, just great. At least I did get a second Mantis crewmember from another event, but I was falling behind on scrap collection again. Ships with the second shield bubble continued to be very difficult opponents, requiring me to wait for the Charge Ion and Charge Laser to reach their full complement of shots, then shoot all five projectiles together. It was almost laughable when I ran into an enemy ship with its own Zoltan Shield, two shield layers, a Burst II Laser, and a Hull Beam. My own Zoltan C was so far inferior to that design, it was simply ridiculous. Amazingly I did win that battle, largely because all three Charge Ion shots hit the target on the first volley and completely eliminated their shielding. That was a lot of work for 19 scrap...
I actually did continue to get use from the Beam Drone at times. For all of its weaknesses, the thing outputs a lot of damage when an enemy ship has no shields. Whenever I was able to get the shields completely ionized with the Charge Ion, I could fire off a Beam Drone and rack up some free DPS. While this wasn't something that happened in every battle, it was still often enough to be worth mentioning. Between the two Charge weapons and the Beam Drone, this was a real MacGuyver operation.
Here was another memorable moment of the run. The enemy ship had a Defensive II drone and two shield layers, making it almost impossible to deal any damage. However, their own weapons were an Ion Stunner and a Pike Beam, which meant that so long as I had two Zoltans stand in the shield room, they could never damage my ship either. We sat there firing at each other for ten full minutes of real world time, but I was too stubborn to retreat. It was actually a pretty good way to train up the crew, and my replacement Mantis maxed out on weapon skill here. Eventually it concluded with a victory, and a very hard earned 27 scrap.
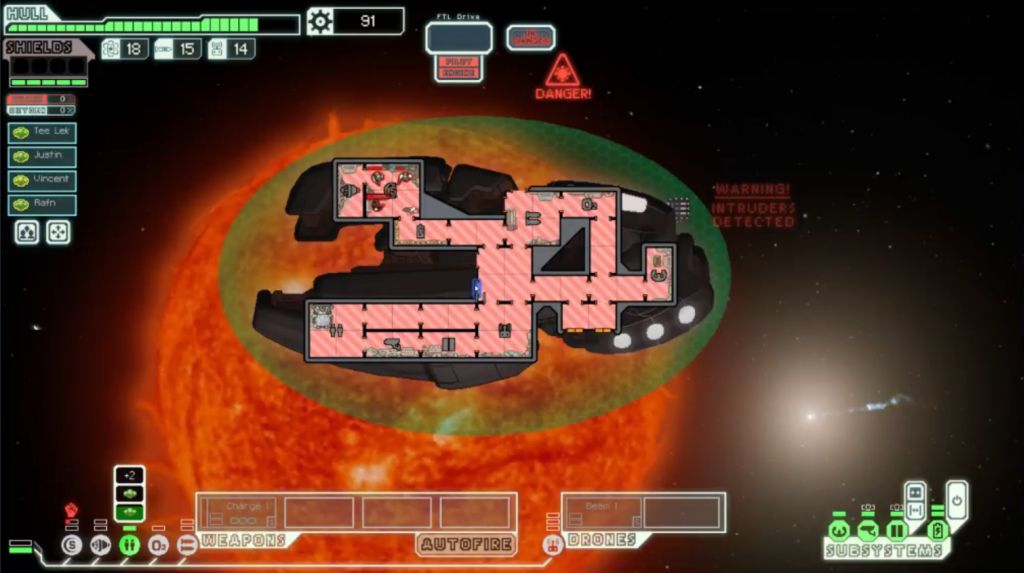
For Sector Four, I had the choice between a Rock sector or a Slug nebula. That was no choice at all, as I had no Defensive Drone or Cloaking to deal with enemy missiles, so I was forced to go into Slug space. Oxygen was immediately upgraded to level 2. The first ship that I encountered had three shield bubbles. Yes, already in Sector Four! Firing all my weapons did nothing, and I was forced to retreat as soon as the FTL drive was charged. Hopefully ships like that would be a rarity. Sadly, the very next battle came against a ship with a Burst II Laser and a Burst II Ion, an extremely nasty combination which quickly eliminated my shields and then poured in the laser damage. My initial Charge Ion volley did nothing at all, and it took another full cycle of repairing system damage and waiting for the Backup Battery to come off cooldown before I could fire the second volley. That one did manage to eliminate the shields, which was a good thing because the run might have been over if it hadn't. This was another hard won victory, with the Zoltan C hull down to eight health remaining.

After limping through the early parts of Sector Four, this store offered a major offensive upgrade. I decided to purchase the four shot version of the Laser Charger as a way of dealing with heavily shielded enemy ships. With this weapon in hand, I could fire off up to six shots at once, which would be enough to deal with three shield bubbles without too much trouble, and even the maximum of four in a pinch. The downside? That Laser Charge doesn't fire very quickly, taking 20 seconds to reach the maximum four charges. I also needed to upgrade Weapons to level 5 immediately, or I wouldn't be able to use the darn thing. There was just enough to pick up the Defensive Drone on sale (yay!), not even leaving enough scrap to heal the ship. I could repair 3 damage with my 9 leftover scrap. We bid farewell here to the Beam Drone, and I almost felt sorry to see the thing go. I preferred my new tools though - a lot more reliable and a lot less random.
By the way, I was still working off of 6 reactor power at this point. 
The new weapons were a true gamechanger. My pair of two Laser Chargers were finally able to deal real damage to enemy ships. The very next battle took place against a Slug ship with three shield layers, its own four shot Laser Charger, a Basic Laser, and a Pike Beam. That would have been pure suicide with my old setup, and yet now I could fight the ship and win without taking any damage. Just miraculous how the math of these encounters had changed. I had done a good job of hoarding scrap on this run, but I also had the good fortune to hit stores right when I needed them. I soon found a Heavy Laser after a battle, which I didn't have the weapons level to use yet but I did intend to use later, and patched up the hull at another store. I was finally able to begin sinking scrap into badly overdue upgrades in shields and engines now. Weapons had to come first, or I would have been completely unable to deal any damage. I will say that the Zoltan Shield was enormously valuable over the course of this run. Without it, I never could have delayed shield levels as long as I did.

This was another ship that took a very long time to defeat. It had good evade and three shield bubbles, and inflicting damage was a slow process. The stream viewers suggested targeting the Oxygen system and waiting for the crew to suffocate, which was doable because this was the weird Slug ship layout where the Oxygen room doesn't connect to the rest of the ship. That did work eventually, after quite a while. The Defensive Drone shot down five or six enemy Breach Missiles during that time, with only a single one getting through. Thank goodness for those defensive drones. I found a second Heavy Laser as a victory for winning, and now I had a potentially viable endgame weapon setup. Doubly so if I could purchase Hacking to ensure that all those shots hit the target. I swapped out the two shot Charge Laser for the pair of Heavy Lasers (both setups needing level 5 weapons), and now if the lasers from the four shot Charge Laser could take out enemy shields, I could pour in the Heavy Laser shots afterwards for big damage. When this worked, it was pretty amazing to watch.
Sector Five was an Engi Homeworld, and I found another store almost immediately. This one had a Halberd Beam for sale, and suddenly I had my final weapons setup. The four shot Laser Charger to remove enemy shields (3 power), then the two Heavy Lasers to add targeted system damage and cause fires/hull breaches (2 power), and then the Halberd Beam to cut apart the ship from there (3 power). Exactly eight weapons power needed. This meant saying goodbye to the two shot Laser Charger, which had been instrumental in reaching this point. Sadly it didn't fit with the rest of these weapons. Hacking now became my number one most wanted system.
Sector Six was the Rock Homeworlds, where I did not fear to tread thanks to my Defensive Drone. To give you an idea of how badly I had delayed normal upgrades, I only picked up level 6 shields at the beginning of this sector, and I was still running off of 9 reactor power. Praise be to the Zoltan Shield!  I'd been forced to invest heavily into weapons to make this run work, skipping out on defense and hoping for the best out of sheer necessity. Then a store offered up for sale the one remaining piece of the puzzle:

Hacking was honestly better than Cloaking here. It would ensure a guaranteed shield removal from the Charge Laser, plus two Heavy shots hitting the enemy ship on a system of my choice, plus the ability to cut lose with the Halberd Beam. When leveraged correctly, that was a full 6 damage to any system of my choice - say goodbye to your Weapons or Shield unit! Even the rebel flagship would be torn apart quickly with this setup. I had finally and decisively replaced the terrible starting setup with a custom loadout of my choice, and it was a world removed from the days of the Charge Ion and Beam Drone pair. All I needed to do now was farm up scrap in the last two sectors and upgrade the Zoltan C appropriately. I had every tool that I needed to win the game at hand.
When I upgraded Weapons to level 6, I swapped over to using the Charge Laser + Halberd combination. This actually proved to be a mistake though, because while the Halberd Beam applied damage to the whole of the enemy ship, I actually preferred having the double Heavy Lasers apply targeted damage to whatever enemy system was most critical. This is an important thing to keep in mind. It's often better to have 4 damage applied directly onto the enemy weapons rather than 6 total damage, but only 2 damage applied to weapons. Hacking's ability to guarantee hits with those Heavy Lasers made them the stronger option in most of these encounters. I actually swapped back to the dual Heavy Lasers, at least until I could upgrade weapons to level 7. Some of the enemy ships I was running across would have been genuinely dangerous if I hadn't been able to use those hacking drones to eliminate their weapons quickly.

Sector Seven was a civilian sector, and another place where Hacking made the battles immensely easier. This rebel ship pictured above had the maximum four shield layers and 30% evade. One hacking drone and a full volley of shots later, and the thing was completely crippled. I was somewhat concerned about running out of drones between hacking and defensive use, but it looked like I'd have enough for the remainder of the run. Along the way, the ship picked up a Rock crewmember from an event, purchasd an Antidrone and Hull Repair drone, and upgraded Weapons to level 8. That Rock guy was the subject of an intense debate in chat regarding whether or not he should replace the Zoltan pilot, which I didn't fully understand at first. I still maintain that it was better to keep the Zoltan in the piloting room, despite the loss of passive ability, since the Rock was better at fighting enemy boarders. Anyway, with a Hull Repair drone on top of everything else, it was getting to the point where I would be hard pressed to lose the game. Compared to the first few sectors, this was a cakewalk.

Sector Eight was surprisingly short. I headed north to hit a repair station for extra drone parts, fought three battles with the rebels, and then immediately found myself taking on the flagship. The pathing through the beacons practically forced me there, and the flagship was still nowhere near the federation base. Fortunately I had all of the upgrades I needed now, and every system that I could want save for Cloaking. My Zoltan Shield held just long enough to get the first volley off in the initial phase, which was fortunate because the rebel Hacking ended up hitting my own weapons room. I managed to get in the full blast of damage right before the weapons hack and the flagship's cloaking went off, really nice timing there. A bit lucky. The second volley finished off the first phase, with my Zoltan C taking only two damage. Hull repair drones quickly fixed those minor scratches.
I swapped in the Antidrone for the second phase, which performed as well as it always does here. With no Cloaking to fall back on, I took some hits from missiles and the drone surge but nothing serious. Even getting 5 Combat drones and 1 Beam drone from the flagship's drone surge (a very bad result) wasn't enough to affect the outcome. My weapons setup did critical damage on every volley, and soon enough the phase was over.
Both of our ships began the third phase with Zoltan Shields, which prevented the flagship from using its Mind Control or Teleporter for the first thirty seconds or so. I had rotten luck with all my shots missing at the start, and then after my Zoltan Shield went down the rebels used their Mind Control on one of my Mantises. I had to sacrifice other crew by feeding them to the superpowered Mantis, relying on the Cloning Bay to bring them back. At least the rebel invaders were a non-issue, as they ignored nearby system to try and meet up with the mind controlled Mantis. They were also far away from any of the crucial systems like Piloting, Weapons, and Shields. Once the flagship's own Zoltan Shield was down, my first Hacking-enhanced volley did 12 damage, reduced them to a single shield bubble, and set fire to the shield room. My ship had taken exactly zero damage thus far, plus I still had the Hull Repair drone on standby call. In other words, this was a pretty serious asskicking, and the flagship exploded into pieces from the next full volley:

One damage taken. I told you the Zoltan C was a good lategame ship. 

The final stats graded out to an average run for Hard difficulty. 5300 score and 1750 scrap collected are both as typical as it gets for a winning run. The actual process of getting there was anything but ordinary, of course. I credit this win to having such a strong first two sectors, which both went about as well as possible. The biggest break of the run was finding the two shot Charge Laser halfway through Sector Two. That allowed me to have a chance at dealing with the enemy ships in Sector Three with two shield bubbles; otherwise the run probably would have been a loss. I also did have good luck at finding stores at key moments through the voyage, never being forced to go for long dry stretches. That said, I was pleased that there were no ridiculous strokes of good fortune here, nothing like finding a Burst II Laser after the first jump and then purchasing Long Range Scanners from the first store. This was a legit victory with the Zoltan C, not a run that happened to stumble into wildly good luck. Aside from that one key Charge Laser, I bought nearly everything that I wound up using. Finding the two Heavy Lasers near the end of the run was certainly nice, but not crucial. I could have simply kept the two shot Charge Laser instead, and that would have worked nearly as well.
Winning with this ship was a tough challenge, and it pushed my skills as an FTL player. I'm glad that it's out of the way now, and I can't say I have much of a desire to use this ship anytime soon. The challenge ships are fun to try, but I don't like the ones where you can't control the outcomes, and this ship's reliance on that silly Beam Drone makes it a bit too RNG dependent for my liking. In any case, it was quite a ride. Thanks for reading about the story of lucky attempt #10. 


