
This will be the first writeup for an individual game playthrough with FTL. I plan to take all of the different ship designs through Hard difficulty at least one time, and do a short (for me!) report on what happened during the successful missions. There are 28 ship layouts in total in this game, with most ships having the default "A" layout, an alternate "B" layout unlocked by completing the game's achievements, and a final "C" layout added in the expansion with the Advanced Edition content. We'll start by taking a look at the most basic of the ships, the default Kestrel A Cruiser.

This is the only ship unlocked at the start of the game, and it's intended to serve as a beginning tutorial of sorts for FTL. Fortunately the Kestrel A is also one of the better ships available even after everything else has been opened up, and I'd probably rank it somewhere around 5th or 6th best out of the complete list. This version of the Kestrel starts with a Burst Laser II as one of its weapon options, and that's one of the nicest pieces of equipment to have in the whole game. The Burst Laser II fires quickly (12 second cooldown) and produces three shots for two power output. This is far superior to almost everything else that you're likely to find. In fact, one of the strongest weapon setups possible is four Burst Laser IIs, getting 12 total shots off in each volley. Of course that's exceedingly rare (I've never found more than two of the weapon in any one game), but it demonstrates how strong this weapon can be. You can ride the Burst Laser II for a very long time even on Hard mode.
The accompanying Artemis missile is a lot weaker. It's a basic one shot missile that deals 2 damage and ignores shields, useful if you need a bit of extra punch here or there. It also requires missile ammunition for each shot, like all missiles and bombs. Still, having that extra weapon is nice, as is beginning the game with level 4 weapons. That's more than most ships get at the start. The weapons are the best thing about the Kestrel A, you're set for quite a while instead of needing to scramble to find offensive output immediately. The ship is fairly average in terms of crew, with three Humans not lending any particular advantage or disadvantage. As for the rest, most everything is standard across the board, with no major advantages or disadvantages. Pretty much what you would expect for the default starting ship. While the Kestrel A doesn't begin with any interesting subsystems or augments, it also lacks any of the crippling disadvantages that many of the other ships have. Strong weaponry along with no major penalties makes the Kestrel A an excellent choice overall.
It was an obvious pick to take the Kestrel A out for a spin as my first voyage on Hard difficulty. I'd been beating Normal most of the time with all but the most handicapped ship layouts, and that meant it was time to take on the real challenge of the highest difficulty level. Sector One began calmly enough, with some pirate ships getting in missile hits but otherwise nothing of consequence. I upgraded shields first to level 4 (two layers of shields) halfway through the sector, and that cut down on damage from anything that wasn't a missile or bomb. This is generally the way to go with most ship setups, getting that second layer of shields enormously reduces stray laser shots getting through your defenses.
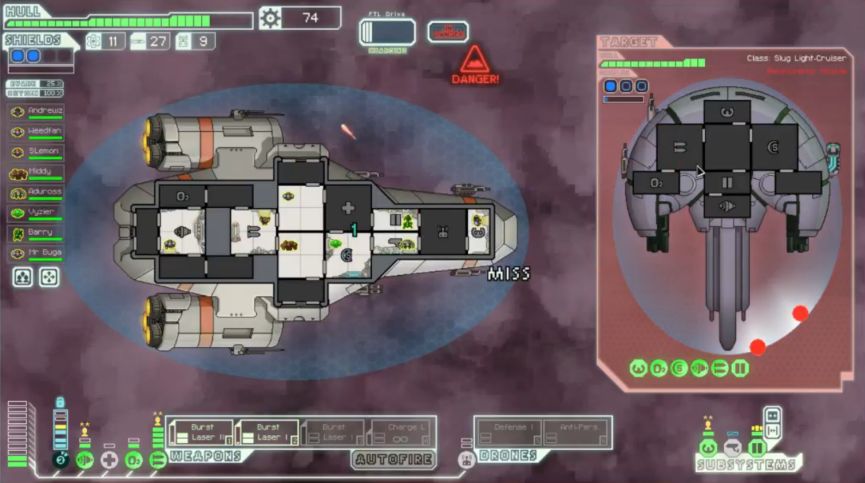
This autoscout in Sector Two was the first really annoying opponent on the run:

The battle was in a nebula, which meant limited power available, and of course I was trying to run on minimal reactor power as always. I depowered shields because there were no lasers on the autoscout, only to see the first ion shot hit my weapons (disabling them temporarily), and then the first enemy missile ALSO hit weapons, delaying them further until I could repair them. Then the second missile hit shields, argh! Bad RNG here. I took six damage before getting out of this one, and only picked up 13 scrap. Definitely the worst battle of the run to date.

That said, I could hardly complain about luck with this run. I had already picked up two crewmembers from events, one Rockman and one Engi. (I kept getting the space battle against the slavers repeatedly on this run, from start to finish. I was offered so many crewmembers I didn't know what to do with them all!) Mere seconds after the previous battle against the autoscout, I found this Laser Charger floating in space. The weapon was far inferior to the Burst Laser II, but it still provided another two shots for two power output. This was extremely helpful, as the enemy ships were starting to ramp up their shield and evade levels. I was rapidly reaching the point where the Burst Laser alone would not be sufficient to pass their defenses. This free weapon pickup helped me stay ahead of the dreaded Curve.
The next few areas were handled without too much trouble by the Burst Laser + Charge Laser combo. Five shots per volley on a 12 second cooldown was enough to punch through most enemy shielding at this stage of the game. The nastiest battle came against another autoscout that looked like the previous one described above. It too had an ion weapon and a missile launcher, along with a beam droid flying around. This time the first missile hit shields at the same time that the first ion shot disabled shields as well, and that left the beam droid flying around causing mass chaos until I could fire the second volley and knock out their droid controls. In the 10 seconds or so while the shields were down, that little thing did eight hull damage!  Sheesh. Those attack droids pack a wallop if shields are down.
A shop in Sector Three had one of the game's best purchases on sale: Drone Control that came with a free Defensive Drone. The Defensive Drone is worth 50 scrap in its own right, so you're basically getting 135 scrap value from an 85 scap purchase price. Yes please. The store also allowed me to fix up the hull damage from that last fight. The rest of Sector Three was a steamroll from that point on, as the Defensive drones solved the Kestrel's vulnerability to missiles. That was the one thing that had been causing so many problems earlier, and now I had a ready solution. Damage taken dropped enormously, very little damage at all in the following battles. There was enough scrap available to upgrade shields to level 6, with the third layer. I even found a Zoltan crew member in another friendly event, sweet!
A blue event at the start of Sector Four produced another lucky find:

I gave up a drone and took four hull damage in return for scrap and the Burst Laser I. That was an outstanding trade, giving me another strong weapon for free and cementing the build for this game. Looks like a laser-firing gunship for sure this time. With these free weapons the game was feeding me, it would have been silly to go in any other direction. Now I just needed to get some more weapons upgrades, enough to be able to fire all of these weapons at once. Even better, I found Long Range Scanners for sale at a store! However I actually made a mistake here at the same store, spending 55 scrap to pick up a Mantis crewmember, one that already had experience in fighting. That was wasteful as there was still plenty of time to pick up crew for free out of events, and indeed I would get plenty more opportunities along the way. Hiring this mantis delayed my weapons upgrades, and that would end up causing some problems a little later.
This mistake was compounded by purchasing another Burst Laser I at a store in the next sector. It was hard to complain too much about the purchase, as that was the near-perfect fit for my final weapons slot. I'd have 9 total lasers firing at once, with a very short cooldown of only 9.5 seconds per volley after the weapon expertise of the crew was applied. However those weapons were still sitting in the hold not doing anything. The Kestrel was still firing only five shots at the moment, and with many of the enemy ships now having level 6 shields with three layers to penetrate, it was hard to get damage onto many of them. To make matters worse, I had a run of luck where the enemies kept trying to run away, and in several cases they succeeded, denying me any scrap rewards. Take this Slug ship for example:
It was very hard for me to get any damage here with the mere five shots of my current weapon setup. I needed four out of five shots to hit, and the slugs likely had something around 30% evade on each one. Most volleys were not getting any damage, and their own ion-heavy return setup could deal real damage to my own ship. The battle lasted for long minutes on end, and I considered fleeing at one or two points. Eventually they offered a partial reward for letting them surrender, which I accepted. The result: four fuel. ARE YOU FREAKING KIDDING ME?!  That was an absolute joke, especially coming on the heels of a lengthy and dangerous battle. Those darned slugs! Moral learned: do not trust the slugs. The lack of scrap was a real problem though, and I was in serious danger of falling behind The Curve. I needed more damage ASAP. Delaying my weapon upgrades had been a real mistake.
Finally I staggered my way to the necessary scrap and upgraded weapons to level 6. This immediately put me over a tipping point and decreased the difficulty level of the game enormously. Seven shots instead of five was the necessary breakthrough, and the battles became a cakewalk again in an instant. It really is amazing how a seemingly small upgrade can shift the gameplay so dramatically in FTL. This was the crucial turning point of the run.
Well, along with this freebie dropping a couple of battles later:

This one literally had me dancing in my chair on Livestream.  The marvelous Weapon Preigniter offered up completely for free! This causes your ship to start each battle with the weapons already charged, allowing an initial first strike before the other ship can react. The first volley is usually the most important one, as it can knock out enemy weapons or some other crucial system, and therefore reduce the damage that you take in turn. There's not much they can do if you remove their weapons within the first second of the battle! This find was therefore simply awesome, and it swung things even more decisively in my favor. Now I could focus on maxing out weapons at level 8, and getting off an even bigger first strike. While the Preigniter wouldn't be that great against the rebel flagship (that battle is long enough that it has a more minimal effect), it sure would help me run over everything leading up to the final boss much more easily
I had to survive one fight against the rebel fleet at the end of Sector Six, where they reached the exit beacon by mere inches on the map screen. The fleet hit me with one ASB shot, fortunately nothing else connected. I got out of there with minimal damage. In Sector Seven, the main decision was figuring out what to purchase from the last stores. I wound up with Cloaking, the Backup Battery, and a second Defensive Drone. I came up just short on picking up Mind Control, which I really would have liked to have for the final boss. It was too bad that the shops were both located right at the start of the sector, and I never found the one store in Sector Eight. Ah well. The rest of the sector was a process of farming scrap and upgrading the Kestrel's systems. I had all of the tools that I needed for the final battle now, it just remained to execute it properly.
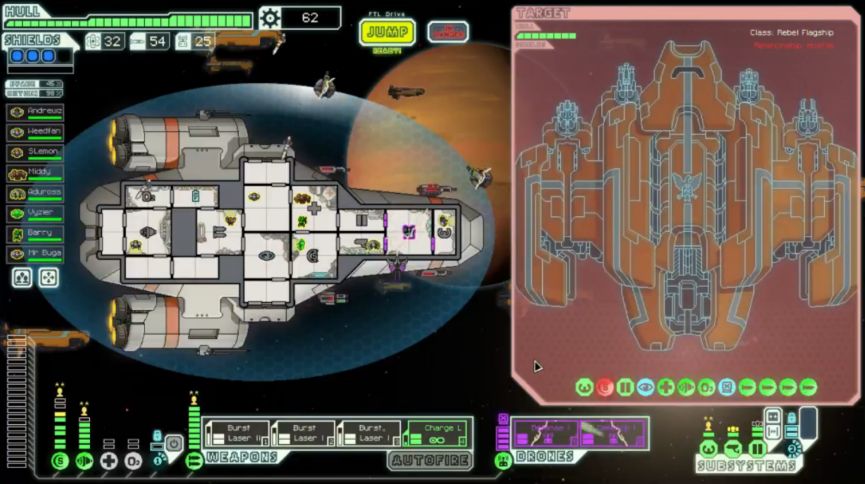
In the first phase of the rebel flagship battle, the enemies wound up hacking my drone control. I didn't think this would be much of an issue, only to find that the boss hacked my drones an instant before the two of them were about to shoot down the incoming swarm of three missiles. Argh! That was pure dumb luck, as the AI doesn't coordinate that kind of stuff intentionally. If not for that slick maneuver, I wouldn't have taken any damage in this phase. As for the offensive side of things, I fired my first volley at the missile launching weapon (Weapon #3), but I found that to be an unsuccessful strategy. Here on Hard difficulty, the rebel flagship no longer has those little weapon cubbyholes, and even if you damage the weapons, more crew will simply walk in and repair them. It's vastly more difficult to knock out any of the weapon systems. I had more success going after shields, as each point of damage made it easier to inflict more damage on the next volley. The rebel crew also piles into the shield room to repair the shields, and I was able to kill quite a few of them on subsequent volleys. Eight or nine lasers hitting all at once is brutal even for the rebel flagship. I would follow this same pattern of firing on shields in the following phases.
For the second phase, I deployed my defensive drones right away but still didn't shoot down the incoming boarding drone. I guess they weren't able to hit it in time. I used cloaking to dodge the enemy drone surge, and shot down the missiles as best I could. The defensive drones didn't do a particularly great job there either, and one of the missiles hit piloting, knocking out my change to dodge any future shots until I could get it repaired. I should have upgraded piloting to level 2, I'll remember that for the future. I did have scrap to spare before the fight. Damage was fairly minimal in this phase.
The last phase of the boss battle started out with my mantis crewmember getting mind controlled. That was one of the worst targets possible, the mantis and the human in piloting were the two worst choices there. I sent my rockman to fight the mantis, only to forget to micro him away in time, and he was killed by the mind-controlled mantis. Noooo! Darned slow rockman movement speed, he couldn't walk out of the room fast enough. My guns were still chipping away at the flagship's Zoltan Shield, it took three full volleys to get the thing down. The rebel crew beaming over died very quickly, so they were not a problem this time, thankfully. In more bad RNG luck, my defensive drones shot down the first two missiles, only to see the third get through and hit piloting. Again.  Really should have upgraded that to level 2 before the battle! Now I had 0% evade again until it could be fixed. I had been saving my cloak to dodge the laser burst superweapon on the flagship when it came out. However, in another extraordinary feat of bad RNG luck, the damage to piloting meant that I did not have a perfect cloak, and the very first missile hit the cloaking unit, knocking me out of the cloak one second after it started. Of all the stuff that could have gone wrong! This was one second before piloting would have been repaired, mind you. Now with no cloak available, the laser surge hit with full force... and all of the shots missed due to my restored 48% evade. I think one of them hit shields, all the rest missed. Praise RNJesus! What a weird sequence.
This would have been an easy finish, except that there was one more surprise left to come. I had cloaking ready again for the next laser surge, only the rebel flagship mind controlled my pilot at the same time that the cloak was going off, and then ANOTHER missile hit the cloaking unit, and again cancelled my cloak almost the instant it started. Folks, you can't make this stuff up. So once again the laser surge hit with full force, and this time with the pilot mind controlled, I had no evade at all. The hull took some nasty damage, and the engine room was set on fire. Fortunately the rebel ship was almost dead as well by now, and a few more volleys finished it off. Victory on the first try with the Kestrel A:

What should have been a very easy victory turned into a nasty fight thanks to all of that silly RNG stuff. I spent most of the final phase without being able to use my cloaking unit, as the flagship's missiles kept hitting it at the worst moment possible. I had the two worst crewmembers get hit by mind control, the mantis (who became an unbelievable death machine with the mind control bonuses) and the pilot. Much of the final phase was also done without any evade, due to missiles hitting my piloting and then the mind control. Crazy stuff. The one saving grace is that weapons were never touched at any point in time. With those lasers firing away, the rebel flagship was being decimated itself. I killed every single crewmember over there, and the thing had reverted to AI control by the end of the battle. Thank goodness for all those lasers. Pew pew pew indeed. 

This became my highest-scoring game with the extra bonus from playing on Hard difficulty. I'm sure that will be surpassed in the future. For all of the weirdness in the final encounter, this was a friendly run overall on luck. Landing two useful weapons for free was a great boon, and the charge laser really helped make a difference in the early sectors. Spending 50 scrap on a weapon (rather than finding one floating in space) would have set me back quite a bit. Obviously landing the Weapon Preigniter for free was a cherry on top of the sundae. It made a game that was already snowballing in my favor roll down the hill that much more quickly.
All of these runs are intended to be played on Livestream, and should be saved for future viewing as desired. Hopefully Twitch.tv won't keep messing around with the ability to save and preserve past recordings. Here's a link to the Livestream for this particular run. Thanks for reading or watching as the case may be.


