
Livestream Link (for those who would rather watch first before reading)

This is the second of the two layouts for the Federation ship, the mustard yellow colored Federation B. Unlike the extremely strong Kestrel B layout, the second version of the Federation Cruiser is definitely weaker than its original A setup. While the defult ship version has the amazing Burst Laser II as its primary weapon, the Federation B has to fall back on the mediocre Dual Laser + Leto Missile combination. This is simply not as good at getting through enemy shielding, and the starting nine missiles won't last very long. (Not that the weak Letos do much anyway!) The starting crew for the Federation B are also subpar compared to the A model, keeping 1 Human on each design but losing the Engi, Mantis, and Rockman in favor of a Zoltan and a Slug. Don't get me wrong, this is still a very solid crew (especially the free starting zoltan), but it's simply not as strong. More crewmembers are always better, after all, and the Federation B has one less to play around with. The Federation A works quite well as a boarding ship if you can acquire a Teleporter system; slugs and zoltans don't carry the same muscle as mantises and rockmen for that sort of work. Invading other ships probably isn't happening with this setup, not without some luck picking up crew along the way.
In exchange for these disadvantages, the Federation B gains an extra level in the Artillery Beam. This system unique to the Federation ships will begin the game at level 2 instead of level 1, meaning a 40 second cooldown instead of a 50 second cooldown. That's nice and all, but not worth the tradeoff on everything else. The Federation A is just better overall. We can tally up a rough approximation of the differences between the two setups via the scrap cost of each item. The Burst Laser II is priced at 80 scrap in stores, and while the Dual Laser and Leto Missile can't be purchased, they sell for 12 and 10 scrap apiece, giving them a total value of 45 scrap (the Dual Laser is valued at 25 and the Leto at 20). With regards to crewmembers, humans and slugs cost 45 scrap to hire, engi cost 50 scrap, mantis and rockmen cost 55 scrap, and zoltans cost 60 scrap. Finally, the level 2 artillery beam upgrade costs 30 scrap. Summing them together gives a total value of 285 for the Federation A against 225 for the Federation B. The numbers agree that the default setup is stronger for the Federation Cruiser.
That's not to say that the Federation B is a terrible ship, far from it. This particular design falls somewhere in the middle of the pack, a very average ship when compared to its peers. It always has the artillery beam to fall back upon if an enemy ship can't be damaged normally, and that's a very useful tool indeed. Just be aware that it does occupy one system slot (as with the Federation A), so no Cloaking + Drone Control + Hacking for this ship. You'll have to pick and choose whatever fits best on each particular run.
I'm going to try and keep this report a bit shorter than some of the previous ones I've written for FTL. These are fun to put on the website, but doing 28 of them for every ship layout is going to drive me crazy if I don't trim it down a bit! 
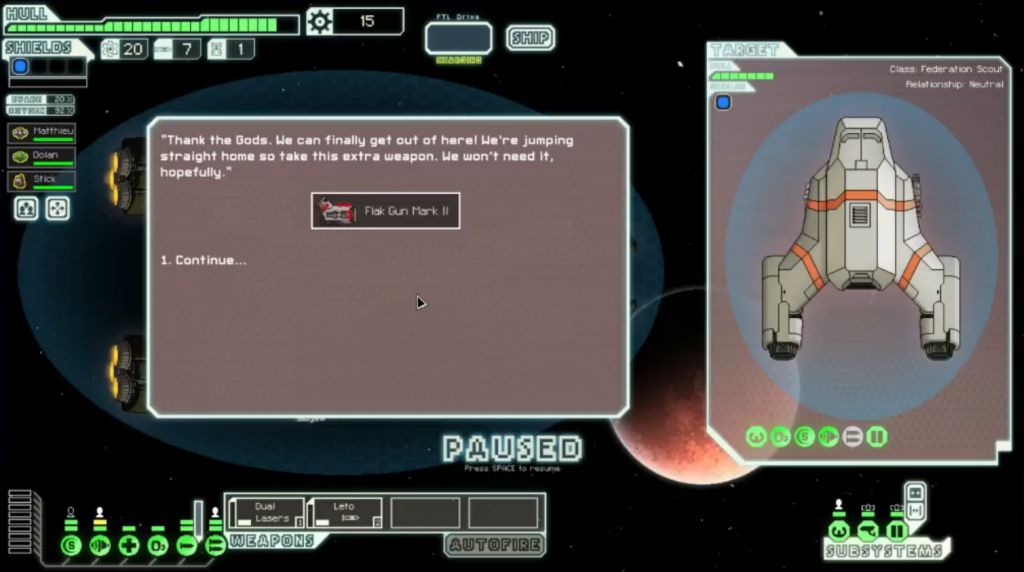
The first noteworthy event of this particular voyage was pulling a free Flak II weapon in Sector One. I had a distress event where a stranded ship asked for fuel, and they handed over this amazing prize in return. Very nice indeed. The Flak II is a tremedous lategame weapon, very good at stripping away even the maximum four layers of enemy shields with its seven projectiles. The major tradeoff is the extremely long cooldown of 21 seconds. This is too long for the early game where enemy ships don't have much in the way of shielding, and I would keep the weapon in storage for quite some time while moving to upgrade other systems. Here on Hard difficulty, there's not a lot of freedom if you want to survive. I strongly recommend upgrading shields first to level 4 (two shield layers) on most ships, and then getting a few more levels in engines. The early levels are incredibly cheap (10 scrap, then 15 scrap, then 30 scrap) and you'll need that extra dodge chance. Level 4 engines along with a crewmember in the piloting and engine rooms will grant 30% evade for the dirt cheap total of 55 scrap, and it will save your hide a hundred times over. Get the second shield bubble and decent evade ASAP if you want to survive on Hard mode.
I was able to minimize damage taken while getting these important early game upgrades with the Federation B. The ship only took three points of damage while saving up the 50 scrap for level 4 shields, for example. Some helpful blue event options provided extra scrap and an engi castaway to man the shield room. There were lots and lots of distress signals in Sector One, and all of them had useful results. Sector Two started out with a full map reveal from the very first beacon jump, which I've explained before is one of the best little swings of luck to get. This allowed me to plot the ship's course through engi space, taking advantage of the few enemy ships in the area and many helpful dialog options. I found another engi for a fifth crewmember (heading off to man the Door controls), picked up the Laser Charger as a reward for defending one engi ship against mantis pirates, and had the hull repaired back to full strength as part of a quest. Lots of good stuff there. I was able to use the Dual Laser + Laser Charger to get off a four shot volley every 12 seconds, and this would form the basis of my ship's offense for the moment. I even had Leto missiles to fire if I needed an extra kick of damage. That would work fine so long as the enemy ships had one or two shield layers; when they began appearing with three bubbles, I would need to begin using the Flak II or something similar.

This ship at the beginning of Sector Three was probably the single most annoying enemy ship of the entire run. They had a Burst III Laser and a Leto Missile for weaponry, and fortunately I was able to keep the laser weapon knocked offline for almost the whole battle. That wasn't the issue. The problem was the constant swarm of rockets from that low cooldown missile launcher, which my ship was apparently unable to avoid despite its 30% evade rate, an excellent number for this early part of the game. Missile after missile plinked away at my hull, and they mostly found their way to the weapons room. My weapons were hit by no less than FOUR missiles in a row at one point, knocking the Dual Lasers out of commission over and over again. On the other end, that triple engi crew managed to keep repairing their weapons faster than I could damage them. Making matters worse, I turned down a surrender attempt only to see more missiles continue to batter the sides of the Federation B. Made a mistake there for sure. All I could do was laugh when weapons were hit once again by yet another missile. While this wasn't exactly a life or death situation, it was pretty memorable for sheer frustration.
Then things started getting a bit screwy. First I picked up a Defensive Drone II for free at a beacon without a fight. Very nice, even if I didn't have a Drone Control system yet. The next beacon handed over an Anti-Bio Beam, also for free. Sweet pickup, although probably sellbait with this engi-heavy crew. (The Anti-Bio Beam combines best with boarding attacks.) Then the next jump handed over a Heavy Laser II weapon, also completely for free. Three jumps, three pieces of free equipment in a row?!

Combined with the earlier Flak II, this was a disgusting assortment of riches. Now I had to think about what I wanted my endgame offensive setup to be; I certainly had no need to waste scrap on purchasing weapons anymore. I decided that I would use the Flak II to strip away enemy shields, then follow that up with the Heavy Laser II. This is a weapon that's not particularly great at removing enemy shields, since it requires three power for only two shots, but if you can take out the shields somehow, the 2 damage Heavy shots dish out a pounding. These shots have a chance to breach the enemy ship's hull, set fires, and stun crewmembers. If you can get both shots through, then they'll cause 4 hull damage, massive system damage, and almost certainly breach the hull or set fires. Very dangerous when paired with Flak weapons. That left two power remaining, which I could use for the Dual Lasers or something else if it dropped later. For the time being, I swapped out the Charge Laser for the Heavy Laser II, and made certain to fire the Dual Laser first to get the heavy shots through to enemy hulls. Against enemy ships with three shield layers, I could swap out the Heavy Laser for the Flak II, since they cost the same amount of power. I did a lot of weapon swapping on this particular run, much more than others due to the treasure trove of findings.
All the junk that I didn't need also sold for a lot of scrap, enough for me to purchase a Drone Control System at the next store. Now I could put that Defensive Drone II to good use. No more missile shenanigans!
These weapon upgrades carried me through Sector Four (rock space), using the Heavy Laser II against enemy ships with two shield layers and the Flak II against foes with a third bubble, paired together with the Dual Laser in each case. The rock ships generally like to fire a lot of missiles, and that was the case again here, but the new defensive drone shot most of them down and eased my worries. Because it was a Defensive II Drone, a couple times it fired at incoming lasers rather than missiles, argh. Always hate that about those things, plus their three power requirement as opposed to two power. Still, I'd found it for free so I certainly couldn't complain. While traveling across the sector, I pulled the final piece of the weapon puzzle:

This was another blue event option at a distress signal, available because I had a defensive drone. I took some slight hull damage while pulling in scrap and a new weapon, the Pike Beam. This was a near-perfect fit for the last weapon slot: use the Flak II to strip away enemy shields, then smash hull breaches with the Heavy Laser II and finally rake the Pike Beam across whatever was left over. The three systems together used eight power, the limit for weapons, plus I would still have the Artillery Beam in the background as well. Heavy damage! If I could get a Cloaking system to shore up defenses, the run would be all but assured of success now.
This picture summarized most battles moving forward from this point:

Lots of burning and horrible death on their side, smooth and easy progress on my side. I had played enough FTL games by now to know what to do when out in front of The Curve, and the random drops had just been so absurdly generous on this run. It would be an embarassing mistake to lose at this point. I upgraded shields to level 6, hit the point of diminishing returns on engines at level 5, and then began upgrading weapons to get all of the shiny toys in play. I also picked up a Human crewmember from a slaver ship in Sector Five. A quest reward even healed up my damaged hull again - this was almost too easy. The worst battle was probably against a Lanius ship fought in one of those ion pulsar events, where my shields were again ionized and I took heavy damage. I was able to get out of there quickly when they made a surrender offer, whew. I don't mind any of the other hostile environments (asteroids, suns, etc.) but I really dislike the ion pulsars.
One other weakness of my ship was its poor ability to fight in melee combat against invading boarders. I had three engis and a zoltan on board, which meant that I had little choice other than to drain the oxygen from any room where teleporting hostiles appeared. (On the other hand, having all those engis meant that my repair speed for damaged systems was top notch, and that's pretty valuable in its own right.) I hoped to get an additional crewmember to help deal with the attackers upcoming in the final battle.
The other main goal for the last couple sectors was purchasing a Cloaking unit for the final system slot. I kept 150 scrap in the bank at all times during Sectors Six and Seven, hoping to find a store that would sell one. The first shop in Sector Six was a dud, failing to offer any systems for sale at all. A second store in Sector Seven was exactly the same, offering no systems for purchase. I grabbed a rockman there who came with maxed combat skill for 55 scrap, still hoping for another store to appear. Two jumps later, I came across a slug ship that offered to scout the sector for me. That was worth the minor scrap payment in this situation, and I gained a revealed map... only to find that there were no other shops remaining.  Dang it. Unless I could find the one store in Sector Eight (which is fairly unusual), I would be stuck with only my current tools for the final battle. No Cloaking, no Hacking, no Teleporter, no Mind Control. That could be a bit dicey. Even Hacking would make the flagship battle far easier, but it was not to be. Not a single system for sale in stores in Sectors Five through Eight this time.
The rest of Sector Seven was fairly uneventful (aside from some battles where I was somehow unable to get through enemy shields with the NINE combined projectiles of Flak II + Heavy Laser II; what was going on there!) I was unable to find the one store in Sector Eight as expected, so it was indeed time for the flagship battle with no extra systems. I did manage to upgrade the Artillery Beam to its maximum of level 4, intending to micro power back and forth between the beam and engines constantly. Whenever there wasn't something shooting at me, that power would go into charging up the artillery beam faster. Let's do this thing.
The enemy Hacking drone in the first phase went onto the Backup Battery system. That's a weird one to hack, it actually drains power from the reactor instead of adding it! Still one of the mildest possible targets, of course, and a welcome bit of good luck. I had to be careful about firing my full burst combo at the flagship in this first phase, as one of the weaknesses of Flak II is that its chargeup time is almost exactly the same as an enemy cloak. If you shoot as soon as it charges, the rebels will cloak just as your projectiles arrive, wasting them completely. You have to wait until after the cloak finishes and then fire off everything in a burst. The good news was that initial volley did crippling damage to the flagship. Flak II dropped the shields like a champ, Heavy Laser II breached the hull and set two fires in the shield room, while the Pike Beam and Artillery Beam sliced everything apart. It was fourteen total damage in that first blast. Here's what it looked like:

The rebel crew was unable to put out the fires in the shield room, and the flames burned out the remaining health on that system. The flagship was left with zero shields! I fired the Heavy Laser again as soon as it was charged, pounding the shield room again and killing two crewmembers. This left the hull with a single point of health, and the Pike Beam finished it off two seconds later. My Federation B ship took 3 total damage in the process. What a fantastic first round!
In the second phase, my defensive drone shot down the first enemy boarding drone but the second one got through. Fortunately it popped up in the Medbay, the best possible place to fight attackers. While that was going on, enemy missiles managed to hit both the shield room and the artilley beam room, not good. At least I had all of those engi crewmembers around to repair the damage. My first volley was not nearly as effective this time, largely because I mistimed the Heavy Laser shots and had them impact on the shields. Needed to fire them ever so slightly later. (This can be tricky because the animation for the Flak particles is different on every shot.) If there was an MVP for this phase, it was the Defensive Drone II for shooting down so many of the lasers from the flagship's drone surge. Most of the ones that popped out were beam drones, and my own defensive drone stopped enough of the lasers from the few combat drones to stop those beams from getting through shields. Otherwise this would have been a complete slaughter with my own shields already damaged and no Cloaking unit to hide behind. My second volley fared much better, cutting apart the flagship's defenses and getting both Heavy Laser shots onto the shield room. The thing was left with 1 health after everything fired, and I was able to finish it off with the next use of the Pike Beam (after the Heavy Laser missed twice!) before the second drone surge could go off. Whew. My ship took nine damage in this messy phase.
The third phase had the potential to cause serious problems for my weak fighting crew. I was glad that there were only seven rebels remaining over there, having eliminated a good number of them in the first phase. Their Mind Control hit one of my engi crew, another break of luck. That was the best possible target, the worst race at fighting in this game. The first pair of rebel boarders teleported into the northwest corner up the ship, up by the sensor room, and the following duo went to that same part of the ship. This was another break of good fortune, as I was able to drain the oxygen from those areas and not lose control of key systems like engines or piloting. The one stroke of bad luck was having an early missile hit the weapons room (and set a fire in there!), which I fixed as quickly as possible with a spare engi. The ship actually took zero damage from the first firing of the flagship super volley. Praise be to four shield bubbles, 45% evade, and a Defensive II Drone taking out some of the shots!
The only other hiccup in the fight was losing the defensive drone temporarily when another missile hit the system. It set two fires in the room, but there was actually no oxygen in the room already from the early venting of rebel marines. As soon as the fires disappeared, I sent some engi up there to make repairs and had the system online very quickly. Meanwhile my first full volley after the flagship's Zoltan Shield had dropped did massive damage again, leaving the rebels with a single shield bubble and four health on the hull. It was a race to see what would finish off the flagship, Heavy Laser or Pike Beam or Artillery Beam. I think that the Artilley Beam won by less than a second, victory coming as the rockman finished off the final rebel boarder at the same time:

This was an outstanding flagship battle overall, especially the first and third phases. The second phase was the only rough spot, and it was a self-inflicted wound there because I didn't time the firing of the Heavy Laser II correctly in the initial volley. Those heavy shots were the biggest difference maker, causing so much system damage to the flagship's shield room, as well as breaching the hull and setting multiple fires. Do not underestimate the two Heavy Lasers in this game, they do excellent work if you can remove shields in some other fashion. The other major help was microing the power on the Artillery Beam to get it firing much faster. This also increased the damage output of the Federation B substantially. And I had to win this battle quickly due to the lack of defensive tools at my disposal. Without a Cloaking unit, a lengthy duel would have resulted in sure defeat. Instead, I got through the second phase while facing only a single drone surge, and saw just two power surges in the third phase. This was one of the fastest flagship kills I've ever picked up, and certainly the quickest without having Hacking to ensure 0% evade. Offense to the rescue this time!

The score of 4578 points is the lowest that I've achieved on Hard difficulty to date. According to the Livestream chat, this was due to the fact that the scoring system does not count scrap from selling things in stores, and I sold more junk in stores on this run than any other. I didn't even write about half the stuff that dropped at one time or another, only the useful things along the way. Score seems to be based almost entirely on ships defeated and scrap collected, and this voyage of the Federation B scored low in both counts. Obviously this run benefitted from a lot of good fortune, but I was still able to work around the holes in my setup (such as no Cloaking) and deliver a convincing flagship victory. It was a fun trip, even if it wasn't the hardest challenge.
I will probably use the Federation C layout next to complete the group. This is one of the weaker ships in the game, so things will be a lot more difficult. Stay tuned.


