
In the first part of this report my group had managed to clear out two realm dungeons, leaving three more yet to go. Fortunately I had already discovered another dungeon in the form of the Water Tower; while I had been thinking about heading there next, the dungeon increased up to Level 6 in the aftermath of conquering the Obsidian Keep, and I realized that I needed to head off to other towns to restock on supplies and gain additional experience. I believe that the realm dungeons increase by two levels each time that one of them is cleared out, starting at Level 2 and then increasing to Level 4, Level 6, Level 8, and finally Level 10 for the last one. This ensures that the challenge will keep ramping up with each obstacle conquered, and even two of them spawning right next to one another on the map (as happened here) won't lead to any easy victories.

My party sailed to the west after exiting the dungeon, heading into the Burning Forest region with the intent of scoping out its two towns. One of them offered up a new item for sale that changed how I was developing Charlie's character build. This would be the pictured Wizard's Tome, an Intelligence-based weapon that offered a huge damage increase (from 12 base to 23 base) and several useful abilities. The default Surge attack was magic resistance piercing, while the Area Blast attack provided a multitargeted attack (at half damage) that I was lacking on any of my characters. Time Jump also provided a "Rush" ability that I could use to jump someone else ahead in the turn order, although Charlie was doing enough damage with this weapon that I almost never chose that option. Overall it was too good of a weapon not to pick up, so I purchased the Wizard's Tome and began swapping gear around on Charlie to emphasize Intelligence rather than Strength. This is one of the advantages of hybrid classes like the Monk, with their varied stats letting them choose between different types of weapons. The disadvantage is that their stats are spread more thinly across multiple areas, leaving them worse at doing any one thing. The Hunter class starts with a score of 78 in Awareness, for example, while the Monk can't do better than 74 in Strength or Intelligence. It's often better to do one thing really well than be decent at a whole bunch of them.

I had also picked up another reduce chaos quest in town, and fought off another difficult camp of Chaos Mages to achieve the quest reward. The party was victorious but not without suffering a major setback: MrWhiskers suffered a would-be killing blow and his Sanctum of Wealth shattered in the process. Argh, I had been hoping to keep that a lot longer. The enemies simply focused him with a series of attacks before I could get a heal off. Fortunately there was another sanctum nearby, this one attuned to vitality, and I would grab that in short order to restore the death protection on MrWhiskers. The victorious outcome in this battle also banished the upcoming chaos marker from the timeline at the top of the screen, leaving me a long grace period before I'd have to worry about more chaos popping up. As for the spoils that dropped from the monsters, this Lightning Lute was an upgrade that I decided to have MrWhiskers equip. While the base damage was slightly lower than the Ornate Tambura, the Lightning Lute was resistance piercing on a perfect attack roll and also inflicted Shock status. Shock is the nastiest debuff in FTK, causing anyone afflicted to fail their first dice roll on any attack. The combination of piercing damage and Shock was too good for me to pass up.
I was able to explore most of the Burning Forest from the boat by sailing along the shoreline, always the best way to explore a region if possible. This turned up the Mage Dungeon, another one of the five major dungeons that needed to be cleared for this game mode, and after restocking on supplies I headed inside. The battles in the dungeon were challenging to complete, and I used several Godsbeard herbs along with a Tinder Pouch at the halfway resting point. One of the disappointing things that I discovered inside was that nearly every enemy seemed to be immune to the Shock debuff. That's the biggest drawback to weapons that inflict Shock: almost every opponent you'd want to tag with the debuff ends up being immune, including all bosses and scourges. While I was still reasonably happy with the Lightning Lute, I rarely managed to get much use out of the Shock property.

Take a look at this boss fight at the end of the Mage Dungeon, for example. The Fire Priestess was the only one of the three enemies vulnerable to Shock, and this had been a common occurrence throughout the dungeon. This was a nasty fight with my party already poisoned from previous battles, and the fire/ice casters stacked Frozen and Burning debuffs on top of that. The Lightning Crag also had heavy armor and resistance, making it effectively immune to any attack that didn't roll perfect and get the piercing property. (Another good example of why those piercing weapons are so necessary.) Charlie had lost his Sanctum of Purity earlier in the dungeon, and he had to use another Party Heal to keep everyone's health up. I was also nearly out of Focus and desperately needed more of it so that my party members could roll perfect attacks and get their piercing attacks to land. This led me to use one of my two Precious Pearl items:

What an amazing item: cures all party ailments and restores all party Focus. These things are worth their weight in gold. The poison, burning, and frozen debuffs were wiped away in one stroke and the party gained back 11 total points of Focus. This allowed Ballgown to reliably land her armor piercing attack as pictured above, doing 22 damage instead of the 7 damage that she otherwise would have inflicted on a non-piercing attack. With their Focus restored, the party was able to finish off the Lightning Crag at the tail end of a difficult fight. The chest at the end had a Jester Outfit with +8 armor, +8 resistance, and +5 Talent on it, perfect for MrWhiskers. Very nice.

I continued sailing west from the Mage Dungeon until reaching the end of the landmass, then turned north to find myself in the Guardian Forest. This was not the starting area in this particular world but rather a dangerous land full of high level monsters. It turned out that the Glittering Mines were right here as well, easily visible from the boat, and with that lucky discovery I had found all five of the realm dungeons. This was truly fortunate as I hadn't even ventured inside the Parched Waste area and now it looked like I would never need to do so. Still, it wasn't all good luck from a map perspective. The water came to an end here and did not wrap around to the north, where there was a second ocean with more Sea Caves floating on the waves. I would have preferred to keep sailing to the north into that second body of water, which would have allowed me to explore the Guardian Forest from the safety of the boat. Instead, I would have to disembark and explore most of the Guardian Forest on foot, a slower and more dangerous prospect. At least the town of Woodsmoke was nearby to provide a safe retreat point.
Here's a danger that had opened up again following the loss of MrWhiskers' Sanctum of Weath:

There are monsters in this game that will steal your money, and MrWhiskers no longer had his steal immunity. I probably should have put the Lucky Hat back onto him but I was enjoying the bonus experience from the Princess Hat. The loss of 520 gold in a situation like this could be catastrophic, and I absolutely needed to kill this Golden Leprechaun before it ran away with all of that money. Fortunately both Ballgown and Charlie were set to act before the monster had another turn, and I could see that two perfect attacks from them would be enough to kill the critter. (Thank goodness for the piercing attack on Charlie's Wizard Tome!) I pumped in a bunch of Focus points to ensure perfect attacks from both of them and managed to smash the little thief before he could get away. Whew. This was an unorthodox danger but a danger nonetheless. Without that money I wouldn't be able to afford the Godsbeard herbs that I needed to ensure the health of the party.

I explored through the Guardian Forest in counterclockwise fashion, starting in the southeast corner at Woodsmoke and then cycling around in a big circle back towards the town again. Oarton was located nearby to the north of Woodsmoke, and I picked up another reduce chaos quest there, then promptly forgot to clear the camp on the north shore. Whoops, I don't know how I missed that. There were other goodies to pick up here, including a normal stone statue that Charlie tributed, a Cult Device to smash for more chaos reduction, and a scourge in the form of the Hangman. It's usually a good idea to clear out scourges when your party comes across then to avoid the need to return later on, and we were able to defeat the Hangman without too much difficulty. He hits hard but is fairly slow and therefore can be worked around. There was another scourge that was causing a lot more trouble, and that was the Bandit King who had already activated (note the little popup on the right side of the screen). I hadn't known where the Bandit King was located, and therefore wasn't able to put a stop to the scourge before his effect triggered. That effect was to make the store prices more expensive:

A *LOT* more expensive.  Everything was doubled in price, and that's a huge problem given the tight economic constraints in FTK. I had taken an Alluring Pool teleporter connection back into the Golden Plains because it was actually the closest path back to a town, only to find these prices confronting me back in Parid. 320 gold per Godsbeard herb and 160 gold just to use the inn on a per character basis? Ouch! The worst thing was the presence of the Tome of Wonder on sale, the single best Intelligence-based weapon in the game. It also has piercing on its default "Surge" attack along with the multitargeted "Area Blast" and the awesome "Rush Group" ability that gives the other two party members an extra turn. I desperately wanted this for Charlie but just couldn't afford it at the 900 gold asking price. In retrospect, I should have cleared out the camp along the north shoreline to achieve the reduce chaos quest, and then used the Cult Device for -1 scourge to get rid of the Bandit King's ill effects. That would have left me in much better shape instead of wasting a lot of money simply to heal the party back to full.

Nevertheless, I had enough funds to restore the party back into good health and return to the Guardian Forest via the Alluring Pool at the top of that screenshot. Fully exploring this region revealed another sanctum, this one the Sanctum of Focus, which I gave to Charlie and restored everyone back to sanctum protection once more. Charlie was up to a disgusting 7 Focus points now, between +1 from the Gold Hero Statue, +2 from the Sanctum of Focus, and another +1 from his Intelligence-based gear. It turned out that the Glittering Mines were a rough dungeon from a sanctum perspective, with both Charlie and MrWhiskers losing their sanctums along the way before the party even reached the boss. The monsters were hitting hard by this point in time, and if they all concentrated their attacks at once on a single character, someone could go from full health to dead in the blink of an eye. You can't exactly afford to keep everyone at full health 100 percent of the time in this game, and a streak of bad RNG luck can wipe out a character very quickly. That's why the sanctums exist, to provide some protection against that sort of result.
In terms of itemization, I ended up replacing the Lightning Lute on MrWhiskers with a new weapon called the Fancy Theorbo. It had a higher base damage (21 as opposed to 17), and it traded away the Shock and piercing properties on the Lightning Lute in favor of a Slow property on the main attack. While I would normally never make this kind of switch, the Fancy Theorbo also had the crucial property of a Reset attack and that was something that I desperately wanted. A Reset attack causes a character to give up their turn to cause a single enemy to lose their turn (requiring a perfect attack roll of course, or else the attack fails and nothing happens). When you have three characters and there's only one enemy left, the resulting math is obvious, as your party can avoid ever taking any damage if the Reset attacks keep landing. Since MrWhiskers was more of a support character than a main damage dealer, I was willing to give up a piercing attack in favor of having that Reset option available.
The boss fight at the end of the Glittering Mines consisted of a Mind Melter and two Mummies. Right from the outset, disaster struck my party:

The Mind Melter used a Confusion attack that succesfully hit both Ballgown and MrWhiskers. I therefore lost control over both party members immediately, leaving me with only Charlie functioning normally. This wouldn't have been a probleme except that Charlie was targeted by both mummies in succession. Two perfect attack rolls did 37 damage followed by 37 damage, and just like that Charlie was dead. No sanctum to save him this time, as he went from perfectly healthy at 70+ HP to finished. Remember that Charlie was my healer with 8 Godsbeard herbs on him, while Ballgown had all of one Godsbeard on her and MrWhiskers had none, having already consumed his herb in this battle. Meanwhile, all of the monsters were still alive and their heavy resistances meant that MrWhiskers would be of little use in dealing damage. This had turned into a full scale trainwreck and there was every potential that the game was about to end here. 
I realized that the most important thing was to eliminate the Mind Melter. Another Confusion attack would surely result in a game over situation and that had to be stopped at all costs. First Ballgown consumed a Dancing Needle herb, something that I rarely find myself using but which gave her additional combat Speed and +25% additional Evade. This took her Evade up to 72 percent for the moment, making her almost invulernable to incoming attacks. I had her attack the Mind Melter since the creature had no physical resistance, nearly finishing off the thing. Then MrWhiskers used his turn to break out the big guns:

This Blizzard Orb was just the ticket. While it used up his turn, MrWhiskers wouldn't have been terribly useful in terms of attacking anyway, and smashing the item dealt 25 true damage to each enemy that ignored armor and resistance. That finished off the Mind Melter and softened up the two Mummies nicely. Even better, they were both afflicted with Frozen status and would take 25% additional damage from future attacks. Both Mummies then had their turn, and both of them attacked Ballgown... but her 72 percent dodge chance kicked in and she evaded both attacks. Whew, thank you Dancing Needle! Maybe I should pick those things up more often, especially for Hunters since it apparently makes them almost unhittable. Then Ballgown took her turn and I used a point of Focus on her attack, which not only rolled perfect but went critical as well:

Excellent timing! This left the Mummy on the right with only 26 health left, enough so that a perfect attack from MrWhiskers would be able to get the kill with the Frozen damage bonus. He delivered with a clutch perfect attack (with no Focus to help him out) and one of the two Mummies was down. With 2 vs 1 advantage, Ballgown and MrWhiskers were able to finish off the remaining monster before he could manage to kill anyone else. Victory at last, with zero Focus points remaining on anyone and MrWhiskers down to a mere 35 health. Charlie came back to life again in the aftermath of the battle, albeit at the cost of one of my two party lives. Then I nearly had a disaster against the Chaos Generator in the final room when MrWhiskers failed his initial dice roll to smash the thing before Ballgown was able to get it done. Whew, very narrow margin of victory here. This was all a little too close for comfort.

I chose to gain back a party life as my reward for finishing the Glittering Mines. With only one sanctum remaining on Ballgown, I had a feeling that I might need those extra lives in the process of clearing the final remaining realm dungeon. My party was also so beat up here that I decided it was too risky to walk over to Woodsmoke or the boat. A single encounter popping up out of the ground could mean the end of the game. I had five Teleport scrolls in total, and therefore I opted to have each character teleport individually over to the town, where they were able to heal up at the inn (still at the doubled prices via the Bandit King). Better safe than sorry here, as I was closing in on the ending portion of the game and there was no reason not to use some of my accumulated resources.
After healing up in town, it was time to deal with the Bandit King. His camp was located all of four tiles from the town of Woodsmoke, and I could have cleared it easily back on my previous pass through the area if I had known that the scourge was there. (The location of the scourges is revealed when their effect kicks in; up until that point, they must be discovered through normal exploration of the map.) It was a simple matter to walk over to the Bandit Camp and face down the annoying scourge:

The Bandit King was a weak opponent by this point, as he had remained locked at Level 8 once his effect triggered while my party had continued to level up. MrWhiskers is pictued above landing a Reset attack, which caused the Bandit King to lose his turn while the group pounded on him with the other two characters. MrWhiskers had about 45 percent odds to land the Reset on a normal attack, and that would go up to about 70 percent odds if I was willing to use of a point of Focus. Pictured here is one of the times when I used a point of Focus, as indicated by the gold coloring of the initial Talent slot. Anyway, the Bandit King landed one good hit on Charlie and otherwise didn't manage to achieve anything. The scourge was finally sealed and the shops went back to normal prices.
Since I already knew the location of the final dungeon in the form of the Water Tower, I took a series of turns to sail my boat back around the Burning Forest and over to the Rogue Isles once more. I fought monsters as I went for additional gold/experience rewards, and stopped at the towns along the way to see if they had anything useful to sell. One of them eventually turned up another one of my favorite weapons:

The Golden Spear was perfect for Ballgown, with a significant increase in damage (7 more points, from 28 damage up to 35 damage) as well as +5 armor and +10% crit chance. As a one-handed weapon, it also allowed Ballgown to equip a shield alongside the spear. Best of all, the Golden Spear had another armor piercing option as an alternate attack, therefore ensuring that Ballgown would always be able to dish out heavy damage no matter the opponent. She would be attacking at 35 damage and 90 Speed throughout the final dungeon, easily outputting more DPS than anyone else on the team while continuing to have nearly 50 percent Evade to avoid incoming attacks. It's a good example of why I think that the Hunter is the strongest overall class in FTK, with its mixture of high damage, speed, and dodginess.

I could have tried to farm up for a bit longer with this party. There was no immediate chaos increase on the horizon, and in theory I could have kept trying to stockpile more items and search out better weapons. However, there was also the chance that I could run into a bad fight and wind up losing some of my accumulated resources, or else have someone die and burn through my limited number of party lives. With 14 Godsbeard herbs on Charlie and 2 more on both Ballgown and MrWhiskers, I felt that I had sufficient resources to take on the Water Tower. My characters were either Level 10 already or about to hit the mark, which should be sufficient to make my way through to the end. When I entered inside, it turned out that the very first room had a shop. Argh, why couldn't that have come later in the dungeon after I'd had time to accumulate more gold? Even more annoyingly, this shop was selling the Dragon Blade, the best Strength-based weapon in the game. It was probably too late to swap over to that since Charlie was packing Intelligence-based gear at this point, but still, what a tease of an item. Why couldn't that have been on sale a little bit sooner? I would have happily switched Charlie back to a Strength-based setup again if that had appeared earlier. Oh well.

As the final dungeon to be cleared out, the Water Tower was full of predictably difficult encounters. This battle was notable for having Level 9 versions of a Demon and a Red Jelly, in addition to a third monster that we had already defeated by the time that I took this screenshot. I managed to make it through this battle by having MrWhiskers get a Reset off on the Red Jelly three separate times, preventing the gelatinous cube from ever getting a turn. Those things will triple poison your party and are extremely obnoxious to face. Later on, the party fought against this Ogre Warlord:

Note that this guy was not a boss, just a regular encounter in the Water Tower. He did 22 damage to Ballgown on an attack roll where he failed two of the five dice rolls, and that despite Ballgown having 17 armor. A quick math check finds that the damage from this attack was 13 per slot, or 13 * 5 = 65 damage on a perfect attack roll against an unarmored target. Yikes, that's a lot of damage. I was able to Reset this monster a couple of times with MrWhiskers to limit the total number of attacks, although sometimes the Reset attack failed and I couldn't afford to use Focus on every single one of those rolls. At least my party had enough healing items that I could eat herbs liberally to keep everyone out of the danger area on health. Then there was another battle against a Wisp and an Imp, both of them with the evade property that caused them to dodge any non-perfect attack roll, and with heavy magic resistance on both. MrWhiskers used this opportunity to break out another Blizzard Orb, damaging and freezing both to make the rest of the battle much easier. This was the time to use those remaining items since the dungeon and the overall game were rapidly drawing to a close.
The last battle in the Water Tower came against an Ice Revenant and two accompanying Frost Knights:

That was a lot of health on the boss, and therefore my party went after the Frost Knights first. Ballgown put her armor piercing attack on the Golden Spear to good use, investing a point of Focus to ensure that she could cut through the heavy armor on those knights. I had one Precious Pearl remaining and Charlie used it immediately to restore everyone's Focus back to full, granting 14 total Focus points back to the party in the process. The Precious Pearl even removed the Frozen debuff that the Ice Revenant had placed on the party at the start of the action. MrWhiskers followed this up by using a rarely-seen ability to grant additional armor to the party, and that largely shielded everyone from the Frost Knights. As for the Ice Revenant, the undead creature hit quite hard and could deal 30-40 damage to the full party on a perfect attack. However, with plenty of herbs on hand there was no serious danger here. Charlie used Party Heal three different times and otherwise attacked with his magical tome. MrWhiskers started using Reset on the Ice Revenant once it was the only opponent remaining, although the boss was extremely fast and still managed to get some attacks off since the Busker was notably slower. Meanwhile, Ballgown continued to be the main source of damage, using one Focus point on each attack to keep carving through the enemies 35 damage at a time. She used all four Focus points from the Precious Pearl, then used a Golden Root to restore Focus to full and kept using more points. MrWhiskers was the one who ultimately landed the final killing blow:

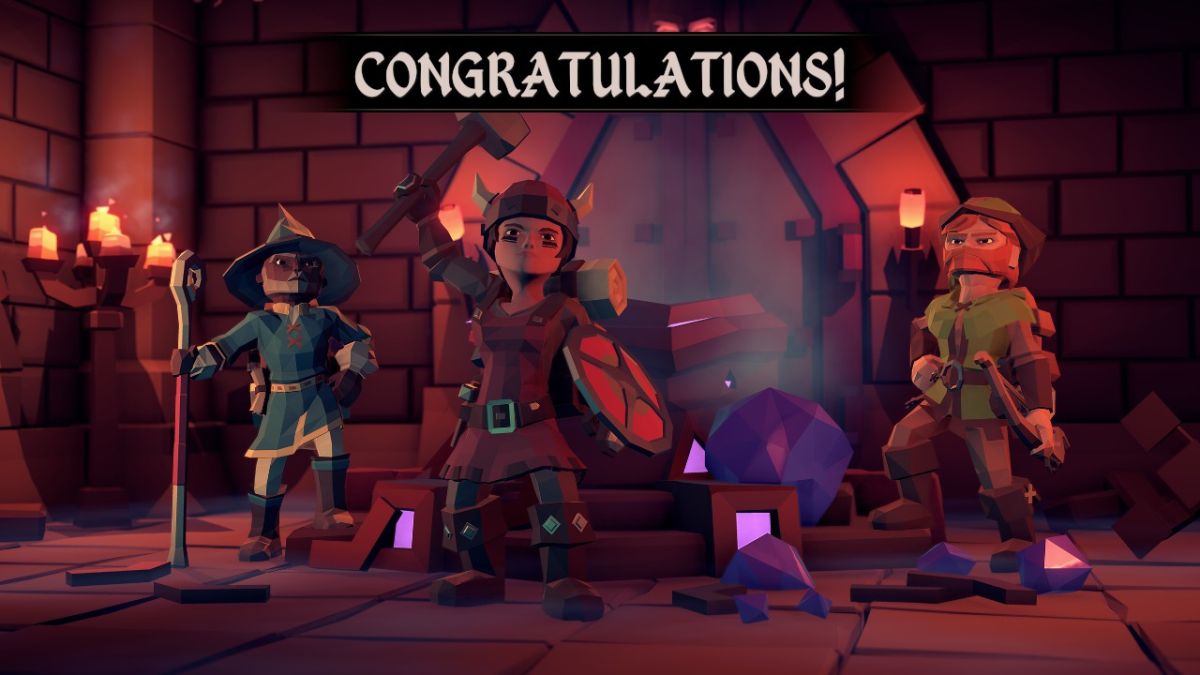
And with the Chaos Generator smashed in the last room, that was the end of the adventure. All five realm dungeons successfully cleared out to complete the quest. 

Unlike the more serious ending following the defeat of Vexor in the main game mode, Dungeon Crawl mode has this humorous finish instead. Hildebrant tells the party that it's over - go home! While this can feel a little bit anticlimactic, especially with a bunch of random monsters standing around on the map, I appreciate that the developers had a sense of humor. The randomness of Dungeon Crawl mode is what makes it fun, as there's no telling where the dungeons will be located or what the final boss might happen to be. I could have chosen to do the Water Tower earlier in the game and then had a different dungeon wind up as the finishing point. Again, I've come to enjoy this more than the scripted path that always leads to Vexor and the same ending battles in the main game mode.
So that's the ending to Dungeon Crawl mode. This was my first victory on Master difficulty for Dungeon Crawl mode, and overall I think that I was fairly lucky in terms of the map's random generation this time. This was my fourth attempt on Master difficulty after three previous ventures ended in failure. I was highly pleased that the party only suffered one actual death in the entire run, although four different sanctums fell along the way. That was much better luck than in my previous attempts, and the ability to keep taking reduce chaos rewards instead of party life rewards helped me out significantly. I may end up playing some For The King variants in time, or perhaps not depending on how long this game holds my interest. While this game doesn't have quite as much depth or replayability as FTL, I've still found it to be a highly enjoyable (and difficult!) experience. The art style helps the game stand out from a lot of other rougelike games on the market, and I find it to be quite charming. If you've bothered to read through these reports, I'd encourage you to spend the minimal cost of this game and give it a try. Thanks again for reading.


