
Next up on the list of Final Fantasy solo challenges, I wanted to explore the gameplay of perhaps the strangest of the casting jobs, the role inhabited by the Time Mage. Unlike the White Mage (who heals), the Black Mage and Summoner (who attack), and the Red Mage (who does some of both), the Time Mage is the king of buffs and debuffs. The Dimensional spells he or she wields don't deal much in the way of direct damage, but they are extremely powerful in their ability to control the speed of the combat, inflict dangerous status ailments, or reduce enemy life by set percentages. The bread and butter of the Time Mage is the Haste/Slow spells, quite possibly the single best spells in the game, but they also get some other minor status buffs (Regen, Float, etc.) and have the ability to mess around with monster statuses too with things like Stop, Old, and so on. Then there are the spells that are just weird, like Void and Reset, with unique functions that aren't duplicated by anything else. And finally, the Time Mage eventually gets some extremely powerful stuff, starting with Comet in the midgame and wrapping up with Quick and Meteo in the endgame. A barrage of Quick/Meteo/Meteo will kill just about anything!
The problem is that for most of the game the Time Mage has very little in the way of direct damage attacks, and with low Strength and Vitality, attacking with melee weapons is no easy task. Comet is a lifesaver when it appears, yet it too can be unreliable in dealing damage, and it never increases in power with more levels. In order to be successful with the Time Mage, one must maximize the value of his/her amazing buffing spells. It's not about casting spells and laying waste to the enemies; instead, the goal is to lay down a whole bunch of indirect status effects that ultimate render the human invulnerable and the enemies crippled. A very complex solo character, the Time Mage - this looked like it would be a lot of fun!
Aside from their Dimensional magic spells, the Time Mage also has the minor advantage of being able to equip three types of weapons: the default knives along with rods and staves. Knives would be highly useful when having to rely on melee attacks early on, and of course allow the Chicken Knife at the end of the game. Rods are useless for this variant in terms of boosting spell damage (no fire spells to benefit from a Flame Rod!) but had the potential to be "broken" to deal mass damage if necessary. I intended to do the absolute minimum of rod breaking possible for this variant; I want to play a Time Mage, not a Black Mage lite! Still, in one or two places this would come in handy. Staves were a new weapon type for my solo playthroughs, as none of my previous 11 characters could equip them. (Only White Mages, Red Mages, and Time Mages can use staves.) There are very few staves in the game, however one of them, the Healing Staff, would become extremely useful. More on this in a bit.
I thought about names for this variant, and drew inspiration from the classic Back to the Future films. After all, who better encapsulates a "Time Mage" than Marty McFly? And the completely ridiculous sprite design for the Time Mage even looks a little like those laughable "future" clothes that they used in the second movie! Here's Marty at the start of his journey:

Is that a dunce cap on his head? *snicker* I suppose I shouldn't be poking fun at my own character, but just look at that silliness!  Anyway, from the stats here it should be clear that the Time Mage has low Strength and Vitality, average Agility, and high Magic Power. Too bad that Magic Power is largely irrelevant for the Time Mage, as most of his/her spells don't deal direct damage and make no use of this number! Well, I suppose it could be worse. Actually, it is worse: since the Time Mage is not one of the starting six jobs, there are no Dimensional spells available until reaching Worus, meaning that Marty has to get through the first three areas of the game with pure melee attack and nothing else. D'oh!
Now I had already been through this process before with Horazon the Summoner, who was in a very similar position, and that earlier experience helped me out markedly. In order to get past Karlabos and Siren, Marty needed a combination of higher levels and a decent stock of Elixirs. I took Marty up to Level 15, where he achieved an attack multiplier of five (two default, plus two from Strength * Level formula, plus one from the knife damage bug) and reached a damage output in the 70-80 range. That meant Karlabos could be killed in nine hits, a difficult but doable proposition. During this span Marty had been fighting Mold Winds in the Wind Shrine, which have a chance to drop Elixirs, and he had accumulated six of them by the time I was ready to go after the boss lobster.
To my surprise, it only took about a half-dozen tries to get past Karlabos, which was much less than I had expected. For whatever reason he was sticking mostly to his default "Attack" move, and Tentacle/Tailscrew didn't appear that often. Marty only had to use two Elixirs to get past. Then I raced through the Ship Graveyard, still at Level 15, picking up the Flail weapon along the way:

The Flail is essentially a Rod, although it's technically classified as a long-range axe in the game's code. This is a really weird weapon: it does full damage from the back row, yet the attack value is wildly inconsistent. On each attack the game rolls an attack value that ranges anywhere from Attack/2 to Attack * (3/2). To use a concrete example of this, the Flail has an attack value of 16, and on any given strike it can range from 8-24 base damage! Furthermore, the Flail misses very frequently, having a default to-hit value of only 70% (most weapons have a 100% to-hit percentage), and this doesn't even factor in enemy Evade, so anyone using the Flail should expect to miss about half the time. In other words, you really have no idea what you're going to get when using this weapon! However, because it could be used from the back row, for the moment it was the best choice for Marty, even if I was tearing my hair out much of the time.
Siren waited at the end of the Ship Graveyard. She was practically a Time Mage herself, using both Haste and Slow during the battle! I longed to counter with Haste myself, yet Marty would have to wait just a little longer. The key here was to attack against the Human form and defend against the Undead one, burning Elixirs as necessary to stay alive. Siren's Slow spell was actually the most dangerous one she could cast, which should tell you something about the power of Time Magic! Marty got this done after a couple of failed attempts, drinking four Elixirs in the process.
I was eager for the real game to begin at Worus, so I had Marty smash the Ice Rod he had turned up in Carwen against Magisa, downing her immediately. Enough fooling around! Let's get some Dimensional Magic!

These are the first four spells, available for purchase in Worus town. Regen is a buffing spell that slowly heals back health over time; I made extensive use of it with Spoony the Bard, as you may have read previously. Void is a unique spell that cancels out all future use of magic, by both the party and the monsters. Keep in mind of course that lots of enemy moves are classified as "abilities" and not spells. Nonetheless, a powerful tool for the arsenal in many situations. Haste and Slow are so important that they deserve their own explanation. Haste is the "Improved Eco Restoration" of Final Fantasy 5 (to use a Master of Orion reference): nothing else in the game gives you so much value for so little cost. Here's the formal explanation of how Haste and Slow work, straight from the Algorithms Guide:
6.11) ATB [Active Time Battle] CALCULATION
1) Everyone's ATB is a measure between 0 and 255.
2) Initial values at the start of battle = ??
3) Eveyone's ATB increases at a constant rate (unlike FF6-9).
4) Once someone's ATB reaches 255, they can perform an action.
5) After performing an action, their ATB gets "reset" and is calculated as
follows:
i) Let N1 = 120 - Agility + (Equipment Weight/8). Minimum value = 1.
For Monsters, use Speed instead of Agility, Equipment Weight = 0.
ii) If they have Haste status, N1 = N1 / 2. Minimum value = 1.
iii) If they have Slow status, N1 = N1 * 2. Maximum value = 255.
Note that Haste and Slow are mutually exclusive statuses. You can only
have one or the other, but never both at the same time.
iv) ATB = 255 - N1
This explains how the Active Time Battle (ATB) system works, the little bars at the bottom-right corner of the screen. All of the bars fill up at the same speed (including the ones for the enemies, which are invisible) and when they are full, the character or monster can take an action. Then they begin filling up again, and so on and so forth until the battle is over. Your characters have what I'll call an "ATB rating" that influences how fast they act; this is essentially equal to 120 - Agility, as detailed above. What Haste does is HALVE this number, a straight division by 2, while Slow DOUBLES it. This is absolutely enormous in terms of determining how quickly characters act in battle. Let me give you some examples with real numbers to explain better:
ATB Rating Comparison
| Normal (No Job) | 120 - 24 = 96 | Marty (Time Mage) | 120 - 27 = 93 | Spoony the Bard | 120 - 33 = 87 | Shadow (Ninja) | 120 - 39 = 81 |
|---|
Not much difference, is there? From the slowest to the fastest jobs, the spread is only 15 points (although I'll point out that even 5 extra points of Agility is definitely noticeable). Still, nothing to get all that impressed about. Now let's add Slow and Haste spells into the mix, and watch what happens:
ATB Rating Comparison
| Normal + Slow status | 120 - 24 = | 96 * 2 = 192 | Marty (Time Mage) | 120 - 27 = | 93 * 1 = 93 | Shadow + Haste status | 120 - 39 = | 81 / 2 = 40 | Spoony + Haste + Agi. Song | 120 - 99 = | 21 / 2 = 10 |
|---|
Now that's more like it! With Haste and Slow statuses in play, suddenly the numbers reveal vast swings in overall speed. The Ninja Shadow could not only attack twice as fast as the default Marty McFly when Hasted, Shadow would actually get 4.5 turns for every one of a Slowed character with the default No Job setup! And to push the exercise to the point of absurdity, you can see what happens when a Bard buffs the Agility stat to maximum and combines that with Haste status, getting roughly NINE times the rounds of combat of an normal character. Pure insanity.
I've been pushing this line of argument for a while now, but it bears repeating: speed is the most important factor in this game. With enough speed, you can do anything. Marty was going to have to do the first world with little more than the Haste and Slow spells at his disposal, but you know what? In all honestly, that's enough. Haste/Slow are powerful enough to carry the day even without much help in the way of offense. Watch and see for yourselves! 
Back in Worus Tower now, Marty made frequent use of his new Haste spell, even against random enemies. It was dirt cheap to cast at a mere 5 magic points, so there was really no reason not to buff up in every encounter and get that speed advantage going. When Marty took damage, I paused to heal up with the marvelous Healing Staff:

This item casts Cure 2 when used in battle. Simple enough, yet that makes it one of the best items in the whole game. I had picked up the Healing Staff from Tycoon Castle as soon as the Hiryuu allowed Marty to travel there, just after completing North Mountain. It's a shame that more solo classes can't make use of this very helpful item! (Ironically, the White Mage and Red Mage are the only other ones who can equip this staff, and they both already have Cure 2! Heh.)
Poor Galura. Marty powered up with the triple buffs of Haste, Slow, and Regen, plus he could heal any damage taken with the Healing Staff. The poor boss never stood a chance.
In Karnak I bought a Mythril Dagger for Marty, however I held off on buying any rods for the moment. We're going to try and do this without breaking rods unless absolutely necessary. A Time Mage can get it done with pure melee attacks and buffing spells, right? (Hmmm, don't answer that!) I found that it was still best to cast the double buffs of Haste and Regen, in that order, against random foes in the Steamship. This reduced the danger considerably and sped up the battles; otherwise Marty would have been forced to waste many rounds of combat using the Healing Staff. And at 5 MP and 3 MP respectively, Haste and Regen weren't exactly burning through Marty's stock of Ethers. Although the random monsters weren't defeated quickly, Marty made steady and safe progress through the dungeon.

Marty's damage output against Liquid Flame was pretty sad, as indicated above. Fortunately, Liquid Flame's offensive output against Marty was even sadder! Between Marty's increased speed, life Regen (also pictured above), and unlimited use of the Healing Staff, she never had a chance. Even without knowing the AI routine of the boss, I probably could have done this with minimum problems. Incidentally, being in Haste status decreases the amount of time you spend paralyzed; the paralyze status lasts for exactly how long it takes to fill up the ATB gauge. This came in handy against the Fingertip move of Liquid Flame's Hand form: Marty could shake off the status effect and heal if necessary before the boss got off a second move!
I made sure to grab the usual duo of Guardian dagger and Elf Cape in the burning Karnak Castle before heading out. Because Marty is not a fast killer, he only managed to get three Elixirs along with the main prizes. In this respect, he reminds me of my solo Blue Mage Strago, who also had access to lots of buffing spells and generally lacked direct damage capabilities.
My experience thus far seemed to suggest that Ifrit would be an easy boss to defeat - and that assumption was right! The fire esper is usually a little faster than your characters; he is listed at Speed 40 in the code, roughly equivalent to a Thief. However, once Marty had beefed up with the triple assault of Haste, Slow, and Regen, poor Ifrit was only getting one attack for every THREE of Marty's. Combine that with infinite healing from the Healing Staff, and constant slow recovery from Regen status, and the battle was a total joke. It literally didn't matter that Marty was plinking away at ~150 damage per attack, because he was totally invincible to anything Ifrit could do. I honestly could have had even less offense and still won convincingly!
Next on the table was Byblos, the bane of so many Final Fantasy 5 variants. Byblos is dangerous because he serves up his own assortment of buffing spells: Thread (Slow) to reduce your attack speed, Armor to cut in half melee damage, Charm to cause mass confusion, Drain to defeat low-offensive variants of all kinds, and Sonic Wave to reduce the levels of your characters down to nil. Now the textbook way to defeat Byblos is to go after his one fatal weakness, his vulnerability to fire spells. Every guide I've ever seen suggests that Time Mages should break Fire Rods to defeat the boss. And indeed this does work... but it's kind of a cheese solution. You're just getting past Byblos by pretending to be a Black Mage, not by using the actual powers of the Time Mage job. I had looked at the code, and I thought I saw another way to do things:

By casting Demi against Byblos! Yes, Demi doesn't work against "Heavy" targets, however Byblos is actually not tagged as Heavy in the code, although he does have an immunity against instant death spells. This minor oversight created an opening for Marty's Dimensional Magic. I started out by casting Haste and Regen on Marty, and then managed to inflict Slow status on Byblos after two failed tries. Byblos is speed 40, just like Ifrit, so Marty was now moving at roughly three times the speed of the boss. This was particularly impressive, because Byblos' Thread move usually means that he moves double the speed of a solo character: Marty essentially acted SIX TIMES faster than my other solo characters! Wow.
So Marty laid down his usual buffing spells, and then set to work with Demi. The spell had an 80% chance to hit Byblos, factoring in his 20% Magic Evade, meaning that few of the casting attempts missed. 1800 damage from the first Demi, 900 from the second, and so on. Anyone who has worked with multiplicative math knows how quickly the scaling factor can pile up damage in a hurry. Five castings of Demi and Byblos was reduced to 113 health, allowing Marty to move into the front row and attack with his dagger, doing ~200 damage for an instant kill. Just like that it was over. Byblos died in roughly 40 seconds of real-world time, and he only got off about five attacks total. Complete and utter domination by Marty McFly, using nothing but his mastery of the Time element! 
Honestly, I was (and am) still pretty stunned by how easily Marty won this battle. With his buffing spells stripped away, Byblos was revealed to be a paper tiger. It just goes to show how ridiculously powerful Dimensional Magic is in this game. As I've repeated ad nauseum, speed is everything. If you can move at triple the speed of the enemy, even a character with virtually no direct damage can win with ease. Having Demi on hand helped out quite a bit too!
Marty grabbed the ship, bought a Flame Ring at Istory, lost the ship, and proceeded back to the Quicksand Desert. The Sandworm was another easy battle, if a tedious one to play out. Marty had to heal himself a lot with the Healing Staff, as Regen wasn't enough to counter the slow loss of hit points from Quicksand, and it took about 25 turns to wear down the boss with weak dagger attacks. Nevertheless, there was absolutely no danger here; it just took forever.

Through the Quicksand Desert and on to the Lonka Ruins and the airship. Crayclaw was waiting at the top, and Marty was ready for him. Repeated use of the Healing Staff canceled out Crayclaw's many Tailscrew attacks - we were alternating Tailscrew/Healing Staff for a half-dozen turns on end at one point - and of course the Haste/Slow/Regen buffs gave Marty all of the tactical flexibility in the world to dominate this encounter. You may remember from Spoony the Bard's variant run that Crayclaw is susceptible to the Stop spell (or song), as seen above. I played around with it a bit, however it involved a little too much work for too little payoff. The Slow spell was enough to pull the teeth from this boss.
Marty had quite the situation on his hands dealing with the next boss, the Adamantium Turtle. Although Marty could easily gain his usual domination through use of Dimensional magic, the problem was that Marty's physical attack was so weak as to drag out the battle to ungodly lengths of time. Marty had to slide into the back row to avoid the potential to be instantly killed by Adamantium's powerful attacks, and from back there he was only getting an attack multiplier of 1, after factoring in the penalty for back row and Armor status on the boss (M = Strength * Level / 128 = 29 * 23 / 128 = 5.2109 = 5, [back row] 5 / 2 = 2.5 = 2, [Armor] 2 / 2 = 1). And that meant that Spoony's damage was simply Attack - Defese, or 36 - 25 = 11 damage per attack. 11-14 damage per round against a boss with 2000 HP. Now Adamantium had no chance to kill Marty, with endless free Healing Staff usage, but you can see how requiring something like 180 rounds of combat to plink away at a boss could be a mite tedious! I got it done though.
I paused here to raise up the 50k cash needed for an Angel Ring, which is almost always a prerequisite for the Sol Cannon encounter when using solo characters. This took Marty to Level 30, right where I expected him to be, as he prepared to take on the next big boss. The Flameguns were of course defeated with ease simply by equipping a Flame Ring. The Rockets were susceptible to Demi, so I had Marty equip the Healing Staff (so that he would heal himself when he became confused) and work them down into the red zone, then finish them off with a single swipe of the Guardian dagger. I finally have a pretty good handle on how to do that battle now.

Sol Cannon was impressive... for the total non-threat that it posed! Marty first Hasted himself and cast Slow on the big gun, significantly delaying the countdown to Surge Beam's fire. Then Marty spent the new few rounds carving up the two Launchers with his dagger; they each took four hits to be defeated. That left Marty just enough time to use the Healing Staff twice and restore health to maximum before the first shot of Surge Beam, after which the fight was a complete joke. How much of a joke? Well, Marty only had to use the Healing Staff once to remove the damage caused by each Surge Beam, and I counted that even after using the Staff he could get off a further ten attacks before the next Surge Beam arrived. That's right, Marty was getting ELEVEN attacks to each one that Sol Cannon issued! The fact that it took some 50+ dagger strikes to unplug the cannon didn't matter. Piece of cake.
Many of my characters avoid the encounters inside the Lonka Ruins, but not Marty. He continued to have success through the simple combination of Haste spells and Healing Staff use. I also mixed in castings of Void against enemy spell-users like Ra Mages and Lamias. Void would lock out their magic at a dirt-cheap cost of 3 MP, and did I mention that using the Healing Staff doesn't count as casting a spell? Heh.
Marty had no serious difficulty with ArchaeoAvis either, Hasting and Regening up and then going to work with dagger. This game is simply not that hard when you have access to completely unlimited healing power, and can move much faster than your opponents. ArchaeoAvis is actually made up of five separate monsters, although the first four look completely identical, so Marty had to keep recasting Slow as each new form appeared:

Easily done, of course. There are other weird minor differences between the forms, such as the fact that forms #2 and #4 do not have the Heavy flag in the code, while the other three do. That meant that Marty could use Demi to whittle away the health of those two forms, both of which were easily defeated. I stuck with the Elf Cape/Guardian defensive combo, kept Marty's health at max at all times, and attacked as the opportunity presented itself. Marty won on the first try with no difficulties to speak of.
Marty didn't need to Elixirs in any of these boss battles. In fact, Marty hadn't used a single healing item of any kind since getting the Healing Staff at Tycoon! I continued to be amazed at the incredible power of Time magic. I had thought that this would be a rather tough variant, and it just wasn't. Far from it. Although Marty was a slow killer, he was one of the most dominant classes I had yet experienced!
Time for the meteor miniboss trio next. Both Chimera Brain and Titan were handled the same way: activate the usual buffing/debuffing spells, use Healing Staff as necessary, and keep attacking. Not much else to say there. As for the Puroboros:

I had Marty break a pair of Rods to finish them off quickly. This was only the second time in the entire game that I resorted to Rod-breaking, since it would have been exceedingly difficult to do the battle any other way. Now I could have gotten Marty past this spot with normal attack (see my Dancer report), however it would have required tons of leveling and painful effort. This was another spot where breaking the rods made a lot more sense.
In the second world, Marty had a spell ready to counter Gilgamesh's own buffing spells in the fight on the Big Bridge:

Recall that Void locks out all magic for both player characters and enemies, essentially inflicting Mute status on each side. (For that reason, Blue spells still work because there's a bug in this game that causes Blue magic not to be affected by Mute!) Marty could use Haste/Slow/Regen and then lock out future spells, which meant that Gilgamesh's own Armor/Shell/Haste moves would all fail when he cast them later on. Pretty good stuff. It's a shame that Void doesn't work in most boss battles - there's actually a flag in the code for every single possible battle that indicates whether or not Void can be used!
Up to this point in the game, Marty had been forced to rely on his daggers for melee damage, despite his extremely modest physical strength. Upon reaching Rugor village, Marty was able to load up on fourth-level Dimensional magic: Reset, Slow2, and Comet. This last spell was the first direct-damage spell available to Marty, and it would become the mainstay of his offense for quite a while. Comet does damage completely independently of Level or Magic Power, following the simple formula of Damage = ((50..200) - Magic Defense) * M, M = 8. In other words, generate a random number between 50 and 200, subtract out the enemy Magic Defense, and then multiply by 8. This spell was therefore frustratingly random at times, doing anywhere from 400 to 1600 damage at a time, and repeated castings even at the very reasonable cost of 7 MP per spell could drain Marty's magic points in a hurry. Nevertheless, standing in the back row and casting Comet over and over again was often the best course of action.
I was happy to pick up the Dancing Dirk shortly thereafter in the Moogle Forest, opening up another possible avenue of attack for Marty. With his high Magic Power stat, Marty would get good results from all four Dancing options, and stealing back magic points through Mystery Waltz was a big deal for this character. I found myself using the Dancing Dirk against most of the random encounters in the Hiryuu Valley, although not against these Zombie Dragons:

Being undead, the best "weapon" to use was the Healing Staff, which damaged them through the casting of Cure2! That was a fun way to fight the battle.
Marty was not able to equip the Bone Mail armor, as the Time Mage is one of only six classes that can't wear it. This meant that the status ailments inflicted by the Hiryuu Plant and its flowers were going to be a little more tricky than usual. The poison and darkness flowers (#2 and #3) were irrelevant, and Marty could counter the aging flower (#1) by equipping the Angel Ring accessory. As usual, it was the paralyzation (#4) and charming (#5) flowers that would pose the true difficulty. The standard way to win this battle would be through breaking rods, but nope, not going to go down that route here. Marty was perfectly able to win this one through the use of pure Time magic.
I started the battle by casting Haste on Marty, then destroyed Flower #4 with Comet before Marty could be paralyzed. I could then hit the Hiryuu Plant itself with Slow, which would give Marty more time before the flowers were revived. Marty still had to kill off Flowers #4 and #5 again (and Marty did get confused once, but I had given him the Healing Staff as a weapon so he would cure injuries rather than doing damage when attacking himself!) then he could proceed to go after the Hiryuu Plant. The boss has 12k hit points, too many to wear down with Comet in reasonable time, however the Hiryuu Plant does not have the "Heavy" flag in the code and could therefore be hit with the Demi spell! Three such castings did 6000, 3000, and 1500 damage, and a pair of Comet spells finished off the boss. Marty was able to win on the first try, and there was no need to break any rods - work SMARTER, not harder!
Marty next flew the Hiryuu to Surgate Castle, where he was able to pick up the Float spell by solving the book-reshelving puzzle inside the castle. (Honestly, what is it with this game and libraries?) Float wouldn't be needed for a long time, but I would want to have it for one boss eventually. The next upcoming boss got a healthy dose of Comet:

It made more sense to attack with Comet, even though the damage was random and unpredictable, rather than relying on the even more unpredictable Dancing Dirk. Marty's triple buffs saved his bacon in this battle, as Gilgamesh successfully managed to land Death Claw two different times. On both occasions, Regen + Slow allowed Marty to heal back enough life to survive Gilgamesh's next (Slowed) attack. Much better than most solo characters, for whom Death Claw usually represents a certain death sentence.
I wanted to turn up a Wall Ring in the Barrier Tower, however Marty turned out to be one of those characters who couldn't get a quick item drop to save his life. The three different enemies in this area each randomly dropped Speed Drinks (Neons), Dream Harps (Travelers), and Wall Rings (Wall Knights). Marty accumulated 3 Dream Harps and 10 Speed Drinks before getting his hands on a Wall Ring! Sheesh. At least the experience points came in handy, because Marty was a little underleveled due to his rapid progress through the game.
I thought that I might be able to defeat Atmos normally, if Marty could double up Fast and Slow to get 4x normal speed in play. Unfortunately this didn't work out, because it turns out that Atmos has an immunity to Slow in the code. (He's also immune to Fast, for all the good that does.) Even Fasted, Marty had no chance to inflict enough damage by himself to avoid a fiery death from a hail of Comets. So I did my normal thing and killed off the other three characters one at a time in battle, rather than start the battle with all of them dead. Marty could have done this battle normally, by leveling up to 60+ and then breaking Fire Rods for maximum damage potential, but then that would have removed all challenge from everything else in the variant due to overleveling. I've explained why I don't like to go that route.
Mua granted access to fifth-level Dimensional magic for Marty, specifically the spells Quarter, Haste 2, and Old. Out of these three, Haste 2 was useless, as casting Haste on all party members did nothing more than a standard Haste spell! Old unfortunately came too late in the game to be of much use. But Quarter would prove handy in many spots, as I'll get to in a minute. I also found Marty spending a lot of time casting Slow 2:
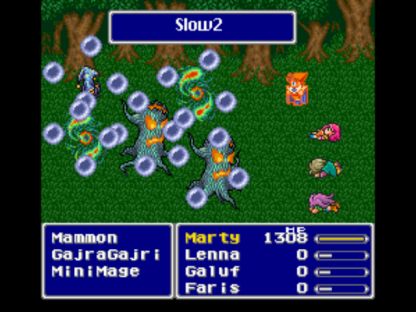
Like Haste 2, Slow 2 simply casts Slow on all enemies, and has a lower base chance of success (80%) than the normal Slow (95%). In other words, it was less useful for boss battles but came in very handy for random encounters like the one above. Marty would start random encounters by Hasting himself, and then hitting all of the enemies with Slow 2. With 4x speed power, Marty could then carve them up from the back row with the Dancing Dirk. And with the occasional Mystery Waltzes popping up, Marty had an endless supply of magic points to promote spellcasting. This allowed Marty to make steady progress through the forests of Mua, resorting back to the Healing Staff whenever health dipped below 1000 HP. It was an unorthodox way to do things, but very successful!
As it turns out, the Crystals/Seal Guardians do not have the "Heavy" flag in the code. That made this battle enormously easy:

Yep, they were all prey for the Quarter spell. The name is actually incorrect, as it decreases health by 7/8, not 3/4. For these Crystals, they lost 6804 of their 7777 health immediately and could be disposed of easily from there. I made use of the Flame Ring here for free healing from the Fire Crystal, but in all honesty Marty could have made due without it. Haste + Slow + Regen + Quarter was a powerful combination.
I made more frequent use of Quarter in Exdeath's Castle, since it had a 99% base chance of success against everything that wasn't flagged as "Heavy". The Dancing Dirk continued to be a great weapon for a spell caster, with all four Dancing moves producing good results for Marty. I did have to be careful with some of the instant-death spells inside the dungeon, as Marty lacked the Bone Mail and could be killed instantly by spells like Doom or X-Zone. That was the one real drawback for this character. The dragons in contrast were handled quite easily; endless curing power from the Healing Staff and Haste/Slow power pulled their fangs completely.
The biggest danger in Gilgamesh encounter #4 is normally his ability to pull out Sonic Wave and cut down on the level of my solo characters. However Marty used Comet for his offense in this battle, and damage from Comet is completely independent of level! I laughed off a pair of Sonic Waves and won easily on the first attempt.
Exdeath causes many problems for a solo character, most especially his Condemn spell that means instant doom for one character by themself. Marty sort of had a way to counter that:

Every time that Exdeath started the battle with Condemn, Marty could cast Reset and begin the fight all over again. While far from a perfect solution, at least it was better than dying and having to restart from the last save point. (Only the Chemist can actually stop Condemn, via one of his Mixes.) Marty tried to cast Slow on Exdeath, despite his insane 85% Magic Evade, and with enough attempts I eventually got it to work successfully. However, the designers evidently decided to rule this out as a tactic, because when Exdeath is hit with Slow he responds by Fasting himself. Because Fast and Slow status override one another (rather than canceling each other out, as you might expect) this was actually WORSE than doing nothing! Whoops.
Now I could still cast Fast on Marty and increase his own speed, yet this didn't help as much as you might think because Exdeath is already really quick himself (speed 50 in the code). Neither Comet nor the Dancing Dirk did damage very quickly, and of course spells like Demi and Quarter were out of play here because of Exdeath's Heavy status. I could avoid the first Condemn with repeated use of Reset, yet inevitably Exdeath would go all the way through his AI routine and get back to Condemn again, which usually worked the second time. There are ways to get around this problem by simply running the boss battle over and over again, twisting probability in your favor through repetition (see: Arylon the Dancer), but I was pretty sure I could be smarter than that. Was there a better way of doing things?
This is Final Fantasy 5, so of course the answer was yes! Exdeath has a weakness to Holy element in the code, which of course is useless because no one can cast the Holy spell this early in the game... right? Well, there is a rare item called the Light Staff that casts Holy when it is broken in battle, just like breaking the Fire/Ice/Lightning Rods with cast Fire/Ice/Bolt 3. The Metamorph enemies in Guido's Cave will rarely drop these staves in battle, so I decided to go back there and grind out a pair of them for use against Exdeath. I worked out a quick strategy for the Metamorphs: start the battle with Haste, cast Quarter against their "transformed" state to knock out most of their hit points, and then finish off the Metamorph in its original state, which is the only one that can drop the Light Staff. This all worked like a charm, except that the stupid game refused to drop the friggin' items! It took 30 battles to get the first one, and then 43 battles to get a second one! Jeez! What a pain.  The odds were under 5% to need that many battles to get the item drops I wanted...
Anyway, back to Exdeath with Light Staves in tow, and now for the big payoff:

Yep, that was the kind of damage I was looking for. The two Light Staves did about 13k damage to Exdeath, almost enough to get him under 16k health and initiate his AI routine change, after which Condemn can't appear anymore. Here's where the battle became interesting again: usually my solo characters go into the Exdeath fight with Wall Rings equipped, to reflect back his spells after the AI routine change. But a Wall Ring would mean that Marty wouldn't be able to cast Haste on himself, and that went against everything that the Time Mage stands for! I opted to go with a Flame Ring instead, which would cancel out Exdeath's Fire 3 and Ice 3 spells, leaving only the Bolt 3 ones to worry about. Doing the final 16k damage to Exdeath was thus a long, drawn-out process of constant use of the Healing Staff intermixed with occasional castings of Comet when Marty had a safe opening. Although it took a while, Marty pulled it off flawlessly and didn't need to use so much as a single Elixir. Perhaps it might have been easier just to go the standard route with a Wall Ring, but a Time Mage with no Fast spell to play around with is one sad puppy!
Marty laughed off the Antlion, whose Sonic Wave move is only dangerous because it cuts level by half. Apparently no one gave him the message that Comet damage is unaffected by level! After detouring briefly to pick up the Chicken Knife, Marty killed the pair of Gargolyes (using Fast/Slow to stop them from reviving one another) and entered the Pyramid. This area involved a little more work than I expected, Comet not doing enough damage to be reliable anymore and the Chicken Knife fleeing away from more battles than I wanted. Marty winded up using the Morning Star he had picked up in the Forest of Mua quite a bit, which did decent damage from the safety of the back row. I also remembered that many of the enemies in the Pyramid are undead, which meant that Marty could break out the Healing Staff as an offensive weapon again. (Love doing that!) The Machine Head robots were very easy to take down: Quarter, followed by one hit from the Chicken Knife, and they were finished!
I used a combination of Haste, Slow, Regen, the Flame Ring, and the Chicken Knife to take down Merugene/Mellusion. She's pretty easy for a solo character, although I imagine her Fire/Ice/Bolt 3 spells would pose more of a challenge in a party setting. Marty then did the usual run of stocking up on equipment: Assassin Dagger, Sage Staff, and Wizard Rod from Kuzar Castle, along with Coral Ring, Running Shoes, and sixth-level Dimensional magic from Mirage village. The Running Shoes were not an auto-equip with Marty; I found myself going with the Guard Ring and casting Haste in battle much of the time, as Marty could use the extra defense, due to lack of Bone Mail.
The two new spells were X-Zone and Quick. Although X-Zone is an instant-death spell, it's one of the weakest ones in the game: X-Zone costs 20 MP, it only hits one enemy at a time, and it has a base success rate of 50%. Compare that to the Samurai's incredible "Slash" ability, which costs nothing to use, hits all enemies, and has a base success chance of 85%! The Time Mage kind of got a raw deal there. However, his other spells help to make up for it:

Quick is one of the most unique spells in the game, granting the caster two subsequent actions in a row without interruption. The Quick/Bahamut/Bahamut combination move is considered the standard spellcasting power play in non-variant games, for example. But you don't even have to cast spells; Quick can be followed up with any two actions, so melee attack or using items is equally possible. The tradeoff for this wonderful spell is its ungodly cost in magic points: 77 MP per casting. Yikes!  That prevented Marty from making widespread use of Quick except in special circumstances. Three castings of Quick would pretty much clean out Marty's magic point store.
Fork Tower offered up a more interesting experience than usual. Marty beat the Minotaur easily enough, using a combination of the Chicken Knife and the Healing Staff, and then hit the reset button and moved over to contend with Omniscient. With a genuine spellcaster I was determined to beat him for real, not simply sit around with a Wall Ring and wait for the boss to reflect himself to death. I went with the Guard Ring instead, Hasted up, and proceeded to fight out the battle. Marty found that Comet did damage very slowly, due to Omniscient's Shell status, and his constant Regeneration of life was healing back much of the damage that Marty was doing. I tried to cast Dispel on Omniscient using the Wonder Rod (which would remove those buffs), but that would trigger Omniscient's Reset move and start the battle over again. Hmmmm.
A quick check in the code revealed that Ominscient had a fatal weakness:

No immunity to Aging/Old status! That spell had been mostly useless thus far, but it came in handy here. Hitting Omniscient with Old meant that his Level steadily dropped from its starting value of 53 down to 1. Now the simple formula for Regen is Vitality * Level / 16, and therefore the rate at which Omniscient healed back life began plummeting. He was initially getting back 175 health every time Regen kicked in, but you can see in the picture above that that dropped all the way down to 2 HP! By nullifying Omniscient's regeneration, Marty had a much easier battle, and he managed to crush the boss under a hail of Comets before running out of magic points.
Completing Fork Tower opened up the submarine and the last two dungeons in the third world. Marty was happy to find that all of the enemies in the Great Trench were undead, and thus prey for the Healing Staff's leet attack skills, yet overall the area was still rather difficult. The blob Unknowns would respond to attacks with Possess, an instant-kill move, so Marty had to defeat them by casting Quarter followed by Comet. The worm and spore Unknowns were less difficult, albeit time-consuming to take down, but the skeleton Unknowns could cast Condemn, and Marty could only run away from them. Frequent self-healing with the staff was also needed, making this a slow dungeon to complete.
Against the boss trio at the end, Marty defended their spells by equipping a Flame Ring and attacked using Quarter. None of these three bosses are flagged as "Heavy" so they could all be hit by Quarter (which did 9999 damage!), however they also have 60% Magic Evade and therefore most of Marty's spells missed their target. These bosses could also cast "Rainbow Wind", a spell that inflicts Mute status and blocked Marty from casting any more spells! Each time this happened, I would use the Wonder Rod to cast Reset, starting the battle over again. After some half-dozen failed attempts, Marty managed to hit all three enemies with Quarter, which was followed up with a Bahamut summon from the Magic Lamp to kill them all instantly. Whew! And with that out of the way, Marty could finally claim his prize:

Awww yeah! No more dinking around with piddly damage for Marty anymore. He had just graduated from Time magic university and was ready to start strutting his stuff. Meteo is essentially a souped-up version of Comet, doing Damage = ((50..200) - Magic Defense) * M, M = 14. That is, generate a random number between 50 and 200, subtract out enemy Magic Defense, and then multiply by 14. Oh, and then do that FOUR TIMES IN A ROW! Average damage is therefore 125 * 14 * 4 = 7000, enough to annihilate pretty much anything in a hurry.
Meteo has just two drawbacks: first, the spell is random and cannot be targeted. It's like X-Fight, in that you can't pick and choose where the damage goes, which can be a real problem in certain encounters like the Neo-Exdeath battle. Secondly, Meteo comes with a very high cost in magic points, at 42 per casting. Thus Marty might be able to lay waste to entire continents with the Quick/Meteo/Meteo combination, but like the Black Mage of 8-bit Theatre's Hadoken, he runs out of juice really really fast. To alleviate this problem I had Marty equip the Goldpin helmet much of the time, which cuts magic point consumption in half, although it came at the tradeoff of significantly lower Defense. Reduced to 21 MP, Meteo could serve as a primary weapon in random battles as well as against bosses. I also switched over permanently to the Running Shoes accessory, so that Marty could immediately start casting Meteo. This cut Marty's Defense even further, turning him into a total glass cannon! But it was oh so sweet to watch Marty get off TWO Meteos before the enemies even got a chance to move, laying waste to everyting in sight.
Marty crushed the enemies in Istory Falls as if they were run over by a DeLorean going 88 miles per hour. Even large groups of random foes were no match for repeated castings of Meteo. Unlike most solo characters, Marty could equip the Coral Ring and still buff up with Haste, Regen, and Slow, so you can imagine how not dangerous the boss battle against Leviathan was.
With nothing more of interest to achieve in the third world, Marty purchased a bunch of Ethers, Cabins, and Elixirs, then entered the Cleft of Dimension. The first "desert" part of the final dungeon served up the difficult Land Crawl enemies, and Marty had a bit of an unorthodox solution to deal with them:

This was the one and only point in the game where X-Zone came in handy. The Land Crawls have 22,000 hit points and I didn't want to waste 4 Meteos on taking them down, plus they are extremely difficult to run away from. However, since they do not have the Heavy flag in the code, they can be hit by instant death spells like Doom and X-Zone. That's not to say this was easy either: recall that X-Zone only has a base 50% chance of success, and with the inherent Magic Evade of these enemies factored in, Marty only succeeded with X-Zone about a quarter of the time. It was still the best way to kill them though, and nice to let another Dimensional spell get a chance to shine.
Fortunately most of the other random foes could be killed pretty easily with Meteo. The Lonka Ruins part of the final dungeon did present some real danger though, as one of the enemies in there can cast Roulette, and that would mean death for Marty (lacking the Bone Mail) if the bouncing cursor stopped on him. I tried to get through there as quickly as possible. Ironically the first two bosses (Wood Sprite and Apanda) were easier than some of these random encounters! Apanda tried his best to hit Marty with Sonic Wave, not realizing that Meteo's damage is completely independent of level. Whoops. Bad news for him!
Apocalypse was the first significant boss encounter in the ending run:

The issue here is that he has an extremely high Magic Defense rating of 75; most enemies don't get above 20. Recall that Meteo's damage is based on rolling a random number between 50 and 200, then adding a multiplier to it, so fully 1/6 of the Meteo hits were doing no damage at all! Very weird to see one of the blasts hit and do no damage. The danger here was that Apocalypse would hit Marty with Roulette, Condemn, or ????, each of which could pose instant death. I thought about how to do this fight, and decided that the best solution was to push in favor of all-out offense, trying to kill Apocalypse as soon as possible before he could get off those deadly spells. That meant sticking with the low-Defense Goldpin/Running Shoes combination, not wasting a round of combat by trying to cast spells like Slow or Regen (Apocalypse has Slow immunity anyway), and using each round to push the offensive with Quick/Meteo/Meteo blasts.
I do believe that this was the best plan of action, however Marty still needed to work a bit and have some luck to win out. Twice Marty was killed with Condemn, another time he was hit with Roulette (a shame he couldn't equip the Bone Mail to defend against that!), and a final time Marty was taken out by ????, which was particularly frustrating because he had inflicted 27,500 damage out of Apocalypse's 27,900 life at the time! The fifth try was the charm, and I could finally stop doing those long walks from the previous save point with each encounter!
At least Catastrophe was easy:

Cast Float and levitate harmlessly over his Earth Shaker move. Catastrophe would respond with "Gravity 100", which cancels out Float, but Marty would simply cast Float again, and since he was faster than Catastrophe, he could both defend with Float and get in rounds of attack with Meteo. Pretty simple stuff, Marty didn't even have to use Quick.
In classic Time Mage fashion, I pushed for speedy kills against both Halicarnassus and Twin Tania. Against the first boss, Marty eschewed the usual Wall Ring and stuck with the Running Shoes, confident that the combination of repeated Quicks and dual Meteos could kill her before she got around to casting her deadly Holy spell. This worked perfectly, although it did drain Marty's magic points in epic fashion: 81 MP with each Quick/Meteo/Meteo combo, even with the Goldpin equipped! Twin Tania counters magic attacks with Mega Flare, which necessitated equipping a Wall Ring for that fight. Fortunately Twin Tania was easy prey for the Slow spell, which was almost like getting Haste status back again, and Marty was able to kill off the boss before he managed to reach his Giga Flare move. Since Giga Flare does 3000+ damage, and Marty only had some 2800 max HP, that was a very good thing.
Once Marty got into the Void, I started running away from the random encounters because they no longer provide any experience, just gold and ability points. It was at this point that I suddently realized that casting Exit in battle provides an instant successful run. Why didn't I think of that earlier? D'oh!  Would have been useful in a number of places in this solo run, sigh. Anyway, I was pretty confident that Necrophobia wouldn't be that tough for Marty, and I was right. Marty's ability to equip rods meant that he could use the Wonder Rod to cast Shell in this fight, effectively doubling his health against magical attacks and taking the danger out of the battle with the four Barriers. Meteo also cannot be reflected, and it went right through the Wall spell protecting the Barriers. For Necro himself, repeated Quick/Meteo/Meteo castings took him down in a hurry. Marty did win this one on the first attempt.
And then the fun began...

Now the first Exdeath form, the "Tree" form, wasn't all that bad. I had Marty cycle through all of the spells in the Wonder Rod before the final battle, so that he could immediately use it to cast Shell again at the start of the fight. Shell not only halves magic damage, it also cuts in half the chance for status-effecting spells to work, and that meant that White Hole went from having a 90% success rate to a 45% success rate - a very big deal indeed! Marty therefore had pretty good odds not to get killed instantly when it appeared, although I still longed for an Aegis Shield to provide complete protection. In addition to Shell status, I also would begin the battle by casting Regen, which you can see working on the right side of the above picture. By accident, I discovered in this fight that Regen healing continues working even while the game is "paused" after casting Quick! This is a huge deal, because with Regen + Quick, you can simply stand in place and wait for health to be regenerated to full over and over again. What a huge break! Because Marty was casting Quick constantly, it meant that he had absolutely no need to use Elixirs to heal himself. He could simply wait around after using Quick and be back at maximum health in a flash. Amazing!
This tactic is semi-exploitative at the very least, and I questioned whether or not to use it. Ultimately I decided to allow it, because the Quick spell is the sole prerogative of the Time Mage, and this little move couldn't be used by any other solo class. You can really abuse things with the Bard's Regen Song (which hits the whole party) and use of Quick in a full party setting though - I've never seen anyone mention this online before, so I think this is a genuinely new tactic that I've worked out. Use or do not use at your discretion!
Anyway, Marty's newfound healing prowess meant that Exdeath's physical and magic attacks were not dangerous. I kept attacking over and over again with the Quick/Meteo/Meteo combo, which did tremendous damage; roughly 9000 or so with each pair of Meteos. The two dangers in this battle were White Hole, which continued to kill Marty a little under 50% of the time, and Exdeath's own use of Meteo, which he had a chance to pull out when he dropped under 10k health. I eventually worked out a plan of attack that minimized the danger: casting Quick/Shell/Regen on the first round, then follow with three Quick/Meteo/Meteo combos, then follow with Quick/Meteo/Elixir to restore magic points. Exdeath would be at roughly 15k health left at this point, so Marty would wait until Exdeath moved, and then follow with Quick/Meteo/Meteo and a second Quick/Meteo/Meteo which was guaranteed to kill him off. Generally speaking, Marty would occasionally get wiped out by bad luck in this fight, but it wasn't all that tough.
The second, Neo-Exdeath, part of the battle was a lot tougher...

The big issue here was that Meteo simply doesn't work as well against multiple opponents. You can never pick where the damage goes with Meteo, meaning that the three Exdeath parts (after killing Part #4 with Odin from the Magic Lamp) would be randomly hit with Meteo blasts in irregular fashion. Furthermore, Neo-Exdeath actually has six total parts, although two of them are "dead targets" that can't be selected or damaged in any way. These targets will get hit by attacks like X-Fight and Meteo, however, meaning that some of the attacks get wasted and do no damage at all. What I wanted was for Meteo to concentrate on killing Part #1, the Grand Crossing part, yet I had absolutely no way to do that while using Meteo! Argh.
I made a brave try of this with Meteo, but it just wasn't very effective. Marty was getting hit over and over again by Grand Cross, and it was frustrating to put in long work only to get wiped out by Condemn or another such instant death move. Plus, I was having to track the health of all three parts, and it was getting extremely tedious as they were each hit with Meteo explosions in random fashion. I had to figure out a better strategy here.
My decision was to go after Part #1 directly, as it was the only thing that had a real chance of killing Marty. Since Marty's non-Meteo spells were much too weak to pull this off, that meant moving into the front row (eep!) and taking on the boss with the Chicken Knife. You can see this at work in the picture above, each strike doing exactly 2522 damage. However, this all came at a cost: Marty's Defense was incredibly low, a mere 14 points (which is what the Knight will have when facing Galura at Worus Tower in the first world!), and you can see in the insert box the kind of damage that Part #3's Vaccuum Waves were doing to him. Those attacks could do anywhere from 2400-2900 damage on each hit, which was a serious problem because when I started this fight Marty only had 2850 max HP! He was one-hit instant killed on my first try. Urp. Well, I went back to the Dimensional Castle and gained three levels, from 53 to 56, which took Marty up to a safer max HP total. Now with 3080 health, at least Marty couldn't be defeated in one hit.
Nevertheless, this was a very tense encounter! Any two attacks would surely defeat Marty in the blink of an eye. Marty's only defense against this was his speed, and ability to cast Quick over and over again for a full refill of health. I had to be very careful to time my actions to avoid Part #2's Almagest and Part #3's physical attacks from landing at the same time. Trust me, don't try this unless you have extensive practice with the game!
With the new strategy in place, Marty had much more success at carving Part #1 down to size. He still got wiped out by Grand Cross, but I could feel myself getting closer to victory. However, when Part #1 got down under 15k health, its AI routine changed to one where it occasionally threw out a physical attack of its own. This was very bad, because remember that any two hits would instantly kill Marty! After I died this way two times in a row, I realized that Marty would have to shift into the back row again at the end of the fight, where he could actually survive a pair of physical blows without dying. Once in the back row, I would cast Meteo repeatedly to do the final ~10k damage to Part #1, which was slower and less direct but also safer. Finally, finally, this worked out successfully on my ninth attempt at Neo-Exdeath. Once Part #1 and its Grand Crosses were gone, I would have had to screw up badly to be killed by the other two parts. I stayed in the back row, played it safe, worked the parts down with Meteo and the Chicken Knife, then finished them with a Syldra summon from the Magic Lamp. No mistakes, no errors, perfect victory:

Grand Cross is the whole danger in the last battle. Once Part #1 is gone, you shouldn't lose.

Marty therefore finished the game at Level 56, right about where I expected him to be. In my experience, most solo characters need to have about 3000 hit points to have a good chance of finishing the game. Less than that is asking for trouble against Twin Tania's Giga Flare and Neo-Exdeath's Almagest/Vaccuum Wave combination. As for this class overall, I'm sure it's pretty obvious from this report that I love the Time Mage job.  All of the various buffs have the effect of providing perhaps the best speed advantage in the game, and I've emphasized over and over again how speed pretty much rules all in this game. What was really surprising is that most online guides suggest that Time Mage is a bit of a difficult choice for a solo game. I didn't find that to be the case at all: Marty was a very powerful character, and had little trouble coasting through this game's challenges. Time Magic deployed to proper effect is devastatingly powerful, and I'm not just talking about Meteo! Given that most of the FF5 online community's solution to all problems consists of "break rods" and "power level", perhaps it's not surprising that the strength of the Time Mage as a solo character has been overlooked.
As Marty heads back to the future, here's a bonus scan of my notes from the Neo-Exdeath fight:

Here I am tracking the health of each of the three parts with pen and paper. Yes, I'm aware that this is horribly low tech, but I don't like to play SNES games in windowed mode, nor do I want to Alt-Tab between multiple windows to use a spreadsheet. Besides, there's a certain charm to writing things out on actual paper sometimes. These long lists of numbers show the way in which Meteo slowly grinded down the health of each part. The bottom-right has my successful victory attempt; I attacked with the Chicken Knife until Part #1 was down to 9604 health, then moved to the back row and started casting Meteo. The line break is where I created a save state in case FF5 crashed on me (which does happen occasionally), and I didn't want to have to redo that part again. I would never reload a save state if I had legitimately been killed, but it's another thing entirely to lose progress in a long battle if the game itself crashes! From there, I worked down the last two parts to under 1000 HP each and finished them off with the Magic Lamp. Victory!
By the way, my math was perfect and each part died exactly when my numbers said they would, so no snickering at my methods! 


