
 |
Special Section: Omega and Shinryuu |
 |
Final Fantasy 5 contains two optional super-bosses named Omega and Shinryuu. They both have ridiculous stats in every conceivable category: immense physical and magical attack, insane speed, nearly impregnable defenses, and gobs of health to play around with. The two super-bosses are all but impossible to defeat, even with a normal party lacking any restrictions. Although there are some narrow cheesy ways to take them both down, in a genuine fair fight, Omega and Shinryuu will own pretty much all comers. With all that said, I believed that I could defeat both of them... with a solo character, no less! 
Of course I'm not talking about just any solo character, but a solo Chemist, the most powerful job class in the game. I had been going through the game with my solo Chemist Issac Newton (you can read his full report here if you missed it earlier), and much of that time had been spent thinking about how I could potentially defeat the terrible twosome waiting at the end of the game. I mean, let's face it, the "normal" bosses were honestly pretty boring for a class as strong as the Chemist, even with just a single character. I knew what Newton could and could not do, and based on the AI Algorithms for Omega and Shinryuu, I was confident that I could defeat them both!
Even better, a specific prompt for this venture came from a post by Sofis at the Realms Beyond message boards. He had also done a solo Chemist run, and capped it off by successfully defeating Omega. When I asked how he pulled it off, Sofis answered by saying:
| "Kiss of Blessing, as well as another, more obscure bug, that allows you to refresh the image status from the Mirage Vest... I don't think it would be possible to win without berserking Omega, as the chemist has no way of blocking Delta Attack." |
Kiss of Blessing is a Chemist mix that berserks the target, thus overriding their AI routine and having them do nothing but attack. While Sofis still pulled off a nice feat, it therefore wasn't really a true victory over the boss. I was especially intrigued by that comment saying that it didn't look possible to win - that sounded like a challenge! Trust me, you never want to post at Realms Beyond that something can't be done. 
As always, the key to winning difficult battles in this game starts with reading the AI code. Here's the script for Omega:
{Atomic Ray,Delta Attack,Blaster}
Surge Beam
{Rainbow Wind,Emission,Atomic Ray}
Surge Beam
No Interrupt{
| {Delta Attack,Blaster,Surge Beam} {Maelstrom,Quake,Rainbow Wind} } |
| No Interrupt{ {Rocket Punch,Rocket Punch,Mustard Bomb} {Rocket Punch,Rocket Punch,Circle} } |
The way this works is that Omega starts at the top and works down through the list of actions; where three actions are grouped together in brackets, Omega would randomly pick one and then move on to the next line of code. For starters, therefore, Omega would pick one of Atomic Ray/Delta Attack/Blaster, then use Surge Beam, then pick one of Rainbow Wind/Emission/Atomic Ray, then another Surge Beam, and so on. The most difficult part of the AI routine came in the middle, where Omega would take two actions in a row (the stuff grouped together under the "No Interrupt" heading). Finally, the part split off at the bottom details Omega's counter-attack routine; whenever Omega takes any damage, he responds with a pair of attacks, made up mostly of Rocket Punches. The general pattern was Omega doing some kind of attack, then using Surge Beam; rinse and repeat. It goes without saying that all of these attacks do a lot of damage and are extremely hazardous!
I'll break the attacks down further, detailing what they do and how my Chemist Newton could counter them:
Atomic Ray/Emission: Fire element direct-damage attacks. Each would do about 3000 damage without Shell protection, 1500 damage with Shell. Newton could counter these with a "Resist Fire" mix, which absorbed fire damage.
Rainbow Wind: Inflicts Mute status. Completely irrevelant for this battle, as Newton had no magic.
Blaster: Instant-death attack. Newton could counter this with a "Dragon's Kiss" mix, which gave him Heavy status and made him immune to death spells.
Maelstrom: A Weak attack that drops HP to less than 10. Dragon's Kiss was again the counter, blocking this move from succeeding.
Quake: Massive earth element damage, 6000/3000 damage with Shell status present or not present. Newton could counter by using a Levitate mix for Float status.
Targeting: Not an attack, just a wasted round for Omega as it selects who to attack next.
Rocket Punch: Cuts health by 3/4 and inflicts Confuse status. Thankfully, it too could be countered by Dragon's Kiss.
Mustard Bomb: A non-elemental direct damage attack, 3000/1500 damage with or without Shell status.
Circle: Another instant death attack, blocked by Dragon's Kiss.
Surge Beam: Deals damage equal to 50% of Max HP, cannot be dodged or avoided. Nothing Newton could do about this other than use healing items!
Delta Attack: Petrification attack. The Chemist has no way to defend against being turned to stone, so this signaled the end of Newton's attempt against Omega. Or did it? There was one thing Sofis overlooked:

Delta Attack can be reflected with Wall status!  That was the key breakthrough, as I had checked in the code and found that a Wall Ring would protect Newton from the possibility of being turned to stone. In fact several other attacks could be reflected as well, such as Blaster and Atomic Ray. (The last one was actually a bad thing, as Omega absorbs fire damage and would be healed when Atomic Ray bounced off Newton!) The other lightbulb moment was when I realized that Levitate would protect against damage from Quake; prior to that, I hadn't seen a way to avoid the enormous damage caused by that spell.
Now that I had answers for each individual action, I could start piecing together the overall strategy. Newton went into the battle wearing a Wall Ring, which meant that he had to use a Speed Drink for Haste status on his first round of combat. None of Omega's initial three attacks could harm him, so Newton would have just enough time to down a Giant Drink (double max HP) before getting hit by Surge Beam. Over the following rounds, Newton alternated between healing with Elixirs or X-Potions and consuming Dragon Armor (Armor/Shell status), Dragon Kiss, Resist Fire, and Levitate mixes. He would very frequently die from some of Omega's attacks before I could get all of these protective mixes in place; Maelstrom and Quake were the big culprits there, either one would basically mean instant death if they went off before the appropriate counter mixture was drunk...
But assuming that Newton could survive long enough to get all of those mixtures in place, he could start drinking Dragon Power mixes, each of which added 20 to his level. Eleven of these would take Newton from his starting level of 50 up to the max of 255, where I could finally switch over to the attack. Now this might sound easy, but keep in mind that Newton would be getting hit with Surge Beams constantly, necessitating unending use of Elixirs or X-Potions for healing! As far as attacking goes, the only mixture that worked was Shadow Flare:

I would have liked to use Dragon Breath or Holy Breath on the attack (which do Damage = current HP), however both of them have elemental affinities, and Omega absords all elements other than lightning. The Breath weapons would only heal Omega! Thus it had to be Shadow Flare, with its non-elemental and Magic Defense piercing properties. The latter was a big deal, because Omega has an impossibly-high Magic Defense of 150, which Shadow Flare was able to ignore. (I'll point out though that I could have eliminated Omega's Magic Defense with repeated use of Split Shell mixtures, had it done anything.) I had also thought about using the Chicken Knife to attack physically, but the problem there was Omega's 95% physical Evade. It was a shame I didn't have an auto-hit ability, like Aim or X-Fight!
Therefore Newton was stuck with Shadow Flare. After taking the above picture, I shifted around some equipment slightly outside of battle so that Newton's Magic Power stat increased from 21 to 26; that was enough to pull Shadow Flare's damage up to the 1700 range. Keep in mind that Omega has 55,530 total HP - and that he was healing himself occasionally when Atomic Ray was reflected off Newton's Wall Ring - so yeah, Newton was going to be here for a while. But I've done some extremely long battles before in this game, what was one more, eh? As long as Newton was slowly grinding away at Omega's health, and the ultimate victory was possible, I was committed to the attempt.
There were two final problems to overcome here. One was Omega's counterattack; recall that every time Omega takes damage, he responds by initiating two counterattacks. Fortunately all of the Rocket Punches and Circles were useless, yet the occasional appearance of Mustard Bomb could cause me problems. I accidentally got killed by a stray Mustard Bomb on one attempt when I hadn't been careful enough about having max health at all times, whoops! Finally, Newton did not have an unlimited supply of Shadow Flares to play around with. You can only hold 99 Dark Matters in stock, which meant a maximum of 49 Shadow Flares possible. I crunched the numbers somewhat worriedly, and found that even with Omega getting some self-healing, I would have just enough Dark Matter to be confident of winning. That estimate proved to be right on the money.
Who's yo daddy now, Omega! 

Once the initial "buffing up" phase of the battle was complete, it actually wasn't all that difficult. Just a long, tense encounter, making sure to continue using Shadow Flare and not mess up with the healing. Newton ended up using exactly 40 Shadow Flares, and roughly 50 Elixir/X-Potions combined. Learn the AI routine, react accordingly, run enough attempts so that you dodge the instant-kill stuff, and then execute flawlessly without making errors. Far from easy, but certainly not impossible. For the record, Omega would be about a billion times easier if Newton could have used abilities from another job; this would have been a cakewalk if I could have combined Mix with any one of Black, Summon, Time, Magic Sword, Aim, X-Fight, or even freakin' Equip Rods! 
* * * * * * * * * * * * * * * * * * * * * * * * * * * * * *
That left Shinryuu still to go before I could lay Newton to rest for good. Out of the two super-bosses, Shinryuu is clearly the more difficult of the pair to kill. While Omega is obviously no walk in the park either, his AI script and overall stats tend to concentrate more on defense than offense. Shinryuu has much lower Defense and Magic Defense... but his attacks, both physical and magical, hit for a lot more damage. And worst of all, Shinryuu is significantly faster than Omega, meaning that he would be flying through his AI script at an incredible rate. (Shinryuu is actually the fastest monster in this game, by quite a large margin.) Just surviving the battle long enough to start drinking Chemist mixes was going to be a real adventure!
I'll start once again by posting the AI algorithms used by Shinryuu:
Tidal Wave [only used at the start of the battle]| {Maelstrom,Fight,Roulette} {MghtyGrd,L2 Old,L3 Flare} } |
| {Fight,Fight,Demon's Eye} {Fight,Fight,Poison Breath} } |
I've simplified this a bit, because the full script involves turning a particular flag on and off; you can go check the full Algorithms Guide if you're curious about it. Anyway, due to the way things are coded, Shinryuu would always start the battle by using Tidal Wave, the same attack employed by Leviathan. Then he would follow that up with two single rounds of action, the Maelstrom/Fight/Roulette and Snowstorm/Atomic Ray/Thunder combinations. At that point, Shinryuu would enter the worst part of his routine: two rounds where he would conduct a pair of actions, on back-to-back rounds of combat. It was therefore entirely possible for Shinryuu to act FOUR TIMES IN A ROW between Newton got a chance to issue a command. That last scripting pair was the most brutal, combining Fight commands with Demon's Eye, a stoning attack. Yikes!  Then it was back to the Maelstrom/Fight/Roulette round of actions, and keep repeating over and over again.
I'll break down what all the attacks did again, starting with that Tidal Wave:

Tidal Wave: Enormous water-element damage, as seen above. The only way to counter was to start the battle with a Coral Ring equipped, which absorbs water damage. Any other accessory and Newton would die instantly!
Fight: Very high physical damage, 3000 even in the back row! Armor status would reduce that to 1500 per attack.
Maelstrom: A Weak attack that drops HP to less than 10. Dragon's Kiss was the counter, blocking this move from succeeding.
Roulette: A bouncing hand cursor picks one of the player characters or monsters and kills them instantly. In this battle, 50/50 chance for Newton to die. It could be countered with a Life Shield mixture.
Snowstorm: Tremendous ice-element damage, 5500/2750 damage depending on whether Shell status was present. Newton could defend with a Dragon Shield mixture (neutralizes fire, ice, and lightning based damage).
Atomic Ray: Fire-element damage. Never an issue, because Newton was always wearing a Coral Ring which neutralizes fire attacks!
Thunder: A lightning-element attack that did damage equal to 1/2 of max HP. Normally this attack does 1/4 of max HP, but the Coral Ring creates a weakness to lightning. Newton could counter with a Dragon Shield mixture.
Mighty Guard: A defensive Blue magic spell that enacts Armor, Shell, and Float status. This was largely irrelevant for this fight.
Level 2 Old: Inflicts Old/Aging status on any target with a level that's a multiple of 2. The best defense was having an odd-numbered level!
Level 3 Flare: Casts Flare on any target with a level that's a multiple of 3. Ditto for Level 2 Old, make sure you don't have a level divisible by 3... I took Newton to Level 53 before fighting to make sure he was safe from these two spells.
Poison Breath: Low poison-element damage, usually about 500 and not very dangerous at all. It could be countered nonetheless with a Resist Poison mixture.
Demon's Eye: The worst attack in Shinryuu's arsenal... This one rolls to see if it hits the target, and if successful, inflicts petrification status. Unlike Delta Attack, Demon's Eye cannot be reflected off of a Wall Ring, so any time this appeared it was pretty much an instant game over for Newton...

OK, if there was no mixture or equipment that could protect Newton from Demon's Eye, then how was I going to do the battle with Shinryuu? Any successful hit from Demon's Eye would be a failure, after all. Hmmm... but if that was the case... then... all I needed to do was make sure that Demon's Eye *DIDN'T* hit its target!  And yes, there was in fact a way to do that. In order to explain this, I need to go a little deeper into the formulas for this game, and explain a bit more about how magical attacks work.
To make a long story short, there are two types of magical attacks in this game: those that always hit (like your Fire 2, Ice 3, etc.) and those that have to pass a dice roll first to see if they are successful. Most of the magical spells that inflict a status ailment fall into this latter category, like Slow or Break and so on. Here is the (simplified) formula for hit determination of magical attacks:
1) Hit% = Spell Hit% + Attacker Level - Target Level
2) Apply multitargetting modifier to Hit%: If targetting multiple Targets, Hit% = Hit% / 2
3) Apply Target status effect modifiers to magic Hit%: If the Target has Shell status, Hit% = Hit% / 2
4) Let N1 = (0..99)
If N1 >= Hit%, the attack misses; do not follow any more steps.
5) The attack hits. Follow the rest of the steps to calculate damage.
Now I cut out a lot of the steps that weren't relevant here, but this shortened formula explains what I had to do to get Newton past that nasty Demon's Eye move. The key parts are in the first and third steps; the base hit percentage for magical attacks is the Spell Hit% (unique to each magical attack) plus the Attacker's Level minus the Target's Level. The third step shows that if the target has Shell status present, the hit percentage gets cut in half. Therefore in our case here, the formula would be Spell Hit% (99 for Demon's Eye) + Attacker's Level (Shinryuu = 97) - Target Level (Newton = 53). That becomes 99 + 97 - 53 = 143, which would get truncated down to 99% overall. Newton would be toast for sure under those odds! With Shell status in place, the odds would improve to (99 + 97 - 53) / 2 = 71%. Still not very good, but maybe he'd have a slim chance of living.
However, the Chemist is the one class that can change his or her level in battle! If Newton could get lucky and have Demon's Eye not appear for a couple of rounds of combat, giving him time to drink some Dragon Power mixes and increase his level into the 200+ category, then he could swing around that Magical Hit Determination formula in *HIS* favor, reworking it to the point where he was practically invulnerable to Demon's Eye. With ten Dragon Power mixes and 200 additional levels, that same formula would become 99 + 97 - 253 = -57 = 1% odds of success! I could live with those odds - and that meant that this was not a fool's errand, but a battle that Newton absolutely had a very real chance to win... assuming he could get the right mixtures in place.
Aye, there's the rub! Shinryuu was so darned powerful that Newton had all kinds of problems surviving long enough to get his protective mixtures in place. Needing to have the Coral Ring equipped meant that Newton couldn't start the battle in Haste status, so he always had to begin by consuming a Speed Drink. Then I would next proceed with Dragon Armor (Shell and Armor status) and a Giant Drink (double max HP); I realized over time it was better to start with the Dragon Armor before the Giant Drink, because they both effectively doubled hit points while beginning with Shell status made it more likely that certain magical attacks would miss. After that, Newton would enact a Dragon's Kiss (Heavy status), Dragon Shield (fire/ice/lightning protection) and Life Shield (anti-death spell, to protect against Roulette) in some kind of order, depending upon where Shinryuu was in his AI routine and what was coming up next. If all of those mixtures were in place, and Newton was still alive by some miracle, I could start adding to his level with Dragon Power mixes.
But in all honesty, Newton usually didn't live long enough to get through those mixes! He needed a very particular sequence of Shinryuu actions to survive beyond the first pass through the AI routine, and that rarely happened. I needed Shinryuu to start with Roulette and MISS Newton on the 50/50 dice roll; if he started with Fight or Maelstrom, I would have to use an Elixir instead of a Dragon Power mix, and that would inevitably spell death later on. Secondly, I needed to have Shinryuu use the harmless "Atomic Ray" on his second action rather than the deadly Snowstorm or Thunder moves. Third, I needed a second usage of Roulette (also missing, of course!) in the third group of actions, and then finally to dodge the appearance of Demon's Eye (at 2/3 odds) in the fourth and final group. The odds of all this happening were low, like maybe 1 in 20, but if it did happen, Newton would have enough protective mixes in place to survive for a while to come. Then I would need Demon's Eye to avoid appearing during the process of buffing up Newton's level to 200+ where he would be safe; I made it to the "leveling" part of the battle three times, only to be killed by Demon's Eye each time. My fourth time reaching the leveling part saw Newton avoid the appearance of the dreaded stoning move, by pure chance. And then it was time to go on the attack!

Shinryuu absorbs Holy element, but he has no particular strength or weakness to the other elements. This allowed Newton to start mixing up some Dragon Breaths, which do fire/ice/lightning damage equal to the caster's current HP. Assisted by a Giant Drink that was a maximum of 6400+ health, which did really outstanding damage to the old boy! Shinryuu has some 55,500 HP in total, and that wasn't going to hold out for long against Newton's own Dragon Breath. By this point in time, Newton was protected against everything aside from Shinryuu's physical blows, his level was 253 (not 255, which is divisible by 3 - I made a mistake earlier about that and nearly died to Level 3 Flare!), and I had ample healing in place to recover from any attacks that got through.
The only way to lose at this point would have been Demon's Eye hitting at 1% odds. Not gonna happen! Game over for you! 

I was surprised that Shinryuu doesn't get the normal boss death graphic, which has two flashes of light appear and then the boss slowly melts away into nothingness. Poor Shinryuu just gets the standard random enemy "fade into mist", which happens so fast I nearly missed getting the screenshot. An unworthy end to a worthy opponent!
Unlike defeating Omega, beating Shinryuu actually gives you a tangible reward in addition to the useless Dragon Crest:
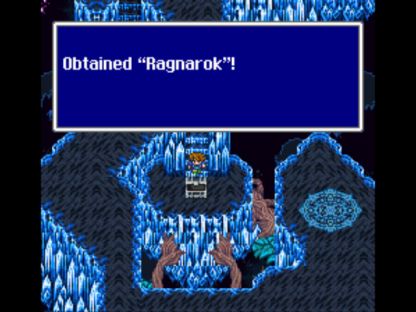
The Ragnarok Sword has the second-highest attack value in the game, after only the fully-maxed Brave Blade. It's a Knight-only weapon though, so I turned Newton into a knight and messed around with the weapon a bit, enjoying the carnage he could do after buffing up to the max level of 255. There was really nothing else to do, as Newton had well and truly finished the game. It had certainly been one hell of an ending, even if most of the ride up to this point had been pretty tame.
In conclusion, it's entirely possible to beat both Omega and Shinryuu without using the broken Kiss of Blessing mixture, even with a solo Chemist! Nor do you have to be some ridiculous level, like 70+ or 80+ in order to get the job done. I was able to win both battles at a very standard level for a solo character, and get them done in completely legit fashion: no save states, no hacks, no cheating. Just running a lot of iterations of each battle until Newton was able to dodge the worst attacks and get his protective mixtures in place. There's no great secret here: study the AI code, plan out your moves ahead of time, and then make sure you execute correctly. With the right luck on your side, you can work miracles indeed.
Thanks to all the readers, I hope you enjoyed Newton's story!


