
The Knight in Final Fantasy 5 is a pretty straightforward character. This job is the game's equivalent of the Fighter class from the original game: a strong, beefy, tank that can equip lots of heavy weapons and armor. Fortunately the Knight isn't as ridiculously overpowered as the old Fighter, but it's still a rather strong job to pick!
Unlike some of the other melee classes, the Knight doesn't have too many abilities to play around with; there are only three of them, and only two worth using in a solo run. The innate ability of the Knight is "Cover", which works in the same fashion as Cecil's Paladin ability of the same name, from Final Fantasy 2/4. When allies are low on health, the Knight will automatically jump in front of them to take the blow from physical attacks. Needless to say, this doesn't help very much for a solo game! The other innate is a command called "Guard"; when using this, all physical damage that the Knight takes is reduced to zero. It doesn't work against magical damage, however, and most of the worst threats in this game are magical... Furthermore, you cannot attack and use Guard at the same time, and what good is a solo character that does nothing but defend himself? Therefore this isn't all that useful, but there are a couple of places where it can come in handy, especially if you know from the monster AI routine that some kind of really nasty melee attack is about to hit.
The Knight's signature ability is called "Double Grip", which allows him to grip weapons with both hands, forgoing a shield to do double damage! Although it's a simple ability, it's among the most powerful in the game. Many of the best weapons in the game can only be used by the Knight (or the Bare job, which can equip everything) and then combined with Double Grip to do insane damage. You can even swap a shield in during a fight using the item menu, giving up the Double Grip ability, and then swap it back out again later in the same battle. Lots of flexibility here. The general rule I employed was to have Double Grip enabled at all times, and only use a shield if I could still kill enemies in one hit. If not, better to forego the shield to kill enemies faster and take less damage overall.
The Knight also has the challenge of doing the whole game without running from battle, so that he/she can take the Brave Blade at the start of the third world. The Brave Blade is the opposite of the Chicken Knife: it starts with an attack value of 150, and goes down by 1 every time you run away from battle. With Double Grip, the Brave Blade has an attack of 300, and that's a LOT! (Note for the stat-obssessed like me: Double Grip actually doubles the modifier [M = M * 2] and not Attack. Final Fantasy 5 incorrectly states the opposite in-game.)
Naming this character was easy: a knight who never runs from battle, and wields the sword Excalibur? Clearly we're dealing with King Arthur of the famous legendary tales. Best of all, another name with exactly 6 letters! Everything was routine up to the Wing Raptor, and with Knight being one of the starting jobs, there was no need to use the emulator's ROM hacking abilities. Sir Arthur's starting stats:

Stat-wise, the Knight has high Strength and Vitality, average to slightly slow Agility, and very poor Magic Power. The Knight also tends to wear lots of heavy armor, which slows him down even more (heavy equipment weight effectively lowers Agility, and makes you wait longer to act in battle). On the plus side, it was nice to have a character with high hit point growth again, after my Hunter Arjuna had to make due with substantially less in that category.
The immediate barrier confronting Sir Arthur was Karlabos, which I've already mentioned is a difficult boss to overcome for many classes. At level 7, Arthur was doing 15 * 4 = 60 damage per attack, which would take roughly 11 rounds of combat to wear down Karlabos' 650 hit points. The odds of getting through 11 rounds without being killed by the dreaded Tentacle/Tailscrew combo were virtually nonexistent, so I resolved to increase his level a bit first. The Torna Canal is a great place to fight early on, as the monsters in there won't even attack the male characters - Arthur could hack them apart in complete safety! My target goal was level 13, where Arthur would pick up an attack modifier of 7, for a base damage of 105 with each attack. When I reached that point, however, Arthur was only 15 ability points away from picking up the Double Grip ability, so I went ahead and fought a few more battles to get that:

Double Grip doubled the attack modifier to 14, making Sir Arthur's effective damage 15 * 14 = 210, at least against opponents with no Defense like Karlabos! Now that he could take down the boss in a mere 4 attacks, I went ahead and did the encounter with ease, winning on the first try. I think Kambei was the only other solo character of mine that did that, and he had the unfair advantage of using GilToss.
Sir Arthur was slightly overleveled here, so I resolved to hurry through the next few (easy) areas of the game. I could not actually run away from any fights because of the future Brave Blade; Arthur must ALWAYS fight whatever he encounters, so he will probably end up with more experience than some of my other characters. Anyway, Arthur was level 15 when he faced Siren. Her undead form had high physical attack and defense, so the best way to do this fight was to attack against the human form and then use the Guard command against the second. Fairly easy overall.
Carwen sold a sword upgrade, the Regal Cutlass, which boosted damage a fair bit. This allowed Sir Arthur to kill the enemies on North Mountain without using Double Grip, so I could swap in a shield for slightly better defense. Against Magissa and Forza, Arthur went back to Double Grip, so that he could pound out the damage. Magissa took three hits, Forza four. I won the battle before Arthur could run out of hit points. Nothing fancy here, just pure brute force! That's one thing the Knight has in spades.

Another example of the Knight banging out the damage with Double Grip. Galura only has 1200 health, so that was a mere five attacks at this point. I'd like to tell you I did something really clever and awesome to win this fight, but that would be a lie. Hold down the Attack button and wait for the foe to drop dead. 
With his rapid progress through Carwen and Worus, Sir Arthur was now solidly back on the normal leveling curve for a solo character, and perhaps even a bit behind it. Karnak offered up more goodies, with better Mythril weapons and armor. These are probably a little overpowered for this point in the game, as most of my solo characters seem to handle the Steamship dungeon that follows with ease. Arthur was certainly no exception here; Double Gripping the Mythril Sword provided enough damage to kill anything with one hit. The biggest issue was running out of Potions - like Solo, Arthur takes a lot of hits. Unlike Solo, he couldn't heal himself with Mantra or rely on Counter to get extra rounds of attack in - but Arthur had better armor and better Defense, so it balanced out somewhat.
I have Liquid Flame's attack pattern down by now, and thus the battle was fairly easy. Sir Arthur was banging out 600+ damage per attack, and thus only needed five hits to win. I used up my two Hi Potions in stock, but managed to win without having to resort to Elixir use. The run out of the exploding Karnak Castle didn't cause any problems either, although the Gigas opponents were noteworthy for being the first foes in ages not to die in a single hit (they have 750 health, a huge amount at this stage of the game).

The Ancient Library was next. I'm really coming to dislike this portion of the game, because the two bosses here are often difficult to defeat, and the enemies inside the Library itself give terrible experience and gold. I always seem to end up having to "level up" by walking around the plains and forests outside the Library, where the fighting is much better, but overall the whole thing is rather boring and unexciting.
Sir Arthur followed this general pattern as well. He was level 21 coming out of Karnak, which wasn't enough to beat Ifrit without a whole lot of Elixir usage, and that would be extremely wasteful in light of the need to fight Byblos next. Arthur was in line to get another attack multiplier at level 25, so I set that as my target goal. (Oh, I TRIED to fight him earlier, and it didn't work out too well!) Then I realized that I couldn't even reach Ifrit at level 25, because all of the Page 64 enemies in the Library cast Level 5 Doom constantly, argh. So level 26 it was. As you can see above, Sir Arthur was doing about 500 damage per attack, which meant 6 successful hits needed to win. I think I managed to get out of this fight with just one Elixir used, helping to save them for later, harder battles to come.
Byblos was next, and here was where the "lying character screen" came into play. FF5 states in-game that Double Grip doubles attack power, but this is actually incorrect - it's the attack multiplier (M) that doubles. Why does this matter? Against foes with high Defense, your characters do less damage. The Mythril Sword has an attack of 31, and Byblos has a Defense of 10, while Arthur's multiplier at this point in time was 12. If his attack was actually doubled, the resulting damage would have been ((31 * 2) - 10) * 12 = 624. Instead, the actual damage was (31 - 10) * (12 * 2) = 504, a noticeable difference.
Sir Arthur had to avoid several different attacks from Byblos: Armor (which increased Byblos' defense, effectively canceling out Double Grip), Sonic Wave (level cut in half), Thread (effectively the spell Slow), and Drain (which sucked hit points out of Arthur into Byblos!) Any combination of these spells would usually result in doom; if Armor and Sonic Wave were both in play, Arthur couldn't do enough damage to get through Byblos' draining and the battle became hopeless. I tried at level 26, then again at level 28 (when Arthur got another attack multiplier) without too much success. I would have needed a perfect combination of AI actions to succeed, and I wasn't going to do endless repetitons to achieve that. Finally, at level 31, Sir Arthur received another attack multiplier, and after a number of tries, I managed to avoid Sonic Wave and won out:

Arthur used two more Elixirs in this fight, which I was mighty glad to win. Now I could finally move past the stupid Library and get on with the rest of the game!
Using the Steamship, I took Sir Arthur to Jachol and Istory. The first town had a new weapon upgrade for him on sale, the Coral Sword, which did slightly increased damage. The real advantage, however, was that the damage was lightning-based, giving me something to use against monsters that had an elemental weakness. Arthur had accumulated about 80k gold overall, more than enough to pick up an Angel Ring at Istory as well. The Flame Ring wasn't needed just yet because I had no way to heal Arthur with fire damage, and the Angel Ring provided better Magic Defense.
In terms of story progression, Crayclaw's battle on the airship was next. Well, guess what: he has a weakness to lightning damage! That made this incredibly easy:

Crayclaw only has 2000 health, so that was a one-hit kill! Sir Arthur was reaping the benefits of mulitiplicative math here: 37 base damage * 2 (Double Grip) * 2 (elemental weakness) * 14 (attack multiplier) = 2000+ damage! Poor Crayclaw, hehe. This was one of the few bosses I hadn't taken a picture of in my previous reports, so I wanted to get him in here. If only all of the battles were this easy!
The Adamantium Turtle was surprisingly difficult, again because of his high Defense. The turtle has a base Defense of 25, so even with all of Arthur's attack multipliers, he wasn't doing much damage after the 37 - 25 = 12 base damage calculation was performed. The fact that the Adamantium turtle is in permanent Armor status didn't help either, as that canceled out the Double Grip multiplier. I got the fight done using the Elf Cape and two more Elixirs. In retrospect, I probably should have used the "Guard" command to nullify some of the physical damage - the Adamantium alternates between a round of one attack and a round of two attacks. Maybe I could have won with only one Elixir used, hmm...

In contrast, Sol Cannon was much easier than usual. After fighting some more random battles for enough gold to purchase a Flame Ring, Sir Arthur crushed the Flameguns and moved on to the big boss himself. The Coral Sword was the star of the show here, killing the Launchers in one hit each and then dishing out massive damage to the Cannon itself. Arthur needed a mere 6 attacks to deal the 12,500 damage and win. I only had to use two Elixirs here, which was far less than most of my solo characters.
There was another new sword for Sir Arthur to pick up in the Lonka Ruins, the Ancient Sword (Attack 43). This weapon had an unusual property as well: a 33% chance to inflict the Old status ailment on enemies when striking. Old/Aging works a little bit differently when it comes to monsters, but it does reduce their speed and magic power stats, making enemies a lot less dangerous overall. There were also some armor upgrades to be found too, the Gold Armor and Gold Shield, so this was a useful place to explore. The biggest drawback? Still having to make due with a supply of 99 Potions, each of which could only heal a measly 50 hit points, argh. 
AracheoAvis didn't pose any particularly great challenge for Sir Arthur. He was dishing out plenty of damage, enough to kill each form in 2 or 3 hits, which didn't leave enough time for anything to go too terribly wrong during the fight. I had Arthur equip the Flame Ring, and used the third "fire" form of the boss to get in some free healing. Arthur died a couple times against the final undead form when ArchaeoAvis did nothing but use his "Fang" charming attack, but soon enough the boss stuck with normal attacks and went down:

Against the miniboss trio, Sir Arthur simply crushed the Chimera Brain and Titan without doing anything particularly special. The Puroboros were the troubling fight yet again. Sir Arthur could dish out three attacks in the 1300-1400 damage area before they got to act, which was great because it completely removed any danger from three of the enemies using Exploder. Then I just needed to do the fight over and over until none of the back three Puroboros (all of them with max health) blew themselves up... Although this wasn't a particularly tough fight, I still had to burn more Elixirs because Arthur had no way of healing himself, and even weakish attacks build up over time. The lack of Hi Potions at this stage of the game was really making itself felt. (FF5 pretty much forces you to use White Magic, as the options for healing your party with items are extremely limited!)
Now in the second world, I did the usual fight against Gilgamesh with solo Galuf. One thing that wasn't typical was having to fight ALL of the random enemies that cropped up as well; usually I run from these battles, and managed to keep the other three characters from gaining any experience points in my last two variant runs (Kambei and Arjuna). It was impossible to do the same here though, since I had to keep fighting every battle for Brave Blade purposes. A little different.
The second Gilgamesh fight on the bridge was a pain in the behind, because I still had no way to heal Sir Arthur aside from using Elixirs. Even though the boss was nothing special, I still had to gulp down two more Elixirs in the process. Arthur had only two remaining in stock, my lowest ever at this point in the game! I would have to be a little careful moving forward. In Rugor, I could finally - finally! - purchase some Hi Potions, and reduce Arthur's dependence on Elixirs for healing. There was also a new and better weapon there, the Slumber Sword (attack 49), which had a 50% chance to put opponents to Sleep. That was a darned useful special ability in all kinds of different situations! The rest of the Rugor/Moogle diversion was uneventful.
Then it was off to the Hiryuu Valley, which I often think of as the "Bone Mail" valley due to the presence of that all-important piece of gear. Even for a Knight like Arthur, who wears heavy armor, the Bone Mail took him from 25 base Defense to 45 - bit of a difference! There was one other irritation I should mention in this area: the Bone Dragon random battles.

These are some of the most frustrating opponents in the game, at least for a solo character. They have two different nasty attacks: Bone, which reduces hit points to critical, and Tail, which paralyzes the recipient. The Bone Dragons have a lot of health and can't be killed in one hit, which means that every such random encounter turns into a long battle of hoping for fortunate outcomes on dice rolls. Now I usually just run away from these guys - but again, that wasn't in the cards here due to Brave Blade purposes. Arthur got wiped out on a number of occasions, forcing me to redo areas over again in tedious fashion. Argh.
I talked a little bit about fighting the Hiryuu Plant with Arjuna, but the battle was a much longer ordeal with Sir Arthur:

This is the flower that has to be taken out, flower #4 in the code. It inflicts the paralyzation status, which can't be defended against (at least, not with anything other than a Ribbon!) The other four flowers inflict Aging, Poison, Darkness, and Charm respectively. The goods news is that these four status ailments can all be defended against using the Bone Mail. The bad news is that the attacks from the flowers all hit automatically (can't be deflected with shields or the Elf Cape) and pierce Defense, so the armor Sir Arthur was wearing did nothing to protect him. And naturally equipping the Bone Mail meant that Arthur couldn't heal himself using Potions or Elixirs! In other words, he HAD to win the fight before his health ran out, as there was absolutely no way to heal himself. Interesting, to say the least...
Over the course of several trial runs, I carefully worked out a strategy. Sir Arthur had to kill flower #4 on the first round of combat, or else he would be paralyzed (very bad!) Then, on the second round, I had a brief reprieve before it came back to life, which I used to attack the Hiryuu Plant itself with the Ancient Sword, in order to inflict Aging status on it. Even though the Hiryuu Plant itself never attacks, Aging status would slow it down, and reduce the rate at which it revived the little flowers. The third round necessitated killing flower #4 again, and then it was simply a race to kill the Hiryuu Plant ASAP before Arthur ran out of hit points (swapping to the stronger Slumber Sword in the process). I did manage to accomplish this eventually, after several false starts. I could have saved myself some trouble had I known at the time that an even better sword was hidden in Bal Castle, the Epee. I would get that a little later, would have been nice to have it here!
With the Hiryuu (wind drake) in tow as a new form of transportation, it was time to head to the Barrier Tower sequence. The first notable encounter here was the Gilgamesh/Enkidou ship battle:

I started out the fight by hitting Gilgamesh with the Ancient Sword, to inflict Old status on him and slow down his movements. (A surprising number of bosses are not immune to its effects.) Once Enkidou showed up, I concentrated on killing him first, which was rather easy as Enkidou only has 4000 hit points and Sir Arthur was doing impressive damage with Double Gripping his new Epee sword. Then it was simply a matter of hitting Gilgamesh four or five times to send him into the drink. Did lose this fight twice to that stupid Death Claw ability before succeeding, sadly.
Sometimes a Wall Ring drops quickly in the Barrier Tower, sometimes it doesn't. This was one of the slow trips, and Sir Arthur gained three full levels (from 41 to 44) while I was awaiting the random drop. Not quite as bad as Kambei's struggles to get a Wall Ring, although still not fast. Against Atmos, Sir Arthur could do just under 2000 damage per attack, which wasn't anywhere close to enough for victory. Rather than level up to a point in the mid-60s, I did my usual tactic of killing off the other characters throughout the battle, and winning that way. I'll just repeat my familiar mantra here: the Atmos fight is broken for a solo character, and I'm not going to jump through hoops just for this one encounter. (Now if a solo character can't win even with killing off the other three characters during the battle, that's a different story. Jobs like the White Mage and Berzerker have to use special approaches.)
Guido's Cave was irritating, as Sir Arthur had to fight every single Metamorph enemy. I usually skip these battles by running, since they give negligible experience. In Mua, Arthur was able to upgrade to slightly better Diamond equipment, and picked up some great experience by fighting in the Forest. At the end of this region, he picked up the Flame Toungue sword, which did additional damage and added a fire element to Arthur's attack. The tree enemies REALLY didn't like that! 

They took double damage from fire, naturally. With the Ice Brand sword that Sir Arthur would soon pick up in Exdeath's Castle, he had all three primary elements available for attack. Even better, I could now heal massive amounts of damage with ease using the Flame Toungue + Flame Ring combo! Wish that the sword had come a little earlier in the game though. Sir Arthur used his old Epee against the Fire Crystal, and the Flame Toungue against all the rest. With the Fire Crystal casting Fire 3 constantly, and healing Arthur via the Flame Ring, this was an extremely easy boss fight.

Exdeath's Castle was dominated by the Flame Tonugue + Flame Ring combination. Sir Arthur could heal himself to full instantly (3000 hit points!) just by attacking himself, which made battles pretty easy. Even the dreaded two Yellow Dragon combo, which usually kills my solo characters, could be done with ease. The final Gilgamesh encounter was a non-event.
By the time Sir Arthur reached the end of the castle, he had gone up to level 50. I made many, many attempts against Exdeath, only to keep running afoul of his Condemn spell. Obviously Arthur needed the first one to miss, but his damage output was actually less than that of many of my other chracters, and he therefore needed to dodge a second Condemn as well. Exdeath is a tough matchup for physical characters, with his high Defense (25). Eventually I got frustrated with this, and decided to gain three levels, to 53, where Arthur would pick up another attack multiplier. With the additional damage, and roughly 500 more health to work with, I was able to get the job done:

Just had to keep running boss fights until Exdeath missed on his second Condemn (which did take a while). I leveled up by fighting Magic Dragons on the floor just below the final save point, which give good experience and have a slight chance to drop Elixirs. This both buffed up Arthur's level and built up my stash of Elixirs - I still had 10 remaining after beating Exdeath!
Once in the third world, Sir Arthur immediately dispatched the Antlion (not even caring that he was hit with Sonic Wave twice) and quickly proceeded to his goal. The ultimate weapon for a Knight was calling out to him:

The fully maxed-out Brave Blade, what a sight to behold! Now finally Arthur could reap paydirt from fighting each and every encounter throughout the game. The Brave Blade actually has an Attack value of 150, which the lying character screen incorrectly reports as 300 due to Double Grip, as well as a +5 bonus to Strength. With his level of 53 factored in, Sir Arthur was now getting an attack multiplier of (56 * 53) / 128 = 23 + 2 = 25 * 2 = 50. An attack multiplier of 50 times a base damage of 150 meant 7500 damage against opponents with no armor - wow! That's a lot! 
Since most random enemies have roughly 3000-4000 hit points even at the end of the game, Sir Arthur was now doing overkill damage against his non-boss opponents. This opened up some room for flexibility on my part. I could swap in a shield if needed, particularly the Aegis Shield against enemies who used Stoning attacks, or alternately I could place Arthur in the back row, to cut down on normal physical damage significantly. Even with his attack multiplier cut in half, Arthur would still do ~3000 damage and kill virtually everything in one blow.
In the Pyramid I quickly turned up the Cursed Ring and assigned it to Arthur, his Defense now increased to the point where it was all but impossible to hurt him. With the Thornlet helmet added, Sir Arthur's Defense ballooned to an impregnable 75, which made random battles laughable. I did get wiped out on occasion by the Machine Head robots when they used their Missile/Surge Beam combo, but that was about it. Merugene was a laugh, cut down in four quick swings of the Brave Blade. Afterwards, I sent Sir Arthur to Mirage and picked up the Running Shoes, which granted him the one thing he had always lacked: speed. My knight now became an unstoppable killing machine, with most enemies quailing in fright as they were slaughtered one after another.
The gargoyle mini-bosses that guard the entrance to each of the four temples in the third world were actually somewhat interesting, since they will revive each other endlessly and Sir Arthur lacked the ability to multi-target the two of them together. I ended up swapping to the Slumber Sword, putting them both to Sleep, and then killing them once they couldn't bring each other back to life. Nothing was able to stand up to Arthur in the Solitary Island temple, and that included Stalker/Stoker, who went down in a mere three hits. I was fairly lucky guessing his location too, making it a really fast battle!
I've described how I do the Minotaur/Omniscient battles a number of times now, and won't repeat the same story again. The one thing that was a little different was the fact that Sir Arthur was too slow to hit Omniscient with Mute from the Mage Mash and then get in an attack with the Brave Blade. Omniscient would cast Reset every time I tried this. Instead, I sat back with the Wall Ring and let the boss slowly kill himself with his own reflected spells. Have I mentioned how much I love the emulator's Fast Forward feature at times like this?

Down in the Great Trench, Arthur ran into a serious problem. The blob Unknown enemies use an attack called Possess (pictured above) that causes instant death, with no chance at dodging. The trigger is selecting the "Fight" command in battle - they will always respond with Possess if attacked with the normal Fight command. My other solo characters had dealt with this in varied ways: Solo defended and responded with Counter, Black used magic, Kambei used Slash, and Arjuna employed X-Fight. None of those options was available here! Of course, I could always run away... nuts! See the issue? I went through my inventory of gear, and sadly none of the Knight weapons were able to function as offensive spells here when used in battle. The only solution was to skip the dungeon entirely, which was of course optional after all. The enemies in the Great Trench should consider themselves fortunate.
But wait - didn't I need to run the Great Trench in order to power up the Magic Lantern? Well no, as it turns out. Apparently you can also recharge the device in the spot above Istory Falls where you first find the item. I wish I had known that earlier, as it would have saved me a ton of walking...

One thing you really notice when using the Brave Blade is all the fights that you characters usually run away from. The Tonberi encounters in Istory falls are a prime example. These guys have almost 40,000 hit points and give menial experience and gold. They use an extremely powerful Cleaver special attack, which ignores defense and dishes out something like 2000 damage per hit. Again, I normally avoid this battle like the plague, but that wasn't an option here. After getting wiped out on my first try, I realized that the solution was to have Sir Arthur use his Guard command right before Cleaver came out. (The Tonberi telegraphs the attack by moving closer to your party, so it's easy to know when it's coming.) That produced the screenshot above, and allowed me to win with minimal difficulty. Guard definitely has its uses, even in a solo playthrough!
Leviathan was beyond easy, the Coral Ring providing free healing and each attack doing over 6000 damage.
That meant that it was quickly time to go into the Cleft of Dimension for the final fights. Arthur was already a little above average on the leveling curve (at 56), due to his vow to avoid running from battle. I continued to use the Running Shoes as his accessory, along with the Bone Mail armor. I've come to the conclusion from my solo playthroughs that this is the optimal endgame combo for virutally all situations, with the Bone Mail providing great defense and protecting against a half dozen status ailments, while the Running Shoes allow for extremely fast response to enemy actions. It's not just about getting in more attacks; Haste status lets you heal yourself, change rows, use items, or do anything at double pace. There's no excuse not to be in Haste status at all times, unless another accessory is needed for defensive purposes. The Running Shoes really are that good.
The parade of bosses in the final dungeon were not overly intimidating. The random encounters proved more interesting, since they could not be avoided:

I usually run from these Achelones, for example. They have a high evade and are hard to hit, plus they respond to physical attacks by using the stoning attack Demon's Eye. I had to equip the Aegis Shield to defend against that, which cut down on offense somewhat. The Ninjas in the Dimensional Castle were also a bit of a pain, for the same reason. One thing I would do in these fights is have Sir Arthur use the Defender Sword in battle, which casts the spell Armor (cuts physical damage by half). This helped to reduce attrition via potion use.
Wood Sprite and Apanda were cut down without even blinking. Apocalypse only got in a total of three attacks before croaking. He even used Condemn on one of those rounds, and Sir Arthur slew him before the counter could reach zero. I think that's the first time any of my characters have pulled that off against a major boss! Catastrophe and Halicarnassus were both easy meat. Twin Tania was slightly more interesting, although I never even had to use an Elixir because his Tidal Wave attacks kept healing Arthur via the Coral Ring. With 4000+ health, Giga Flare wasn't something to worry about. I'm skipping pictures of these fights because I've shown all of the bosses plenty of times already. Besides, the random foes I usually run away from were more interesting anyway:

The foes in the Void itself aren't overly hard, however I tend to skip them because they don't give any experience points for winning battles. This area is the best place in the game for gaining Ability points, but no experience sadly. (This is one way that the game tries to discourage players from grinding, another sign of a well-designed system.) Enemies like this Crystal Dragon were still relatively fresh to me, and therefore made entertaining fights. Conserving Hi Potions with Arthur was harder than with any other character since Solo though.
I did manage to make it all the way up to Necrophobia in one go. Sir Arthur had enough firepower to kill the Barriers in two hits each, and enough health to survive four castings of Flare/Holy. I made sure to prep for the second half of the battle by using Golem via Magic Lamp and Armor via the Defense Sword. As such, the rest of the fight was surprisingly easy, and since Necrophobia never even tried to use Maelstrom, I did the second half without using a single Elixir for the first time ever! Neat.
Arthur still had to walk all the way back out again to recharge the Magic Lamp. I made it out with about 10 Hi Potions left, heh. After restocking and refilling everything necessary, it was time for the final battle:
Against the initial "Tree" form, Sir Arthur began the fight by equipping the Defense Sword (to cast Armor again) and the Aegis Shield. O, that wonderful Aegis Shield! Its ability to block the Stone instant death attack nullified the one great danger in this boss fight, Exdeath's White Hole. It was well worth giving up the extra damage from Double Grip. As such, Arthur won on the first try without issue.
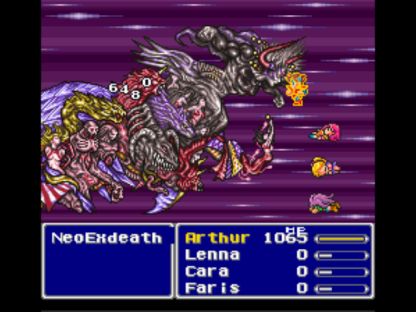
The final multi-form Neo Exdeath is always a little more complicated. Obviously I had an Odin summon remove Part #4, but I was ready to implement a slightly different strategy this time around for the other three parts. Rather than go after the physical Part #3, I decided to target Part #1 (Grand Cross), which was the only really dangerous one in the bunch. With the Brave Blade doing massive damage (see above), this went relatively smoothly, even though that part has 55,000 hit points. Arthur was hit with two Grand Crosses, which inflicted Darkness and Confuse status on him. Thankfully Arthur had full health when he was Confused, so that he didn't kill himself instantly with the Brave Blade!
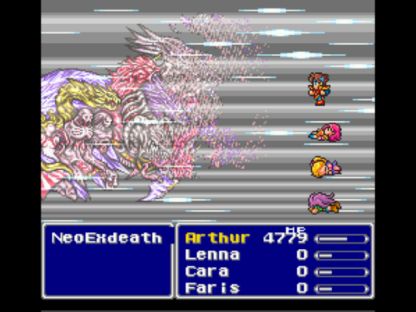
Neither Part #2 or #3 are overly dangerous; although they will slowly wear you down with a combination of Almagest and physical attacks, there are none of the insta-death moves like White Hole or Grand Cross. I had all the time in the world to whittle them down, and make sure Arthur got the kill. Once the two of them were down under 6000 hit points, Arthur had to swap to alternative weapons that did less damage, as the next summon from the Magic Lamp only did ~1000 damage. I had to get them both under that total without defeating them! This is another reason why I save all those old weapons, to have them on hand just for an occasion like this. Anyway, with some playing around, Arthur got them both into the critical range and finished them off with a Syldra summon:
Sir Arthur thus lays claim to the same honor as Kambei, by winning the final boss battle on the very first attempt. What did they have in common? Two words: Aegis Shield. It's really that important. For a non-variant playthrough, equipping anything other than this shield at the end of the game practically amounts to a handicap. Use it! I was also kicking myself for not hitting on this superior Neo Exdeath plan of action sooner. I was so locked in to taking out Part #3 first because Solo, my original solo Monk, HAD to remove that part at the outset. Its physical attacks would have caused that part to kill itself with Counter regardless of what I did, so I couldn't "save" that part for last. I was still stuck with that train of thought even though it wasn't needed for my other characters! The good news is that I should be able to do the last battle much easier with many of my future runs.

Arthur finished at level 59, just behind my other two melee characters Kambei (lvl 57) and Arjuna (lvl 58). Keep in mind that this included skipping an entire dungeon! You really do get more experience by fighting every single battle, imagine that. On the whole, the Knight was a lot of fun to play, and probably slightly harder than I expected it to be. Yes, everything in the third world was a cakewalk after getting the Brave Blade - but prior to that, much of the game was a little on the tough side. The Knight's slow speed and complete lack of any magical ability are some major drawbacks. Double Grip is easily among the game's best abilities, however, and helps compensate for a LOT of other shortcomings. Too bad those "Equip Shields/Armor/Swords" abilities are all so useless!
By defeating the final boss, Sir Arthur was officially promoted to KING Arthur, as I listed at the top of this page. I hope you enjoyed reading through the journey, and will stick around for the future ones to come. 


