
Just when you thought that we were finished with the Final Fantasy 5 solo games, it turns out that there's four more jobs available to use! These are the new classes added in the Gameboy Advance remake of FF5, which in most other respects is a near-perfect port of the original Super Famicom cart. (Do not use the Playstation version of FF5, the one with the horrible translation and the glacial load times, under any circumstances.) These four new classes do not arrive in normal play until the very end of the game, and the extra bonus dungeon in the GBA port is more of a tedious grindfest than an interesting challenge. Nevertheless, the GBA version provides some new content to explore, and I plan to go through the game again with at least some of these jobs as solo runs. This first one with the Gladiator class was recorded on Livestream as well, largely because it was requested by viewers when I was doing the Four Job Fiesta stream earlier. Links to the streaming sessions are posted down at the bottom of this page for anyone who's interested.
As for the Gladiator class itself, this is another melee fighting job that has some strong options under the normal rules, and turns out to be brokenly overpowered when using an "All Jobs" cheat to access it from the beginning of the game. The Gladitor's signature ability is called Finisher, which has the chance to do three different things:
1) Attempt Failed: nothing happens
2) Critical Hit: a "Critical Hit" is carried out (more on this below)
3) Elemental Attack: your character deals 9999 damage, attuned to their crystal element (Bartz = Wind, Lenna = Water, Galuf/Cara = Earth, Faris = Fire)
Needless to say, those 9999 damage attacks from Finisher are ridiculously overpowered in the early parts of the game, one-shotting pretty much every boss. Obviously you are not supposed to have access to the Gladiator class at this point, and indeed there's no Gladiator sprite for Galuf at all! By the end of the game, however, Finisher is certainly no worse than abilities like X-Fight and 2-Handed, to say nothing of GilToss and Mix. The elemental part of the damage can be resisted or absorbed, and it's not like every use of the command is a successful Elemental Attack either. The starting odds are 6/16 for the attack to fail, 6/16 for the critical hit, and 4/16 for the elemental part. The odds for Elemental Attack improve with every job level (not character level) of the Gladiator class, eventually finishing at 4/16 for attempt failed, 4/16 for critical hit, and 8/16 for the elemental attack. In other words, this is like a beefed up version of the Dancer's Sword Dance command, where you're picking Finisher and hoping for good luck from the dice rolls. It might even be weaker in lategame, considering how many monsters are immune to elemental damage. For all its randomness, Sword Dance always hits the target and the damage can't be absorbed or resisted.
There are some other interesting abilities on the Gladiator class as well. The first one is the passive skill "Lure", which increases the random encounter rate of monsters. I suppose that could be useful for grinding somewhere, otherwise not that interesting. There's another more useful passive in the form of "Long Reach", which allows characters to attack from the back row without penalty. (Normally the attack modifier M is cut in half for characters in the back row.) That's a very useful skill to have in all sorts of situations! I anticipate using that a lot. The final skill for mastering the class is the activity ability "Blade Blitz", which hits all enemies on screen with a penalty to the attack modifier. (M = M * 3 / 4, or roughly 25% less damage.) This could also be helpful against swarms of weaker monsters, although it does mean giving up the use of Long Reach.
I named my Gladiator after Russell Crowe's character in the movie Gladiator, who had the somewhat unoriginal name of Maximus. (In Latin, maximus simply means "best" or "greatest". They weren't exactly digging deep there on the symbolism.) I did the start of the game up to the Wind Shrine in normal fashion, then went ahead and changed classes:

Unfortunately there's only room for six characters on the naming screen, so we have Gladiator Maxmus here. Hey, there's no "I" in "Team" when working to defeat Exdeath! Err, except that this is a solo game here, so... uh, anyway, moving on. 
It's a bit of a shame that the Gameboy Advance runs on a smaller resolution than the original Super Famicon version of Final Fantasy 5. This means that the status window has to be spread across two different screens, and there's less field of view while playing the game. The Gladiator class has very good stats overall, starting with a Strength value of 54. That's the highest in the whole game, tied with the Monk for best value. Strength of 54 means an additional attack multiplier every 2.37 levels, which is a lot. Believe me, I've had to use physical attacks with featherweights like the Bard (Strength 20) and the Summoner (Strength 18). It makes a difference. The biggest surprise is the Agility stat, which is also among the game's highest at 39. That's the same as the Ninja and the Mystic Knight, with only the Thief acting faster. I was repeatedly surprised at how fast the Gladiator was able to issue commands while playing this run. The tradeoff for that speed is the Vitality/Stamina stat, which is only average at a value of 30. Most of the fighting classes have much higher numbers there, which means that the Gladiator will have only average hit point growth. Of course, you can stay in the back row most of the time after getting Long Reach, which helps overcome this issue. Finally, the Magic Power stat is garbage, but that shouldn't matter for a class that doesn't cast spells with any of its abilities.
Overall then, this is an extremely strong class, and doubly so when unlocking it from the start of the game. Gladiators can make use of nearly all of the game's weapons, using daggers, swords, spears, axes, bows, and shields. If you've read the past solo reports here, then you should know about the importance of having shields equippable. (Aegis Shield hype!) Enough of this background description. Let's get started.

Normally in a solo game I would build up a few levels in the Wind Shrine, while trying to farm a few Elixirs in random drops, before heading off to the Torna Canal to face Karlabos. That didn't seem necessary here though, so I merely fought a handful of battles to reach Level 8 (where Maximus would pick up another attack multipler) and then headed off to face the red lobster. The gameplan was simple: use Finisher and hope for the Elemental Attack insta-kill. In the first battle, Maximus was unable to come up with the successful dice roll and found himself strangled by tentacles. On the second attempt, I failed the first attack and then was paralyzed by the Tentacle attack. This was followed up by Karlabo's Tailscrew move (reducing health down to the critical range), and the stream chat called game over. However, I knew from the Karlabos AI routine that there was 1/3 odds that the boss would use Tailscrew a second time, having no effect, and Maximus would get one final chance to land a killing blow. Karlabos did indeed go with the Tailscrew move, followed by Maximus hitting on his Elemental Attack, and there was at least one very embarassed face in the stream chat. Instant victory.
Note: I've played this game too many times using the fan translation patch to alter all the names of monsters/spells/abilities. I'll just go with what I've used in past reports, even if it doesn't always line up with the official GBA translation. Apologies for any confusion.
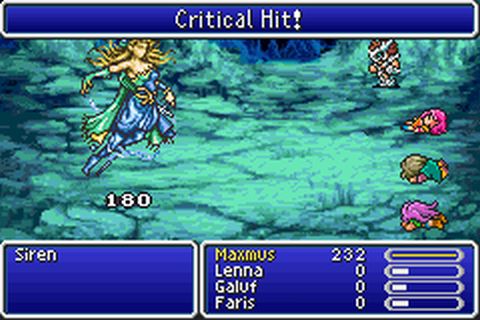
The Ship Graveyard was fairly uneventful. I picked up one Elixir in a random drop, that was the main highlight. I also used this area to test out if Finisher would deal the same damage from the back row; my guess was that the damage would be row independent, and yes, that turned out to be correct. There's no reason to fight these boss battles from the front run when using Finisher. Against Siren, I took a screenshot of a critical hit from Finisher to demonstrate what that looks like. Unfortunately the updated Algorithms guide created for FF5 Advance is an incomplete work that never explains the exact formula for this attack, but as far as I can tell it is *NOT* the same as a normal critical strike. The standard crit is supposed to double the attack value (not the modifier M) and reduce defense to zero. The fact that crits completely ignore enemy defense is what makes them so strong normally. However, the Finisher "Critical Hit" definitely does not work this way. After experimenting a bit, I'm reasonably certain that the Finisher version simply doubles the modifier M, identical to the Monk's BuildUp or the Knight's DoubleGrip. This is still pretty good, but it's nothing like a true critical hit, and it doesn't even double the overall damage (unless you're hitting a target with zero defense). I found this to be a bit underwhelming.
As for Siren, I downed her with another successful use of Finisher for the 9999 payout. I picked up the Regal Cutless (or whatever it's called in this translation) in Carwen along with some Bronze armor, then went off to North Mountain. All of the critters up there died with a single normal attack, just as they had in the Ship Graveyard. I was impressed with the strength of the Gladiator class even without the early game brokenness of Finisher. Against the two bosses, I tried to kill Magissa normally, but was unable to drop her before she summoned Forza. Since Maximus had no chance in a straight up fight, I fell back on Finisher and landed the insta-kill on the first shot:

That's what the Elemental Attack looks like in progress, it has a nifty little animation to accompany it. (It's a reuse of the Samurai's Slash move, with slightly different colored effects.) Then I picked Finisher again, and landed another Elemental Attack on Magisa immediately thereafter. Two in a row!  Well that was rather easy. It raised the question of whether I should be using Finisher at all, or if that move was too much of a cop-out for the beginning of the game. I recall that T-Hawk didn't use Finisher when he was playing through his solo Gladiator run a few years ago. This was a decision that I had made before the run started, however, and I intended to keep on using Finisher for these battles. I think of these solo runs as using each class to the maximum extent of their abilities, and if that meant verging into overpowered territory sometimes, then so be it. Fights like these certainly would be possible without Finisher, it would just mean grinding out some more levels (for more health) and getting a few Elixirs for health restoration. I've already done far weaker classes as solo games, so it's not like I had anything to prove here. Taking extra time to grind levels and items would only serve to bore the stream viewers. Besides, I previously abused GilToss with my Samurai and Mix with my Chemist (everything other than Kiss of Blessing) - why not the Gladiator's Finisher as well? I encourage you to go and read T-Hawk's writeup for the non-Finisher Gladiator. It's well written and certainly worth your time.

Galura/Garula can't damage a character wearing the Heavy set of armor, which meant that the next boss fight was a walk in the park. I did this one without using Finisher, not that it mattered. This is another cool thing about the Gladiator class, as they can use both the Heavy and Medium sets of armor. They are very versatile in their weapon and armor setup. In Karnak, this meant equipping a full set of Mythril gear, the Mythril Sword/Shield/Helmet/Armor/Glove. Maybe all that silvery stuff even fit with the Gladiator sprite design, which I still maintain looks more like someone out of a glam rock band than an arena fighter from the classical period. (One of the stream viewers suggested that these costumes may be from the "gladiators" who fought in the Thunderdome from the 1980s movie Mad Max. It's as good of a suggestion as any that I've heard.)
Liquid Flame was going to be another easy boss like all the rest. Walk in there, use Finisher, wait for the boss to die...

Oh. That wasn't supposed to happen! It turns out that all three forms of Liquid Flame absorb the wind element of Bartz's Elemental Attack, which is something that I hadn't known because normally you have no access to wind damage at this point in the game. Or, as one of my stream viewers put it, "Your wind attack has only fanned the flames and made the boss stronger!"  Should have seen that one coming. Fortunately Liquid Flame is pretty easy to defeat if you know your way around the AI programming of the three forms. This was made even easier by the fact that the Hand form only uses physical attacks, and it couldn't deal enough damage to get through Maximus' armor. I was able to heal up using a long sequence of Potions (50 HP restored each), and only had to worry about danger from the Human form. I would end up using one Elixir when the enemy attacks lined up incorrectly, and otherwise this was fairly straightforward. See, Finisher isn't the solution to everything!
I picked up the standard full complement of Elixirs + Guardian dagger (Main Gauche here) + Elf Cape (Elven Mantle) before Karnak Castle could explode. I tried to use Finisher against the Iron Claw miniboss at the end of the sequence, but after the first three attempts all failed, I took the safe approach and downed him with six normal attacks. No problem.
That was the end of the first streaming session, and a convenient stopping place at roughly halfway through the first world. Afterwards, I looked ahead at upcoming bosses for the first time, and realized that I was going to have a problem against Byblos. The demonic book wouldn't take any damage from Wind element attacks, making Finisher useless, and I had no other reliable means to do this battle. The one saving grace was the Fire Bow dropped by Liquid Flame, since Gladiators can equip bows and that would give me a source of Fire element damage, the one weakness of Byblos. (Attacks with an elemental weakness essentially always act as true critical hits: double damage and enemy defense value set to zero.) There was just one problem: I hadn't known that Maximus would need that Flame Bow, and so I'd make no particular attempt to kill Liquid Flame in her Tornado form. I'd actually missed the item! With no older savegames lying around, the only choice was to restart over again from the beginning. Fortunately that wasn't as bad as it sounds; playing offstream and making liberal use of the emulator Fast Forward option, I made it make to the same point in the game in about 90 minutes of real world time. I also grinded out about ten extra levels in the process, which were not strictly necessary but would make it less likely to get future game overs and force repetition for stream viewers. When I started up again on stream, the new Maximus replicant was Level 31 and had a Flame Bow in tow.

Ifrit was dispatched without any fuss, I downed him with normal attack using 3 Elixirs, then immediately reloaded a save state and rekilled the boss using Finisher. It was easy enough either way, I simply wanted to avoid wasting Elixirs. Byblos would be a bit more complicated. I wanted to avoid his Armor spell (which would effectively cut physical damage in half), and try to prevent Drain from popping up at all, which Byblos will cast repeatedly when he gets under 800 health remaining. My solution was to start the battle using Finisher, but *NOT* in the hopes of landing an Elemental Attack. Any Elemental Attack would only heal Byblos for 9999 life restored, heh. My goal was instead the "Critical Hit" move from Finisher, which would deal doubled damage in identical fashion to the Monk's BuildUp ability. I had calculated that one "Critical Hit" along with one normal attack would be enough to defeat Byblos. Unfortunately the game's RNG simply would not line up properly here for a good five minutes. My first two "Critical Hits" from Finisher ended up missing Byblos (it's not a guaranteed successful hit, and the Flame Bow only has 70% odds to hit), and then after that I rolled ten non-Crit moves from Finisher in a row. Yes, the other two options came up ten times in a row!  All of this prompted a number of resets. Finally, I managed to land the attack displayed above for 2500 damage, and then one more normal attack sealed the battle. That could have, should have, easily happened on the first try!
Next up were the typical errands available upon obtaining the ship. I picked up the Coral Sword and Mage Masher dagger in Jachol, then a Flame Ring in Istory village. Once Maximus found an Ice Bow a little bit later, he had access to weapons with each of the game's three primary elements: fire/ice/lightning. With the combination of shield + Elf Cape + Guardian Dagger, plus the ability to sit in the back row with Long Reach, Maximus was almost impervious to physical attacks. He managed to kill some of those Corvette monsters in the ocean without any real trouble just by dodging all of their normally brutal attacks. Only magical damage and low Vitality kept Maximus in check.
The Sandworm was very easy for a non-Berserker character. There was no need to use Finisher here, six normal attacks was plenty. At the other end of the desert was something new in the GBA translation:

This version provides a name for the destroyed city in the form of Gohn. Is this in the Super Famicom version, or was that a later revisionist addition? I'm going to have to check the Japanese version of this game to find out. I have to admit that I'm curious.
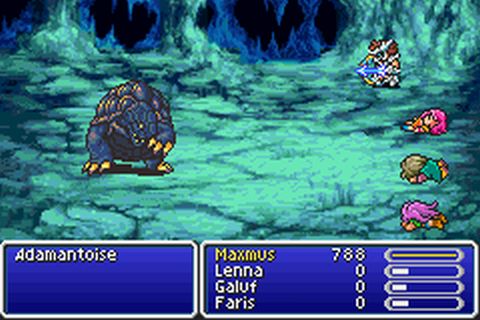
Crayclaw died to two hits from the Coral Sword. He actually came close to dying in a single hit, I think Maximus did 1800 damage and the steel lobster only has 2000 HP. The Adamantium tortoise was almost as easy, taking 550 damage from each shot of the Ice Bow. This would have been a two hit kill as well, except that Adamantium is always in Armor status for this battle. Four shots from the bow worked out just fine, I didn't even need to use any recovery items.
Sol Cannon was next, and that was indeed going to be a problem. This was another boss where the Wind element from Finisher would be completely useless, as Sol Cannon resists the element. (Both the Cannon itself and the Launchers; they take 0 damage instead of being healed, not that this little distinction mattered!) I was going to need some kind of strategy here. My initial thought was to use Finisher on the two Launchers and hope for the "Critical Hit" result. In an ideal scenario, I would get a Critical Hit from Finisher to take out the first Launcher, then have enough magic evade to dodge the first missile, then use Finisher again to one shot the second Launcher. After this failed horribly the first couple of attempts, I started to look at the math involved. Each Critical Hit had roughly 1/4 odds to come out of Finisher, so I would need two of them to go off in succession, and Maximus would also need to dodge a missile at something like 1/10 odds. Ummm... those odds are about 1/160, or 0.6 percent (.006). In other words, possible with enough repetitions, but certainly not Livestream friendly. There needed to be a better way.

Of course there was a better way: grind up enough gold for an Angel Ring to block the Aging/Old status from those Launcher missiles. Then Maximus could get hit by all kinds of missiles and it wouldn't matter at all. This was clearly the better option, and so I powered through a series of battles on Crescent Island (hoping for Doom Axes/Death Sickles to drop since they sell for 3000 gold) and eventually reached the necessary 50,000 price tag. Maximus gained three levels in the process, up to Level 35, and with an Angel Ring equipped, I was able to do this battle without much trouble. Kill the Launchers first using two normal attacks with the Coral Sword each, then slowly start wearing down the Cannon iteself. The Coral Sword was the best choice here because it was guaranteed to hit (unlike the Doom Axe's 15% miss rate) and Sol Cannon is weak against lightning element. I had to drink 3 Elixirs, but was never in any serious danger.
The Lonka/Ronka Ruins were a lot of fun. Maximus used a combination of the Coral Sword, Ancient Sword, and the Doom Axe to defeat different monsters depending on what he was facing. I was lucky enough to get the Darkness Bow in a random drop from the Whirl Demons, one of the few ways to inflict Darkness status in this game. Then the same bow dropped again a few encounters later. Then it dropped a THIRD time! Random numbers can be so silly sometimes.  The other highlight was running into the rare Hydra monster near the bottom of the ruins. I figured that I would use Finisher here for the fast kill; nope! The Hydra absorbs Wind element damage. OK, then let's attack with the Ancient Sword. Nope! The Aging effect bounced off the monster's Wall status and hit poor Maximus himself. At this point, all I could do was laughingly hit the reset button and start again from the last save point.

OK, back to more serious matters. Archaeoavis is a masterfully designed boss, and one that I enjoy fighting with most classes. For Maximus, I went into the battle with as much physical evade as possible: Guardian dagger, Gold Shield, and Elf Cape (roughly 65% total chance to dodge). The Flame Ring will block ice spells from Archaeoavis, and cause fire spells to heal your character, but the biggest threat is the physical attacks from the boss that carry status effects (paralyzation, confusion, etc.) Trust me, take the Elf Cape over the Flame Ring here for solo characters. The first four phases all lacked any resistance to Wind element, so I used Finisher repeatedly and powered through with 9999 damage strikes. The final undead phase is immune to nearly all elements, and Maximus would have to use his normal attack. I plugged the monster with one shot from the Darkness bow to put it in Darkness status, and that reduced the to-hit chance from physical attacks down to something like 10%. A couple more autoattacks with the Ancient Sword sufficed to polish off the beast after that. It went more or less perfectly according to plan, which is a bit of a rarity in this game. Couple of Elixirs burned and that was it.
This was the end of the second stream session, as I knew that I needed to grind out some more ability points before fighting the meteor miniboss trio. As usual, it was the Puroboros that were going to be a problem, with Maximus lacking any area of effect damage options. There was a ready solution in the form of his Blade Blitz ability, which would require mastering the Gladiator class. I killed a Prototype or two for the fun of it, but those battles were too dangerous to be worth fighting, even with their 4 ABP reward. Instead, I went to the Cave of Jachol, which is infamous in the FF5 community for being the place to grind out ability points in the first world. The Skull Eaters in there could be killed by Finisher's Elemental Attack, and they were worth 5 ABP per battle. They would also run away and grant the same five ability points much of the time. I was able to pick up about 200 ability points here pretty quickly, albeit with the need to save frequently since the Skull Eaters still had the possibility of killing Maximus.

With the Gladiator class now mastered, I could begin a new streaming session and face off against the meteor miniboss trio. The Chimera Brain and Titan were both easy to defeat, as usual. Ancient Sword to inflict Old status, Darkness Bow to blind them, then auto attack away. Both of them fell without issue on the first attempt. The Puroboros were the difficult opponent yet again, and here I was able to break out Blade Blitz for the first time. This ability hits all monsters on the screen for slightly less damage than a normal autoattack (the modifier M is set to M = M * 3 / 4, or roughly 25% less damage). Notice from the picture above that Blade Blitz deals less damage to enemies in the back row, and it also deals less damage if the Gladiator himself is placed in the back row. Sadly, it's not possible to use both Blade Blitz and Long Reach at the same time (since the Gladiator class always has Finisher as the default ability), which meant that Maximus was going to be swapping between these two abilities quite a bit from here on forward.
As for the Puroboros, I used Blade Blitz three times to kill the trio of bombs in the front row. At that point, two of the three monsters remaining used Exploder to kill themselves, which Maximus had just barely enough health to survive. I think he had about 50 HP remaining. After that, I used some healing items and waited for the final Puroboros to blow itself up, since attacking and killing the last one would only prompt it to revive the rest with Life 2. Fortunately they will never cast the reviving spell if they are the ones commiting suicide. This battle was therefore also overcome with a minimum of fuss; I would have dreaded doing this one without Blade Blitz.
In the Exdeath Castle escape sequence, for once I was able to continue the solo class challenge. Even Level 1 solo Galuf could defeat Gilgamesh if he managed to land an Elemental Attack with Finisher! I converted Galuf into a Gladiator, gave him as much physical evade as possible, and hoped to land a successful Finisher dice roll. Now Galuf will not be with your party by the time that you obtain the Gladiator job normally in the third world, and as such there is no Gladiator sprite for Galuf. This led to an interesting showdown:


Gilgamesh battled against an invisible opponent!  That must have affected his fighting prowess, because for the longest time he could not manage to hit Galuf. Round after round of combat saw Galuf dodging blows that would have killed him. Each time, a shield would appear out of thin air to block the strike, or a cape would suddenly flash out of nothingness. Meanwhile, Galuf was failing his own Elemental Attack over and over again as well. I believe that he rolled either Critical Hit or Attempt Failed a full dozen times in a row! We were even beginning to speculate on Livestream whether it was actually possible for the invisible Gladiator Galuf to pull off an Elemental Attack. The whole thing was a ridiculous farce worthy of the Gilgamesh character. Finally the Elemental Attack went off, and that brought down the curtain on a memorable escapade. (Note the yellow color of the screen - Galuf's Elemental Attack is attuned to Earth element rather than Wind. Otherwise it's exactly the same.)
The subsequent battles were not nearly as interesting. The Big Bridge Gilgamesh fight was another place to use the Ancient Sword / Darkness Bow combination, which combined to neutralize just about anything that Gilgamesh could do. The GBA version fixes a bug in the SNES original whereby Aging status only drained away monster Agility and not their Strength - the status is supposed to sap away both. This makes the Ancient Sword a much more potent weapon. I did use Finisher at the end of the duel as a finishing move (heh) to avoid the need to waste Elixirs. Rugor/Regole village added another status-inflicting weapon in the form of the Sleeping Sword to Maximus' arsenal. There wasn't much else of note along the Moogle Village part of the storyline. I had an elemental weapon of some kind for all of the monsters in the underground waterway (Coral Sword was quite good down there), and the Tyrannosaur was Phoenix Downed as usual. Here was the one thing that stood out:

Maximus could use Finisher to kill the Cactus enemies in the desert next to the Moogle Village. You are not supposed to walk through this area, the game is set up to produce an instant game over if you don't follow the little moogle's safe path around the desert. Maximus was strong enough to ignore all of that and kill these foes anyway. Sadly they didn't provide much in the way of gold and experience, making it not worth the effort.
I grabbed the hidden Epee sword in Bal Castle, and that provided a high damaging weapon for Blade Blitz use for the next several areas. Blade Blitz was generally more useful against random monsters, where I wanted Maximus to take out waves of weaker opponents with area of effect damage. Long Reach was the winner against most bosses, where the extra safety came in handy and Finisher became the offensive skill of choice. With the heavy set of armor, plus the ability to equip shields, Maximus didn't find himself taking much damage in these random encounters. He was also able to pick up the Bone Mail in the Hiryuu Valley / Drakenvale, which has this amusing caption in the GBA version:

Apparently every piece of equipment has a short description on the equip screen in this game. Most of them are pretty bland, but someone was having fun when they wrote this one. Armor fit for a corpse - I love it! With the Bone Mail equipped alongside the rest of his heavy gear, Maximus was taking 0 damage from many of the monsters in this area. The dreaded Bone Dragons could knock his health down to almost nothing and paralyze him... but their attacks always did zero damage, so they could never kill him. I'd been expecting to get some game overs here because Maximus was avoiding running from battles for Brave Blade purposes later, and this was a pleasant surprise.

Blade Blitz worked perfectly against the Hiryuu Plant/Dragon Pod. Took a while, but Maximus was never in any danger.
For the third Gilgamesh fight on the ship, I once again plugged the fellow with the Ancient Sword and the Darkness Bow. Because Aging status has been fixed in the GBA version, this meant that Gilgamesh could no longer damage Maximus at all once the Old status had drained away his physical strength. I didn't have to worry about the dreaded Death Claw at all, since Gilgamesh would never be able to deal more than zero damage. The one threat came in the form of Enkidu, and so I had Maximus use Finisher against him to avoid the need for many repetitions of this battle. Enkidu did kill Maximus on the first try, but fortunately it all lined up properly on the second attempt. I probably would have done this without Finisher if I had been playing off Livestream. In any case, I needed to fight a bit in the Barrier Tower to produce a Wall Ring drop, so this was a convenient stopping place for this streaming session.

I turned up a Wall Ring (Reflect Ring in this translation) in a medium amount of time offstream. Not immediately, and also not an obnoxiously long amount of battles, somewhere in the middile. Upon starting up a new streaming session, Maximus made his way to the top of the Barrier Tower without any real problems. The Red Dragons in the trapped treasure chests, the bane of several past ventures with normal parties, fell easily to the power of Finisher. Against Atomos, the plan was to hit him with the Slumber Sword, put the big vaccum cleaner to sleep, and then start using Finisher and hoping for Elemental Attacks to pop up. For whatever reason, this didn't work out. Maximus missed out on the sleep effect on all four melee attacks, and Atomos quickly finished him off from there. Hmmm. Newer and simpler plan: spam Finisher and hope for Elemental Attack to appear immediately. This worked on about the fourth attempt overall, with Maximus landing a pair of Elemental Attacks back to back for the instant kill. What an amazing use of strategy on my part!!! 
Sage Guido's Cave was as boring as ever. Maximus spammed Finisher and hoped for Elemental Attacks for the one hit kills on the Metamorphas. Amusingly enough, the very first battle produced a Light Staff drop, something which was completely useless for the Gladiator class. I ran some emulator Fast Forward here to cut down on the tedium. (Someone tell me why this whole minidungeon has only two different random encounters possible?!)

The Forest of Mua (Moore) was its usual self, relatively easy battles with huge payouts of gold and experience. Blade Blitz was the star of the show here, hitting all of the monsters at once. This was particularly useful against the Galajellys (whatever the heck those things are!) which have very high physical evade (50%) and are immune to most elemental damage. Blade Blitz would effectively serve as a weak physical attack against all of them at once, helping to power through these battles more quickly. Wearing the Bone Mail protected Maximus against most physical attacks, blocked some nasty status ailments, and even reversed the magic-draining Pysch/Osmose spells used by the Minimages. I was also able to pick up the Flame Tongue sword and marvellous Aegis Shield at the end of the Forest, both of which would be extremely useful going forward.

The Crystals at the end were not difficult for someone with as many tools as Maximus. Equipping the Flame Ring as usual turned the Fire Crystal into a source of endless healing. I broke out the old Doom Axe to kill the Wind Crystal in the back (since it was immune to the Wind element of Finisher), and then used Finisher's Elemental Attack to kill the rest. I could have done the battle with auto attacks alongside healing from the Fire Crystal, or used the Darkness Bow here to blind the Crystals, or any number of different things. Lots of options in this battle.
Prior to the Crystal boss fight, I had turned Galuf into a Gladiator again, and given him the Wall Ring to reflect back Exdeath's spells. Time for another invisible duel!

Of course, invisibility from not having a Gladiator sprite did nothing to block Exdeath's physical attacks, and Galuf was reduced to zero health immediately. The old man managed to land some nice Elemental Attacks though, as well as quite a few "Critical Hit!" moves from Finisher. These did 12 damage each, since I had forgotten to give Galuf a weapon and he was fighting with his bare fists. It was pretty funny watching a non-existant character pummel Exdeath with his bare hands. Anyway, the cut scene was over soon enough, and Galuf was replaced with Cara/Krile, who does have a Gladiator sprite:
She looks... weird.  Think I preferred the invisible Gladiator!

Exdeath's Castle was probably the most entertaining dungeon of the game to date. Maximus was able to show off the full range of his kit, and make use of the versatility of the Gladiator class. For starters, both Long Reach and Blade Blitz were useful at times, although I went with Blade Blitz as the default ability for random encounters. Long Reach would be saved for use against bosses. I had Maximus using Blade Blitz against swarms of the small fries, with Finisher also getting heavy use against some of the monsters with high health totals. Finisher was a life saver against those dreaded double Yellow Dragon and triple Blue Dragon random encounters. That's not to say that I was using the same weapon all the time, however. Maximus was swapping around between four different tool depending on the situation. The Ice Brand sword had the highest overall attack value, and was useful as a default weapon. The Air Lancet dagger was perfect against the Magic Dragons and their weakness to Wind element damage. The Gale Bow (which is hidden inside Exdeath's Castle) had the unique property of being row independent; it would deal full damage from the back row without Long Reach, and it would also deal full damage to the monster back row too. This was useful in certain circumstances where I wanted to kill all of the monsters at once to avoid triggering potentially fatal instant-death spells. Finally, the Flame Tongue sword naturally possessed Fire element damage, allowing Maximus to heal himself with a Flame Ring equipped. It even did double damage = double healing as a result of the Bone Mail! Maximus was not the first character to use this trick, but the sheer scope of his possible options rivalled the Bare class. I had a lot of fun with this part of the game.
I was going to fight Gilgamesh with normal attack, only for him to break out Sonic Wave / Dischord and cut Maximus' level in half before two seconds had passed. Well screw fighting fair then! He got a pair of Elemental Attacks from Finisher, and that quickly ended the battle.

Finisher was always going to be the solution against Exdeath, and it worked more or less as I expected. Exdeath has 32,768 health (and it's sad that I know that off the top of my head) which meant that it would take four successful Elemental Attacks to win this one. With a Wall Ring to reflect back harmful spells, and Long Reach for free back row status without penalty, I was confident that Maximus would win this battle on the first attempt that didn't start out with Condemn. Unfortunately, the first seven tries at Exdeath saw him starting out with Condemn, which meant an instant game over each time. This wasn't all that unusual, since he has 2/3 odds to use Condemn and I've gotten streaks as long as 12 or 13 in a row with past characters. (Starting seven times in a row with Condemn has roughly 6% odds, which is unlikely but hardly impossible.)
All of those deaths from the ticking doom clock must have sent Maximus in a berserker rage, because on the eighth try when Condemn didn't show up, he went into a complete fury. Here's the list of my command inputs: Finisher / Elemental Attack, Row swap (from a successful Exdeath Dynamo spell), Finisher / Elemental Attack, Finisher / Elemental Attack, Elixir to cure damage, Finisher / Elemental Attack. Six total actions, four uses of Finisher, four Elemental Attacks. Maximus was seriously pissed off!  "EXDEATH, ARE YOU NOT ENTERTAINED?" Wow. What an awesome finish to the second world!

The beginning of the third world offered up the Brave Blade, which was just as amazing as ever. Even with an ability like Finisher, having the Brave Blade was still highly useful. Many monsters died in a single normal attack, allowing me to avoid the randomness of Finisher's three possible outcomes, and even against bosses it was helpful to have the Brave Blade equipped for its huge +5 Strength bonus. Keep in mind as well that 25% of all Finishers became "Critical Hits", which would produce roughly 6000 damage with the Brave Blade. Not bad. In the Pyramid, Maximus made use of the Cursed Ring + Bone Mail combination, which had quite a few enemies doing zero damage attacks. I probably would have used this a lot more if the Running Shoes weren't available immediately after this dungeon. There's nothing in the game that can beat permanent Haste status though. Merugene was immune to the Wind element of Finisher, but that just meant that she died to a series of normal attacks with the Brave Blade. Easy.
Maximus had an actual choice of what weapons to grab from Kuzar Castle, since the Gladiator class can equip so many different things. I took Excalibur for its Holy element properties (the Holy Lance would have done the same thing, except that it has exactly one less point of damage, 109 to 110) along with the good old Assassin Dagger and Yoichi Bow. I thought that I might need the legendary bow in one situation or another, and I never did find a use for it over the rest of the game. Oh well. The other possibility was the Rune Axe, and that had attack power too low to be particularly useful. I ran the other usual errands with Maximus upon getting the airship back, heading to Mirage to pick up all the endgame stuff and so on.

Stalker was easily defeated in the Solitary Island Temple. I actually went into the battle with the Bone Mail equipped by accident, and still won anyway. These freaking birds though...  The Tote Avis monsters have 33,000 health and use Breath Wing (deals 1/4 of max HP in damage) frequently. If you manage to defeat them, you are rewarded with all of zero experience and zero gold. I feel like someone at Square was trolling the player when they designed this battle. Normally I just run away from these pointless battles with other characters (although it's a tough battle to run from too!), but Maximus lacked that option due to Brave Blade purposes. Time to use Finisher! Oh wait, the birds absorb Wind element. Lovely. There was nothing to do other than sit there and slug it out one attack at a time, with ten of them needed for victory. (Did I mention that Tote Avis also has 20% physical evade? Bloody hell!)
There was one trick that I could do here to heal. Although the Bone Mail ruled out use of Hi Potions or Elixirs, I could swap from the Aegis Shield to the Flame Shield in mid-battle, and then also swap from the Brave Blade to the Flame Tongue sword. This allowed Maximus to attack himself for some fiery healing, to the tune of about 1500 HP restored. I would do this in a number of situations throughout the remainder of the run, in places where dying would have required a lengthy walk back from a save point. The one real downside was a fair amount of micro required to swap all those weapons around each time. Effective, if a bit annoying.

Fork Tower was an interesting experience. Very interesting... I sent Maximus up the right side of the tower first and defeated Minotaur without a problem. That went easily enough. For the second half of the tower, I did my usual strategy of turning the three other characters in the party into Samurai, then making use of GilToss to get past Minotaur. That also went just fine, but when I was about to fight Omniscent, I ran afoul of a change in the GBA version. After Lenna and crew downed the Minotaur, when the game swapped over to the solo Bartz character, I opened up my inventory to re-equip Maximus and make sure I had everything set correctly for the Omniscient battle. However, doing this caused an instant game over! What the heck?! Apparently, I didn't "take the Flare spell" fast enough in line with the story sequence taking place in the background. Never mind that there was no clock on the screen counting down to destruction, and that the whole "we have to hurry!" plot is the most generic trite nonsense in video game history. This one time, apparently, you do indeed have to hurry. Opening the inventory screen causes an instant game over. (The SNES version does *NOT* work this way!) What a ridiculous sucker punch moment. Are we sure Kawazu wasn't in charge of designing this port?
The net effect was profoundly silly. Maximus had to set up his equipment for the Omniscient battle before Lenna and the other character had even taken one step on the physical side of the tower. From the moment that the girls started out on the right side of the tower, I would have no opportunity to control Maximus (over on the left side) before the Omniscient encounter began. That's profoundly stupid and caused me all sorts of headaches. On my second try at this, I took one step too many with Maximus, swapping over to the other tower before I expected to lose control. Reset, start the whole tower over again. On the third try, I forgot to equip Maximus with a Wall Ring to reflect Omniscient's spells, at least in part because I wasn't thinking properly about the battle yet. Another reset, start the whole tower over yet again. Cut me a freaking break. Is it too much to ask that I can open the darned menu screen before fighting a boss?! 
On this fourth try, I still didn't have everything set up properly. Maximus didn't have the Bone Mail equipped, which meant that he was vulnerable to Omniscent's Drain spells. I really did not want to walk back up Fork Tower for a fifth time though, so I did what I could to make this battle work. Omni reflected a Haste spell off of his own Wall early in the fight, and that opened up the possibility to counterattack. I had Maximus attack himself with the Mage Masher dagger, and eventually succeeded in reflecting a Mute spell as seen above. That opened up the chance to get off one Finisher attack while Mute was still in effect. (You have to be in Haste status for this to work. Otherwise your character isn't fast enough.) I missed a few of them, but eventually landed two Elemental Attacks for the kill. Whew. What a pain in the rear.

Maximus equipped Excalibur over the Brave Blade down in the Great Trench dungeon, since all of the Unknown enemies are weak to Holy element. I tested both weapons, and as expected, Excalibur did significantly more damage. Mostly this was a long series of using Blade Blitz on everything that popped up, mowing them down with few issues. The Blob Unknowns have their "Possess" attack keyed as a response to the "Fight" command, so Blade Blitz was perfectly acceptable. With the Running Shoes, Maximus could get off a whole bunch of them in a hurry. The Skeleton Unknowns died before their Condemn attack could tick down to zero. As for the piggy trio at the end, I used a combination of Aegis Shield, Bone Mail, and Flame Ring to defend against all of their potentially dangerous attacks. Maximus killed them with a combination of normal attacks and Blade Blitz, then for style points loaded a savestate and immediately killed them a second time with Odin from the Magic Lamp. Either solution worked.
Tonberries were the only dangerous monster in Istory Falls, again due to Brave Blade forcing Maximus to stand his ground and fight. I killed the first one that appeared using the strategy of "pick Finisher and pray for Elemental Attacks", but that failed to work on a second encounter that wiped out Maximus (fortunately just after saving). Hmmm. We can do better than that. The danger was those Cleaver attacks, which would land in rapid succession, too fast to heal. When Maximus died, he was hit with three of them in a row at roughly 1700 damage apiece. I needed to reduce the damage from those moves. The solution was to move into the back row, and then use the Defender sword for Armor status. Finisher still did full damage on an Elemental Attack from the back, and Maximus would be much safer there. When I fought a Tonberri for the third time, the Cleaver moves now did about 300 damage apiece, and that was easily survivable. Aha! That was using the old noggin. Everything else in the dungeon died with ease, including Leviathan (Coral Ring + Defender sword for Armor + Finisher from the back row with Long Reach).

I did the optional side quest stuff with Maximus in the third world, partly because it was entertaining for the stream viewers to watch, and partly because a strong class like the Gladiator is inherently fun to play. Phoenix Tower was long and uneventful, a stealth form of level grinding for this character. Bahamut required the use of a Wall Ring to defend against his Mega Flare, and indeed at the end of the battle the big dragon used his Mega Flare, bounced it off Maximus' wall, and then countered a second time with Mega Flare as a response to his own self-inflicted damage. Very amusing. I had to use one Elixir here. Finisher tried to troll me by throwing out four straight "Attempt Failed" results against Odin before landing another Elemental Attack for the win. It wasn't really close though, there were still 20 seconds left on the clock. It might have been better simply to attack normally with the Brave Blade.

Monsters in the Cleft of Dimension were generally handled with repeated uses of Blade Blitz, same as most everything else in the third world. They died readily enough in most cases. These Achelons were one of the few monsters that resisted such efforts, with their high physical evade and counterattacks. I typically run from these guys with other characters, but again, Brave Blade. This was a place where the Aegis Shield was worth its weight in gold, blocking the Demon's Eye petrification attacks which would have killed Maximus, and even stopping this Dischord (Sonic Wave) move as well. I had to use Finisher against these enemies and hope for Elemental Attack to appear, since it will never miss the target if it pops up. The same strategy worked well against the Ninjas in the next area, with their own heavy physical evade. That's one of the understated advantages of the Elemental Attack, the fact that it never misses the target. You know, aside from that whole 9999 damage thing.
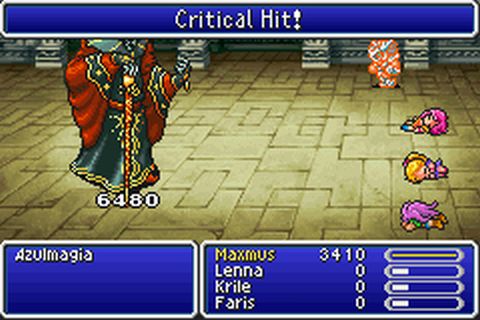
Bosses all had the same strategy. Move to the back row with Long Reach ability, break out the Defender sword for Armor status, and then use Finisher repeatedly and hope for Elemental Attack to appear. Even when it didn't, the Critical Hit produced massive damage as well via the Brave Blade. This basic strategy was enough to tear through pretty much everything. Calofisteri is a joke of a boss, and Apanda almost as much so. If they died to classes like solo Geomancer and solo Beastmaster, they certainly died to the solo Gladiator. Apocalypse / Azulmagia was fought at Level 56, and he landed both Level 2 Old and Level 4 Quarter during the battle. (Maximus also blocked a Dark Shock spell with the Aegis Shield - the dude had spells with level properties on the mind!) Fortunately Aging status didn't affect the damage from Elemental Attack at all, and Maximus still won on the first attempt.
Catastrophe doesn't have enough health to be dangerous, and his petrification attack was blocked by the Aegis Shield. Just like Greek mythology! I went with the Wall Ring against Halicarnassus to stop his/her Holy spell. Not that it mattered, as Maximus hit on a long streak of Finishers and eliminated the boss before the Holy spell could even appear. Apparently Haste status wasn't needed. I equipped the Coral Ring against Twin Tania for the same reason (Finisher is classified as a physical attack, despite the elemental nature of the damage) only to see the big thing almost never use his Tidal Wave move. The one and only time that Twin Tania broke it out, Maximus blocked it with the Aegis Shield. That Coral Ring was completely useless! Instead of trying to cheese the boss in the "Charging Up for Giga Flare!" weak point, Maximus fought the battle in standard fashion and whittled away at the 50k health target. Maximus had 3400 max health, and Giga Flare did 3100 damage, with enough of a health buffer to survive. My solo Gladiator downed Twin Tania just before he could get off the second Giga Flare.

I was slightly concerned about Necrophobia just because of the long walking distance back from the previous save point in the Dimensional Castle. I knew Maximus could win this battle, I just wanted to avoid too many repetitions, since he could not run from any of the tough random encounters in the Void. Crystal Dragons and Behemoths and such aren't pushovers, especially when you have to fight them all. The plan here was to go into the battle with Long Reach as the second ability, using the Mirage Vest for one free use of Image status in the second half of the fight. It would block one possible attempt of the Maelstrom/Fight instant death combo from Necro (plus the Aegis Shield has a chance to block both parts of that combo too). With no Shell status from the Wonder Rod, the Barriers could be a potential problem as well. Fortunately I had a nice bit of luck here, as the very first Finisher rolled an Elemental Attack to take out one of the Barriers immediately. I captured that in the screenshot above, one of the Barriers was dead before Necro even finished his villain monologing! The second Finisher also produced an Elemental Attack, and thus only two of the four Barriers ever got to do anything. Once I was down to a single Barrier remaining, I took the time to use the Defender sword for Armor status, and then prepared for the second half of the fight. The only real questions were how quickly Maximus could pull more Elemental Attacks out of Finisher, and whether or not Necrophobia would go for his cheesy Maelstrom/Fight instant death combo. The answers proved to be "pretty darn fast" and "not at all", respectively. Easy victory on the first attempt with friendly RNG.

And then the Thief Knife went and produced this. Nice one!  I would get to use the Genji Armor in exactly one battle, but hey, the Gladiator was one of the few classes who could put the thing on! I'll take it. One of the stream viewers also pointed out that I should have been using Excalibur in the second half of the Necro sequence, since he's weak against Holy element (he's weak against every element in the game). That was completely correct, and I should indeed have done that. Mistake on my part.
Now I had the save point for the final battle, and Maximus was about as well set up as any class can be. The Gladiator class can make use of the back row + Armor status combo to almost completely nullify physical damage. (Maximus had an effective 14,000 HP against physical attacks!) Gladiators can equip shields, which meant Aegis protection and no need to worry about White Hole from the Exdeath Tree form. Maximus also had Finisher as a high-damaging move to get through each AI script quickly to minimize the risk of bad stuff popping up at low odds. Finally, he even had pretty good health to work with (3500 HP), enough to survive an Almagest and Vacuum Wave hitting simultaneously. There were only three possible ways to die against the last boss: Condemn appearing at low odds from the Exdeath Tree, Meteo appearing when the Tree form gets low on health, and then the great dice roll of Grand Cross. With a little bit of luck on his side, Maximus would prevail easily.

The battle played out just the way that I expected it to. Maximus moved smoothly through each AI script during the Exdeath Tree form, getting past the second pattern before Condemn could show up. With White Hole blocked by the Aegis Shield, and with physical attacks almost completely nullified, Maximus was taking little damage, thus not needing to waste turns using Elixirs. He could use Finisher in just about every single round of combat. I was able to get off an Elemental Attack followed by a normal attack, thus working around the possibility of Meteo ever appearing. First form down with no problems. The second form saw the Magic Lamp's Odin summon take out Part #4 immediately, and then Maximus went to work on Part #1 with his Finisher attacks. The GBA seemed to have terrible problems emulating the Neo Exdeath battle, with massive slowdown dragging out the action. It was like watching a YouTube video with a terrible Internet connection, just lag everywhere. Very different from the SNES version which doesn't experience anything like that. Anyway, this whole battle was going to come down to the big fat dice roll of status ailments from Grand Cross. (Almagest and Vacuum Wave were never going to kill Maximus under any circumstances.) The first Grand Cross had negligible effect. Part #1 was nearing death and had something like 1500 health remaining, but Maximus was about to get hit by Almagest and I had to pause to use an Elixir to be safe. That allowed the part to get off one final Grand Cross... which inflicted instant death status and ended the battle. One of the cheapest and most ridiculous game overs I've ever seen. This is why we hate Grand Cross, folks. Big stupid dice rolls are not a lot of fun.
Anyway, that was a victory in all but name. Still, Maximus had to go back and finish the deed. His second attempt was wiped out by Meteo from the Tree form, when I rolled repeated "Attempt Failed" moves out of Finisher at the end of the first form. Bad time for that to happen, I think there were two or three of them in a row at exactly the wrong moment. On the third venture, I avoided Meteo from the Exdeath Tree, and saw exactly one Grand Cross from Neo Exdeath Part #1 before it was destroyed. That Grand Cross did absolutely nothing. From that point forward, there was no chance that Maximus would lose the battle. I refreshed Armor status when it was Dispelled away, used Elixirs any time Almagest was about to appear, and steadily worked down the health of the two remaining parts. I used some old weapons like the Assassin Dagger and even the Air Lancet to make sure that both parts were under 1000 health remaining, and then finished them off together with the Syldra summon from the Magic Lamp. Routine as clockwork.

The amusing thing is that because the battle ended with the Air Lancet dagger equipped, this was the weapon that appeared in the brief endgame cinematic! Heh. As someone who has seen the ending to Final Fantasy 5 innumberable times, I noticed that there were some changes in the GBA version compared to the original. For one thing, the music is way out of sync for some reason. The music transitions do not line up with the action taking place on screen at all, and it even cuts off in the middle of the series theme at one point. Very weird. The credits are also changed; obviously the staff that worked on the FF5 GBA version has been added, but what's particularly amusing are the omissions. Final Fantasy series creator and FF5 Producer Hironobu Sakaguchi's name is completely absent from these credits, which stands out like a sore thumb. Looks like some bad blood behind the scenes there! I know that his depature from SquareEnix was fairly messy, but that's still petty to cut his name out of the credits from a game where he was essentially the head guy in charge. Also in the trivial department, this version uses a different type setting for the names in the credits. OMG NEW FONTS - YOU MONSTERS!!!  When you've played this game as much as I have, you notice some of these small details.

How does the Gladiator class stack up in the bigger picture of solo classes? If you're using Finisher as I did, then this class is ridiculously powerful, right up there with the Samurai and Ninja and Chemist among the game's best. The Chemist has more raw power, since no other class can do what that job can do, and I think that the Samurai is slightly easier to play, but make no mistake, the Gladiator is crazy good. Even if you disallow Finisher as T-Hawk did, this is still a class with a vast array of weapons to pick between, extremely useful abilities in Long Reach and Blade Blitz, and very high base stats. You get the power of the Monk together with the speed of the Ninja, plus the chance to equip the Brave Blade. That's plenty to beat the game right there, with or without use of Finisher.
I enjoyed this character enough that I'm almost certainly going to take a look at the other GBA classes down the road. T-Hawk has written about the Necromancer (which I'll probably do too, because that class sounds like way too much fun!) but we don't have a great report yet for the Cannoneer or Oracle. Should be entertaining taking a look at what they have to offer as well. Thanks for reading.
Stream Links
First Session (First Half of World One)
Second Session (Second Half of World One)
Third Session (First Half of World Two)
Fourth Session (Second Half of World Two)
Fifth Session (First Half of World Three)
Sixth Session (Second Half of World Three)


