
This is a report that was almost never written. It's somewhat of a miracle that it managed to be finished and posted on the website at all. For reasons that I'll get to in a minute, Rip's journey stalled out during the Exdeath battle and he remained stuck in the same place for long months on end. I went on to the Ironcore team variant, and afterwards stopping playing Final Fantasy 5 for quite some time. There was a very real chance that I never would have come back to Rip's particular quest, and simply left this as an unfinished project. (I have other half-finished characters for various games that never ended up getting posted.) However, eventually I decided to go back and put in some more work with Rip the Geomancer, leading to the report you have written here.
Because of the long interval between playing and writing, I'm not entirely sure what Rip did to get past the Atmos boss battle. I do know that Rip drew the "Air" element set of terrain moves, Gust and Gale Cut and Sonic Boom, in which only Gale Cut proved to be at all useful. Because Gust and Sonic Boom were pointless Terrain attacks, I believe that I opted to use physical attacks with the Dancing Dirk, not 100% sure of that though. The Atmos fight is one where you can move up to the front row with no extra danger, since the boss never uses physical attacks. Equipping the Dancing Dirk and hoping to pull Sword Dances out of the ether remains a staple of low-powered variants, so I'm pretty sure that's what I ended up doing here. I think that I kept running this boss fight until Rip pulled out a series of Sword Dances at very low odds, something like 5 Sword Dances in 8 attacks or something ridiculous like that, which was enough to defeat Atmos. Again, it's been a while, wish I could be more precise.

Rip was able to purchase slightly better defensive equipment in the village of Mua, as well as the Air Lancet dagger, which has the Magic Up property for air element. That's a big deal for the Geomancer, since so many of his Terrain attacks have the air element property. It would not be useful in the Forest of Mua, however, as this area drew the "forest" set of terrain moves. (Surprise, surprise!) Branch Spear was the most common result, a souped-up version of the earlier Branch Arrow, doing single-target non-elemental damage with a spell attack value just weaker than Fire 3. (Branch Spear has a spell attack value of 150, while Fire/Ice/Bolt 3 have a spell attack of 185.) Branch Spear killed most everything in one hit, and Rip was able to stay in the back row to minimize danger, plus equip the old Guardian dagger for some physical evade. The Crystals at the end were defeated through the tried-and-true method of equipping the Flame Ring and damaging the Fire Crystal to trigger healing Fire 3s. It's boring and I've done it a million times already, but it does work.
I wish that I could remember more of the journey through Exdeath's Castle, because there were some genuinely interesting fights in there against the random enemies. I seem to recall using Sonic Boom (reduces current health by 3/4) against some of the dragon enemies with good effect. The Magic Dragons are also weak against air element, and one good Gale Cut would wipe them all out - when it happened to appear! Another nice benefit of using the Geomancer class was the ability to avoid trapped floors and pitfalls:

Notice how Rip steps on the trap holes and jumps back without falling in. Of course I already know where all of the trap holes are from playing this game so many times, but you wouldn't know that on a first playthrough. It was also very nice to avoid damage from the lava floors, which always pain my other solo characters when they have to walk through them. Anyway, Rip looted all the treasures throughout the castle and made his way to the top. If there was anything special about the final Gilgamesh battle, I don't remember it at this point. Not sure if Rip used Terrain moves or physical attack, but either way I don't think it was too particularly difficult.
That brought me to the bane of so many variants, the Exdeath battle at the end of the second world. The problem here was that Rip's Terrain attacks were once again ineffective for this boss fight. He once again drew the "Air" set of moves, most of which were completely useless. Gust was too weak to make it through Exdeath's Magic Defense. Sonic Boom and Tornado deal percentage based damage (3/4 of current health for Sonic Boom and drops health into critical range for Tornado), neither of which work against bosses with the Heavy flag in the code. That left only Gale Cut, which did produce good damage at somewhat over 1000 per usage, but Gale Cut only appeared about 20% of the time, and when all other usages of Terrain abilities were ineffective, that wasn't going to be enough to get the job done. This meant that Rip would have to rely on his physical attack:

Rip's base attack with the Air Lancet produced a paltry 500 damage per strike. There was no way that I could take down Exdeath with that kind of damage, so Rip was reduced to equipping the Dancing Dirk once again and crossing his fingers for Sword Dances. When it did appear, Sword Dance produced excellent damage, as seen above. However, Sword Dance only had 1/8 odds to appear on any given attack, and two of the other possible dances (Tempting Tango and Mystery Waltz) were completely useless. Jitterbug Duet would steal back roughly 350 health from Exdeath, and therefore did minor damage, but still wasn't all that great. It was effectively Sword Dance or bust, since the base attack from the Dancing Dirk was no better than that of the Air Lancet.
The real problem, as always with this battle, was Exdeath's use of Condemn. He has a 2/3 chance to use this move in the AI script, and after going through all of his other moves, he will return to the top of the script and once again have that same 2/3 chance to use Condemn. Any use of Condemn meant instant failure, since Rip could not possibly defeat the boss before the ticking death clock wound down. Somehow Rip had to deal 16,768 damage before Exdeath managed to use Condemn, to trigger his AI routine switch to the second and much less dangerous pattern that follows. The only practical solution was to move into the front row (yikes!) and attack with the Dancing Dirk, hoping to pull as many Sword Dances as possible before Exdeath found some way to kill Rip. Needless to say, this was not a particularly easy or feasible path to victory...
So Rip tried to fight Exdeath, and died. And died. And died and died and died and died and died and died and died and died and died and died and died and died and died and died and died and died and died and died and died and died and died and died and died and died and died and died and died and died and died and died and died. I had Rip leave Exdeath's Castle and gain some more levels, then came back to try anew and died once more. Rinse and repeat innumberable times. Adding more levels did very little to increase Rip's damage output, since the damage formulas are based on a combination of Strength and Level and the former wasn't increasing. I remained stalled at this point for weeks on end, soon ballooning to months. Condemn kept finishing off Rip innumerable times (including immediately at the start in 2/3 of all attempts, remember) and there were myriad other ways for Rip to die in this battle as well, between those Vaccuum Wave physical attacks and the use of Hurricane for instant near-death status. I took Rip all the way up to Level 68, far beyond the point needed for most solo characters to beat the game (let alone a normal party!) and he still couldn't seem to defeat Exdeath. Running innumerable Exdeath attempts over and over again was soul-crushingly boring to play out. Hopefully you can understand why I wanted to move on to other projects!
Finally, I came back to Rip after many months of inattention, hoping to win out finally. It only took about another hour of trying to emerge victorious:

On the successful attempt, Rip managed to dodge four different Condemns at a total of 1/81 odds. Despite pulling four different Sword Dances, it was still a very near-run thing, with Exdeath using Level 3 Flare and bouncing it off Rip's Wall Ring to deal 1000 damage to himself, which dropped Exdeath down to 15,800 HP remaining on the very last command before returning back to Condemn again in the AI script. Once Exdeath fell under the magical 16k health barrier, he reverted to his less-dangerous AI script and Rip focused on healing himself as Exdeath bounced Fire/Ice/Bolt 3s off of Rip's Wall Ring and slowly killed himself. Whew. Finally! It only took about eight months to bypass this one battle. Rip fought Exdeath at least 200 times, and more likely somewhere in the range of 300-500 times before ultimately winning out. I suppose that persistence ultimately proved victorious, although sheer stubbornness would probably be the more accurate description!
The Antlion didn't pose any difficulties; Rip dropped a couple of Cave Ins on it from his Terrain moveset, and moved on. That allowed Rip to return to Mua, and pick up his uber weapon for this variant:

The Chicken Knife was already fully powered up from running away, and constituted a bit of an upgrade from Rip's previous equipment. No longer would I have to go through the sort of torment presented by the Exdeath battle - Rip had a real weapon now! This gave me the option going forward to use either Terrain attacks or attack physically with the Chicken Knife, with the latter no longer enormously inferior to the former. I was able to put this to use right away, weakening the two Gargoyles outside the Pyramid with the Chicken Knife, and then finishing them off with a Gale Cut that hit both monsters at once. For later battles against the Gargoyles, Rip would have the Running Shoes and enough speed to down them with Chicken Knife alone.
The Pyramid saw Rip using a mixture of his newfound weapon for physical attack and the old Terrain moves. This area drew Terrain Moveset 18, consisting of Will-o-Wisp, Poison Mist, Sonic Boom, and Cave In. I loved it when Rip would draw Cave In, which effectively duplicates the Meteo spell by doing mass damage to four different random targets. I hated it when Rip would draw Poison Mist, which often healed the undead inhabitants of the Pyramid, d'oh! Generally speaking, I would use Rip's Terrain attacks against the enemies inside treasure chests, to avoid running away from battle and having to redo the same fight over again. I went ahead and attacked with the Chicken Knife in random battles, where Rip would either kill the enemy or run away, either outcome a positive one. It took some time to clean out all of the treasures, but Rip was never seriously threatened, and I avoided having to repeat areas due to deaths. Merugene was effectively neutralized through the equipment of a Flame Ring (thank you for healing me with those Fire 3 spells!) Once she changed her barrier to the one that was weak against physical attacks, the Chicken Knife started doing 4500 damage per hit, and that ended the battle in a real hurry.
Now Rip had the airship once more, and was free to run around grabbing all of the key equipment in the third world. I went ahead and picked the two weapons inside Kuzar Castle that Rip could actually use, going for the Assassin Dagger and the Earth Bell. Only time I've ever grabbed that stupid bell first, haha! It had the Magic Up property for Earth element, and has a 25% chance to cast Quake on attack, not that I was using the darn thing to attack very often. The Chicken Knife was still a much better option in most situations. Meanwhile, in Mirage Rip acquired the standard Running Shoes and Coral Ring accessories, along with the best equipment for a casting character (Circlet and Black Suit). As usual, permanent Haste status was the best option in nearly all battles.

Rip pulled the very common "Air" element set of Terrain moves once again in the Solitary Island Temple. When Sonic Boom or Tornado hit the enemies, I could use a physical attack to finish them off. Rip always hoped to get Gale Cut, which would do 2500+ damage to all enemies and normally wipe the screen clear of opponents. Sadly, that required rolling 10-19 on a dice toss of 1-68, and thus it was not all that common. Stalker was defeated with the Chicken Knife with very little fuss or excitement. Up on Fork Tower, the Minotaur was handled in the same fashion; Rip didn't even need to use a single Elixir to win that battle. Hack and slash in the front row with the Chicken Knife. I thought that I would have an easy time against Omniscient, since he is weak against air element and that's what the bulk of Rip's Terrain moves used. However, I found to my surprise that any use of the Terrain command would result in Omniscient casting Reset and starting the battle over again. Hmmm, wasn't expecting that. Nearly all of the Terrain attacks use the Magic Damage formula, but I guess the game doesn't consider them to be magic attacks. Anyway, that meant sitting around with a Wall Ring until Omni had drained all of his magic points, after which Rip finished him off. Not too exciting.

The Great Trench was surprisingly easy for Rip to traverse. This area drew Terrain moveset #7: Will-o-Wisp, Stalactite, Gale Cut, and Cave-in; the last two of these Terrain moves were the most common due to Rip's level, both doing very good damane. I could equip the old Air Lancet to boost Air element damage from the very common Gale Cuts, and Cave-in effectively mimicked the Meteor spell for free. Even better, Rip could walk across the lava floors without taking damage! Cool beans. The Great Trench is such a strange dungeon, with normally weak solo classes like the Bard, White Mage, and Geomancer totally dominant here, even as they struggled throughout the rest of the game. For the bosses at the end, Rip equipped a Wall Ring to bounce back their spells:

No such luck, Delta Attack! A mixture of Terrain attacks (Gale Cuts and Cave-ins) sufficied to dispatch the trio. I didn't have to worry about lining up the deaths 100% correct, as the Wall Ring protected against their petrification move. Istory Falls turned out to have Terrain moveset #8, with very common Whirlpools mixed in with occasional Stalactites and Cave-ins. Now Whirlpool is a "weak" attack, dropping the target down to a few hit points remaining, and it doesn't work against anything with the Heavy flag in the code. The problem is that the graphics for the attack don't show which target it affected, and so there's no way to know which enemy was reduced to near-death status. I had Rip use his Terrain command repeatedly from the back row, weakening the enemies with Whirlpool so that they would be finished off by Cave-in when it showed up. This was a highly random area in other words... Fortunately Istory is one of the easiest dungeons in the game, and Rip was therefore able to get through without any real issue. Leviathan was downed with the Chicken Knife, a Coral Ring, and several Elixirs.
I had no desire to do any more of the optional side bosses. Rip was already Level 70, and still remained a weak variant character with limited offense. I wanted to get into the Cleft of Dimension and try to finish off the variant as soon as possible. Although the starting desert area wasn't too bad, I was reminded again in the Lonka Ruins section how any solo character without the Bone Mail can be killed instantly with an unlucky role of Roulette. Argh, had to walk through this area several times. However, in a stroke of real fortune, Rip was able to get the Rune Bell to drop from a battle with the Bardandels enemies, the ones who are a palette swap of the earlier Whirl Demons. While the Rune Bell was coming too late in the game to make a real difference, it had the "Magic Up" property for all elements other than Water and Holy. I would get some minimal use out of it with Terrain attacks.

The next forest area had moves from the woodland terrain set, as expected. This Vine Hell command inflicted Slow status on all the enemies, which was pretty useful when it showed up. (At least the first time... repeated uses of course did nothing!) Branch Spear did the most damage here, as it had in the Forest of Mua earlier. The Calofisteri/Wood Sprite boss at the end was killed easily with Chicken Knife and a Wall Ring. (That is seriously like one of the easiest bosses I've ever seen for an endgame situation. Has anyone ever actually lost to her?) Apanda had the same Terrain moveset as in the Ancient Library against Byblos earlier. However, Will-o-Wisp now did very little damage, so I just attacked away with Chicken Knife instead, which worked as well as expected. Apocalypse was the same story, with Rip winning the battle an instant before he would have perished from Condemn!

This was actually really tough, and I had to make the long walk from the previous save point a whole bunch of times. I even took the time to level Rip from 70 to 71, because I was dying too much to Level 5 Doom in the battle. Sheesh. The fact of the matter was that Rip was essentially a crippled melee fighter at this point, his Terrain moves almost useless. I was having to rely on his Chicken Knife and extremely high level to get by, compensating for his lack of any other skills. At least Catastrophe was as easy as usual, the lack of health on the boss allowing him to be mowed down with ease. Halicarnassus met the usual fate, reflecting her Holy spell off of a Wall Ring. Twin Tania's 3000 damage Giga Flare was pointless in the face of Rip's 4900 health, and he was slowly beaten down using melee attacks and Elixirs. I would like to tell you that I did some really clever stuff with Terrain moves to get past these bosses, but it just didn't happen. Terrain was far too random and did far too little damage.
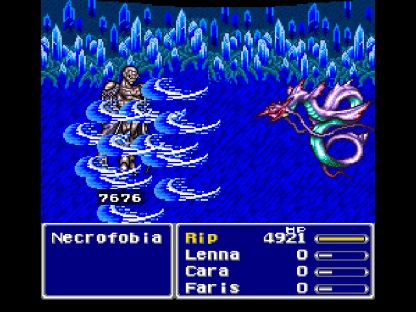
Now I was up to yet another stumbling block for this variant, the Necrophobia battle. Terrain attacks were completely useless again here, with Rip drawing the "Air" set of moves once more, in which a large majority of attacks would be the totally ineffective Sonic Boom or Tornado moves. No chance to stay in the back row, unfortunately. Rip would have to move up into the front and rely on the Chicken Knife. Necrophobia was frustrating for a number of reasons. First of all, there is a long walk to the boss from the previous save point in the Dimensional Castle, and every time that Rip died I would have to make that walk again. Even with the emulator's Fast Forward speeding things up, it was 3-5 minutes between attempts at the battle. Secondly, the Necrophbia battle itself took a long time to play out; killing the four Barriers always took several minutes to play out, slowly defeating them one by one, drinking Elixirs all the while. There was also a chance that if Rip rolled too many "Can't Run!" escapes while attacking with the Chicken Knife, the Barriers could actually kill him by all four casting their reflected Fire 3s. While this didn't happen often, it was very, very frustrating when it did, walking all that way and never even getting a shot at the real boss! Finally, after making the trek from the last save point and defeating the Barriers, Necrophobia still had his infamous bullshit "Hurricane/Vacuum Wave" combo, which can instantly kill any solo character in one go. Rip simply had to avoid this combination appearing, which was dumb luck and required many tedious repetitions. Fun stuff indeed...
I honestly grew tired of this after making a bunch of attempts, and put aside Rip's quest yet again for several months. I always meant to go back eventually, and it was T-Hawk's completion of a White Mage solo run that inspired me to go and finish with Rip. So let's break down the best way to beat Necrophobia. In order to trigger the Gilgamesh cutscene and win the battle, you need to inflict 34k damage (technically 34,045 damage but who's counting?) Each attack with the Chicken Knife from the front row did exactly 2722 damage, which would necessitate 13 successful attacks, not counting the Flee effect triggering or the combat rounds needed to heal. (Normally Rip needed to spend 2 rounds healing for every 1 round attacking.) I would probably need to survive about 50 rounds of combat to win that way... and that clearly wasn't going to happen! Necrophobia's one weakness is elemental damage; he is weak against all eight elements. As a Geomancer, Rip had a high Magic Power stat too. I couldn't rely on his Terrain command for damage, but if I could find another source of elemental damage...
Yeah, that's the ticket! The Magic Lamp was the solution to my problem, turning Rip into a pretend Summoner and relying on the creatures inside to deal damage. Interestingly enough, Bahamut actually did the least damage since the spell is non-elemental in nature, coming in at just under 4000 damage. Then Leviathan would do about 8000 damage as seen above, and after skipping through the useless Odin summon, Syldra would do the most damage of all, over 9000 (indeed) provided that Rip swapped to the Air Lancet or Rune Bell for the Magic Up property. I tallied up that damage and realized that I would need to make five successful attacks with the Chicken Knife to win out; that would do just over 13k damage and I could get the remaining 21k needed from those summons. Needless to say, this was still not an easy task, and it took many repeated attempts to get those five successful attacks without dying. Eventually... eventually though...

Gotcha. Well, that took way longer than I had hoped. Rip needed to drink some 16 Elixirs to achieve victory, and of course I had to walk all the way out of the Cleft of Dimension again to go charge up the Magic Lamp. Still, it was worth it in the end, as I definitely needed that save point for what I knew would be repeated battles against the final boss. Rip had another 57 Elixirs in inventory, which I knew would be more than enough for the last battle.
After the long walk back through the Cleft of Dimension, Rip squared off against Exdeath in the endgame boss sequence. I knew this would be another giant pain in the rear, and I was right. Rip could not equip an Aegis Shield or a Ribbon to protect against petrification, and unlike other mages he couldn't even use Rods, which would at least have granted me Shell protection out of the Wonder Rod. In other words, Rip was a sitting duck against the Tree form of Exdeath and his White Hole insta-kill attack:

Saw that screen an awful lot, let me tell you... The person who wrote Exdeath's AI script really had it in for solo variants. The Tree form has three separate AI scripts: an initial sequence, a second one when Exdeath goes under 30k health, and a final sequence when Exdeath falls down to his last 10k health. The first script is very basic, with Exdeath having a 1/3 chance to Fight, use White Hole, or do nothing. Fight commands were not dangerous, and Exdeath would never kill me even once with his physical attack. White Hole had about 70-80% odds to kill Rip any time it appeared, and since it had 1/3 odds of appearing in every single round of combat, this made for a lot of petrified statues of our Geomancer. If Rip could do 20,000 damage to Exdeath, the battle would move on to the second AI sequence:
{Flare,Holy,Fight}
{Fight,Fight,White Hole}
{Fight,White Hole,Nothing}
{Fight,Condemn,White Hole}
As always, this meant 1/3 odds to do each of the attacks listed here in sequence, and then go back to the beginning and repeat endlessly. The first of these four groups was by far the safest, as it could never kill Rip no matter what. The second and third were pretty similar to the original Exdeath setup. However, that fourth group was an absolute nightmare. If Condemn appeared, it was a guaranteed loss for Rip - Condemn never misses its target, and obviously I couldn't beat the boss encounter before the ticking death clock ran out. If White Hole appeared, Rip would normally also perish instantly, although at least there was a slight chance for that attack to miss. Only the Fight command offered any safety. Assuming that Rip navigate through this group, he then had the final AI sequence to contend with:
{Meteo,Fight,Nothing}
Yep, Exdeath will either Fight (not dangerous), do nothing... or simply kill you with Meteo. Just what I wanted, another giant dice roll to contend with.  Rip actually did have enough health to potentially survive a casting of Meteo, although normally the spell would finish him off. Average damage from Meteo (with 20 Magic Resist) was 5880 damage, and Rip had 4900 health. Of course damage from Meteo is highly random, and if Rip was lucky, he could roll significantly lower and survive. I only saw that happen once though.
I found to my surprise that there was a different Terrain moveset for the final battle: 100% Gale Cuts, nothing else appearing. Well damn, that sure would have been helpful in a lot of other parts of this game! With the Rune Bell equipped to boost Air element damage, each Gale Cut would do roughly 2200 damage. This was compared to the Chicken Knife, which did exactly 3312 damage with each attack, at the cost of missing 25% of the time and forcing Rip to take more damage from standing in the front row. I tried both attempts on the boss, and ultimately the Chicken Knife proved more effective, mostly because the +5 Agility speed boost made a real difference. It was very noticeable that I was getting more attacks with the Chicken Knife, making that the better weapon.
But I still wasn't winning. White Hole was finishing off Rip at a prodigious rate; I could make it to the second AI routine about half of the time, but very rarely to the last AI grouping, that fourth sequence with Condemn destroying many promising attempts. I kept track of my battles against Exdeath, and ultimately gave it up when I died ONE HUNDRED TIMES without ever reaching Neo Exdeath even once. (That was 7 deaths to Condemn, 3 deaths to Meteo... and 90 deaths to White Hole. Holy hell.) At that point I just threw up my hands in frustration. I couldn't even make it to Neo Exdeath, much less beat the game!
So this was the Exdeath battle from the end of the second world all over again. Rather than beat my head against the wall endlessly, I backed out of the final dungeon to go power level for a bit. I hate leveling my way out of difficult situations, but this just wasn't happening. Fine. You win, game. I will go back and cheese my way out of this situation, because even my patience isn't endless. Are you happy now?!? 
OK, let's try again six levels higher, now up to Level 76 because that's where Rip gets double attack modifiers from the Chicken Knife. (His Strength and Agility were both exactly 32, meaning that every gain of four levels would increase the multiplier M, and doubly so because the Chicken Knife scales with both Strength and Agility stats.) Now instead of doing 3312 damage per attack with the Chicken Knife, Rip was doing 3680 damage. Umm... OK, so that wasn't all that big of a difference. However, going from 4900 max life up to 5500 max life definitely helped a lot. I found to my pleasant surprise that Rip now had a decent shot of surviving a casting of Meteo if he was at full health. In fact, there was one memorable stretch at the end of the Exdeath Tree form where we alternated Meteo/Elixir three times in succession, Rip surviving all three castings. Ha! That was my first time successfully making it to the Neo Exdeath form, although it was ended almost immediately with a Grand Cross petrification. Very very sad face on that one.

Anyway, after dying another dozen or so times to White Hole, Rip made it back to the Neo Exdeath half of the battle. My overall strategy here was the same as in the first half of the encounter, stay in the front row and use the Chicken Knife to kill the Grand Grossing "Part #1" as quickly as possible. While Gale Cut would hit all three of the Neo Exdeath parts and do pretty good damage, I didn't want area of effect damage here. I needed focused attack on the one and only part which could actually kill me, since as soon as Part #1 went down, the battle was over and I would win the variant. The Chicken Knife did 3880 damage to this part, meaning 15 attacks needed to win. Well, 14 with the Chicken Knife and then a guaranteed Gale Cut to finish off the last 1000 HP at the end. Rip took a huge pounding from being in the front row, and I was forced to waste many turns on end healing from Part #3's repeated Vacuum Waves. However, as an old hand at this battle by now, I was never going to die to anything other than Grand Cross. It was all a matter of what that big honking dice roll was going to toss out on the status ailments, with nothing I could do to alter the outcome. And as it turned out, this is what I got:
Toad status
Toad status
Weak status
Fortunately I had an Elixir on hand for that last one, which could have been really dangerous. Down to 3 HP for a second there, yikes! But the physical part had just attacked a little earlier, and so I was safe. Then it was going to come down to one last roll of Grand Cross, Part #1 down to under 10k health remaining. I waited with my heart beating anxiously... nothing! No effect at all!  Must have been a Slow or Sleep status that was blocked by my Haste status. One more hit with the Chicken Knife, one Gale Cut, and that was all she wrote for the Grand Crossing part.
The battle was over at this point, the game just didn't know it yet. I moved Rip into the back row for safety and switched over to Gale Cutting to hit both of the remaining parts at once, as pictured above. Boosted with the Rune Bell, Gale Cut did about 2200 damage to each part. Nothing special there, but Rip was now in zero danger, with me using an Elixir any time his health fell under 2000 HP. Even if both Almagest and Vacuum Wave hit together, they wouldn't do enough damage to kill Rip. Rinse and repeat for a while, then use Syldra summons from the Magic Lamp to do 4500 damage to each part and wipe them out together. And finally - FINALLY! - Rip's quest came to an end:

I used about 35 Elixirs in the course of this battle, going in with 63 and finishing with under 30 remaining in stock. Good thing I had enough gold to get a large stash of those things... Rip died a total of 136 times against the Exdeath Tree form: 123 deaths to White Hole, 7 deaths to Condemn, and 6 deaths to Meteo. I never died to the physical attack of the boss at all. Neo Exdeath killed Rip once, from Grand Cross petrification status, and I won on the second try. I was going to go back and raise Rip to Level 80 if I reached 200 deaths against the final boss. Fortunately that wasn't needed.

So finally this whole thing came to an end. Honestly, I did not enjoy this variant much at all, as evidenced by how long it took me to finish. Everything was great up until the end of the second world, and then the uselessness of Terrain attacks against Exdeath (in multiple battles) made the variant a giant pain. It's difficult for me to put in words just how soul-crushing and tedious the final encounters were to play out. When you are dying over and over again, and there is absolutely nothing you can do to affect the outcome of the battle beyond hoping for good luck, it really grates on you as a player. In the Exdeath battle at the end of the second world, it was trying to avoid Condemns and praying for Sword Dances. Against Necrophobia, it was needing to dodge Hurricane/Fight combos. In the final battle, more giant dice rolls involving White Hole and Grand Cross. Not fun, not fun, not fun! This was much worse than grinding a character in an RPG, because at least there you get to see your stats going up, albeit slowly. You are making *SOME* kind of progress. With Rip, I would play the game for an hour, die to the current stumbling block boss of the moment 25 times, and would have achieved absolutely nothing. I was in the exact same spot as before, still making failed attempts, my time and effort completely wasted. I felt like Sisyphus pushing the boulder up the hill endlessly, my character Rip dancing in the hands of Fate's invisible puppet strings. This was by far the solo class I enjoyed the least, which is a shame because the first world was very entertaining. But the ending bosses of worlds two and three wiped out all the earlier enjoyment... I feel like I'm going to have lasting FF5 scars from this, I don't even want to LOOK at a Geomancer right now!
Also, a special Eff You to Condemn and White Hole. Whoever thought up those attacks can go burn in hell. 


