
With my Solo Monk variant, I had the chance to experience all of the ins and outs of Final Fantasy 5 from the perspective of a melee character. However, that meant that I was missing out on half the gameplay - what would things look like from a caster's point of view? I had to try another game to experience a very different take on bosses! Looking over the various jobs, the Black Mage immediately jumped out at me. Just as I had run a solo Black Belt and Black Mage in the original Final Fantasy, I realized I had the opportunity to do the same thing here in FF5. As a testament to my old character Blak, I decided that I would use the same name again, although correcting it to "Black" since FF5 gives you 6 letters to work with instead of 4.
The Black Mage in this game is very similar to the Black Mage from the first Final Fantasy, but there are some differences. There is no Black Wizard upgrade in FF5, so the Black Mage is essentially both classes in one. Thus the Black Mage does get access to Nuke ("Flare" in this game) eventually, which will make the end of the game a lot easier. Secondly, FF5 uses actual magic points instead of the antiquated spell charges of the first game. That's another relief, since you can actually restore MP with Ethers and Elixirs! On the other hand, FF5 is also significantly longer and contains many more difficult bosses than the first game, so this would be no cakewalk either. Overall however, the Black Mage still remains the character who "casts the spells that makes the peoples fall down." 
For my previous Monk run, the main things to worry about were enemy special attacks and how much physical defense each boss had. Black's quest opens up a new area of the gameplay: elemental strengths and weaknesses. Many of the bosses in this game are weak to one or more of the elements. Out of the eight total, the Black Mage has spells that cover four elements: fire, ice, lightning, and poison. (He's missing earth, air, water, and holy.) Best of all, the ultimate magic spell Flare is non-elemental and pierces magic defense, doing massive damage to any opponent. But until Black gets access to that spell at the very end of the game, he's going to have to pay close attention to what enemies resist which elements. Foes that are weak to a spell take double damage from it!
I'll skip over the extremely early part of the game leading up to the Wind Crystal jobs. Black killed the Wing Raptor using a broad sword in the exact same fashion as Solo. Then with those formalities out of the way, he donned the funky hat of the Black Mage and and assumed his permanent job:

Compare to Solo's stats as a Monk, also at level 6, if you're interested. Black has significantly fewer hit points, and vastly more magic points, as you would expect for a casting job. His base magic power was 56, and as I'll discuss a little later on, magic power is the key stat for all casting classes. More magic power equals more magic points and more damage from spells. I wasn't so keen on the weak strength and and subpar vitality, but at least Black could spend most of his time hiding in the back row. This is one job where sitting in the front row is just silly - magic always does full damage independent of row position!
Another thing similar to the first Final Fantasy is that you have to buy magic spells in shops. There are also a couple that can be found in offbeat locations too. In other words, you can't simply level your way into higher-damage spells, as you can in FF 2/4 for example. Tule, the first town, sold the three first-level black magic spells: Fire, Ice, and Bolt. Hmmm... feels like I've seen this before! Aside from Ice being a first-level spell, we could practically be back in Coneria. So Black happily buys his spells, heads outside to check out the damage...

Umm, why is Fire only doing 50 damage to a pathetic Stray Cat? Black's little dagger does 40 damage when attacking from the front row! The sad news is that the first-level black magic spells are all thoroughly underwhelming when used against targets who don't have an elemental weakness. Every direct damage spell in the game has a "spell attack" rating, which functions like the "attack" stat for physical damage. Well, the first-level Fire/Ice/Bolt spells have a spell attack of 15, which isn't all that great. Subtract out the magic defense that most critters have (5), and you only get a base damage of 10, multiplied in this case by 5 for 50 total damage. The good news is that the spell attack of future black magic would go up dramatically, while enemy magic defense mostly stays low. For now, it was pretty unimpressive though.
I fought a few battles until Black was level 8, just to make sure I would have enough potions to survive the upcoming ship graveyard. Then I sent him into the Torna Canal:

That's where Karlabos waited. "This will be easy," I figured, "he's weak against lightning." Ha! Weak against lightning, yes; easy, no.  You may remember Solo had some problems here earlier in my last run. It was even worse for Black, who had no Counter ability to fall back on for extra damage. Yes, Black only needed to cast Bolt four times to kill the stupid lobster. However, Karlabos was faster than he was, and every single round of combat ran the risk of getting stunned by the boss' "Tentacle" attack. Here's the AI script from J.L. Tseng's Algorithms Guide:
{Fight,Tentacle,Tentacle}
{Fight,Tailscrew,Tentacle}
{Fight,Tailscrew,Tentacle}
The way this code works is that Karlabos would randomly choose one of three actions in the first row: Fight (1/3) or Tentacle (2/3). Then proceed to the second row for the second round of combat, and so on repeatedly in a loop. Tentacle was a physical attack that auto-paralyzed Black, an enormously frustrating special attack. Tailscrew was a "Weak" attack, dropping Black's health to less than 10 hit points. A typical fight might look like this: Tentacle (before Black even gets to act) causing paralysis, Tailscrew dropping health to nil, normal attack and instant death. No chance to issue even one command. Wow, fun stuff!
There is literally no strategy here, other than running the battle over and over again hoping for "Fight" to get chosen as the Karlabos AI action. On multiple different occasions Black was on the verge of winning, only to see Tentacle come out at the worst possible time and paralyze him into doom. Finally, after pausing twice to level up out of frustration, Black rolled a series of good results and won out. I probably did the fight over 25 times all told, no joke. Thank goodness for the fast forward key on the emulator to speed up the cutscene preceding the battle! Karlabos is laughable for a full party of four, but he is NOT easy for solo characters. Definitely a foe worthy of respect, despite coming so early.
Black was level 12 by the time I finished that foolishness. The ship graveyard was a paradise for him, as nearly every enemy was undead and burned up readily to Fire. Black gained two levels by the end, reaching 14 and another boost in damage (see below). The boss at the end was the Siren:

She switches back and forth between a human and undead form. The human form casts magic and has very high magic defense (20), enough to make Black's weak magic useless! I simply defended and waited for her to change into her undead form, which has no magic defense and is weak against fire. Each casting did over 200 damage, and thus five spells were enough to take out her 900 hit points. This was the first battle that had been noticeably easier with Black than with Solo.
Time now to explain how the magic damage formula works. As in my other reports, feel free to scroll past this part if the details don't interest you. Here is the formal explanation from Tseng's Algorthims Guide:
ATTACK TYPE (HEX: 06) (Magic Attacks, Light Staff, Staff of Judgement)
1) Aegis Shield Check (6.3.2)
2) Use Magic Damage Parameters (6.4.1):
Attack = Spell Attack + (0..(Spell Attack/8))
M = (Level*Magic Power)/256 + 4
Defense = Magic Defense
3) Apply Multitargetting modifiers to Attack (6.5.1).
4) Apply Target Status Effect modifiers to Defense and M (magical) (6.5.10).
5) Apply Magic Element Up modifier to Attack (6.5.14).
6) Apply Attack Element modifiers to Attack and Defense (6.5.16).
7) Damage = (Attack - Defense) * M. Max Damage = 9999.
Let's break this up into smaller parts so that it makes more sense. Note first of all that there is no hit/miss chance like with physical attacks; this is because magical attacks always successfully hit their target. (The one exception to this is equipping the Aegis Shield, which grants a 1/3 chance for magical attacks to miss. For all normal situations, ignore step #1 above.) The base damage number comes from the spell attack rating unique to each black magic spell; you never see this number in-game, but it can be found in some online guides. As I already mentioned, Fire/Ice/Bolt have a spell attack of 15; Fire/Ice/Bolt 2 have a spell attack of 50, and Fire/Ice/Bolt 3 have a spell attack of 185. Each one is slightly more than three times stronger than the previous. Flare tops out at a spell attack of 254, just for completeness' sake.
Now the other number that involves calculation is the multiplier (M), which is where the real damage is done. The formula for this is stated above in step #2: M = (Level*Magic Power)/256 + 4. Kind of a weird formula, but it works! Increasing the Magic Power stat is thus very important, as even a few extra points can increase the multiplier value significantly. (This is the magic equivalent of the punching damage formula that Solo used, which you may recall was Level*Strength/256.) Then the formula for magic damage is the one listed in step #7, (Attack - Magic Defense) * M. So, to use a current example, Black's multiplier would be M = (14*56)/256 + 4 = 3.06 + 4 = 7. It's important to keep in mind that FF5 uses integer math, and always rounds down (truncates) after all divisions. With a value for M, we can calcuate Black's damage against a foe with no Magic Defense: Damage = (Attack - Magic Defense) * M = (15-0) * 7 = 105. This was indeed consistent with what I observed in-game.
But wait! I need to explain the modifiers in steps #3-6, which are very important as well. Step #3 contains the multitarget modifier; remember, you can choose to target all enemies with spells instead of a single one. If doing so, Attack = (Attack/2). It doesn't matter how many targets there are, the spells will do the same damage against 9 foes as they do when targeting 2. This is handy information to know! Step #4 is pretty simple: a target with "Shell" status takes half magic damage (literally M/2 on the multiplier). Step #5 is an interesting one; there are certain items that give a "Magic Up" modifier when equipped. A good example is the Fire Rod, which gives a bonus to damage from Fire spells. The extra damage is 50%: Attack = Attack + Attack/2. Thus, just by equipping a Fire Rod, Black's base damage from Fire would go from 15 * 7 = 105 to 22 * 7 = 154! That's a big difference. Finally, step #6 is where the elemental strengths/weaknesses come in. Targets with elemental absorb are healed by their affiliated elements (e.g. don't cast Fire spells against Liquid Flame!), while those with elemental immunity take no damage. Those with elemental resistance take half damage, and (most importantly) those with elemental weakness take double damage and ignore magical defense! In other words, elemental weakness is just like taking a critical hit from each spell of the associated element. Keep in mind that all these modifiers are cumulative, so equipping a Flame Rod and casting Fire spells against a weak opponent would do 3x normal damage.
OK, got all that?  The important things to keep in mind are that equipping the associated "Element Up" item gives a 50% boost in base damage, and elemental weakness causes double damage. Those are the most important facts, along with an understanding of why Magic Power increases the multiplier M.
Back to the narrative. The next town of Carwen had a slightly improved armor for Black (Cotton Robe, better than the Leather Armor) and an important hidden item: an Ice Rod. This weapon had the "Magic Up" attribute for the Ice element, the thing I was just talking about above in step #5, meaning Black's ice spells did 50% more damage. For the immediate future, Black would be casting a lot of Ice spells against any target not weak to Fire or Lightning, getting a very nice boost in damage!

The random foes on North Mountain were not a challenge, and Black quickly made his way to the Magissa/Forza duo. Magissa starts out alone, and brings Forza into the fight when her health drops below 300 (out of a starting 650). As you might guess, Magisa does nothing but cast spells while Forza simply fights with physical attacks. Since neither one had any elemental strengths/weaknesses, Ice was the spell of choice. Black took out Magissa with five castings of Ice, by which time he was nearing death from Forza's attacks. Impossible fight? No, because Forza lacked an immunity to Black's Sleep spell! I picked that up in Carwen, and it immediately put the big fellow to sleep. He never attacked again, and six Ices later Forza was history. That worked surprisingly well.
Worus was full of Dimensional spells, not selling anything of use for a Black Mage. The Tower did contain two armor upgrades though, the Silk Robe and Silver Ring. To my surprise, the Galura boss at the end proved to be tough for Black. Even in the back row his attack was doing about 35 damage per hit, and every time Black cast a spell Galura had an inbuilt Counter that responded with another attack. I made a couple of different attempts, never managing to do more than 800 damage to Galura, which was far short of his 1200 hit points. Against foes with no elemental weakness, the basic Fire/Ice/Bolt spells just weren't very good, even with the Ice Rod powering Black's Ice spell.
I gained a couple of levels, up to lvl 18, without making more than token progress against Galura. This was one difference between Black and Solo: the Monk job adds additional damage with every level, so the increase in fighting power goes up steadily over time. Black gained very little from most level ups, however - buying/finding superior spells is where he would suddenly leap up in offensive output. Well, there are two ways that I can do this Galura battle. One is to gain a gazillion levels and wait until Black has enough hit points to survive a lengthy encounter, while wearing down the beast with piddly Ice spells. The other way is to make use of the special rod-breaking ability:

Rods in this game can be used as items, which "breaks" them and deals very high damage. Breaking an Ice Rod causes it to cast Ice 3, for example, although it does destroy the item in the process. Rod-breaking is thus a way to get past a number of difficult situations in the early game, although it's really kind of a cheeze solution. Reminds me of using the Bane Sword to get past Tiamat - convenient for variants, but not a real victory in the truest sense of the word. Since I didn't want to spend ages leveling outside Worus, I went ahead and broke Black's Ice Rod, killing Galura instantly. I intend to do as little rod-breaking as possible, but I won't rule it out for selected battles. Fire 2 powered by a Fire Rod does almost half as much base damage (75) as Fire 3 (185) anyway. That's plenty for all but the absolute worst encounters.
With Worus out of the way, Black could now journey overland to Karnak. And what a wonderful place that was! Karnark had all three of the third-level Black Magic spells for sale: Fire 2, Ice 2, and Bolt 2. These spells did more than triple the base damage of their weaker cousins, and would be the mainstays of Black's offense for ages to come. Just as importantly, Karnak sold Fire, Ice, and Lightning Rods to power each of Black's three main elements. I loaded up on three of each, in order to have two extras for breaking purposes if absolutely needed. Now recall that Black's Fire spell had previously been doing 15 base damage. With Fire 2 and a Fire Rod, that base damage became 75, quintupling his offensive output in a flash!

A group of unfortunate Wild Nacks getting wasted by Fire 2. Beware the fury of the Black Mage! 
I remembered that the Steamship had been an easy area for Solo, and it was the same story for Black. No, check that: it was even easier for him! Most of the enemies here were weak against Ice, and the Ice 2/Ice Rod combo was leveling most enemy groups in a single casting without taking any damage. The few enemies who weren't weak against one of the three elements (e.g. Poltergeists) Black could simply run away from. The only thing that was holding Black in check was running out of magic points; he could cast about a dozen spells before running out of juice. Of course, I solved this simply by leaving the dungeon once to recharge at the inn. Problem solved. That's one important difference between Black and Solo, the former having to use vastly more tents/cabins and inn visits to restore MP. Solo often relied on Potions for healing and skipped the inn entirely, just so I didn't have to kill off the other three characters yet again.

Liquid Flame was waiting at the bottom floor of the dungeon, as usual. Most guides suggest breaking rods as the way to do this battle, but that just isn't necessary. A single casting of Ice 2 powered by the Ice Rod did well over 1000 damage, and thus three such castings finished off Liquid Flame. I shudder to think how powerful a normal party of four black mages would be! Black did have to fight this battle about five different times, because he kept getting unlucky with form shifts into the "fiery hand", which is immune to all elemental damage. (Black got the worst possible result on something like five coinflip form shifts in a row!) Aside from his horrible luck, this was a pretty easy battle. I'd say it was probably about equal to Solo in terms of difficulty, if only because I figured out a simple solution for Solo as well.
The two bosses in the Ancient Library can often cause problems for a lot of characters - but the Black Mage isn't one of those jobs. Both Ifrit and Byblos have elemental weaknesses, to Ice and Fire respectively. Poor Ifrit went down in a mere three castings of Ice 2, never coming close to killing Black. He was not worthy of a screenshot. As for Byblos:

Each casting of a powered-up Fire 2 did more damage than Solo's BuildUp critical hits. Three spells and Byblos was finished. Wow. If a boss has an elemental weakness, they're going down in a hurry. There's really no need to break rods for these fights; they are quite doable with the actual in-game magic alone. Black was winning rather easily as a solo character, to say nothing of a normal party of four! (Now, if you were to be playing a variant with Time Mages or Red Mages, then you might be excused for rod-breaking. But that's a different story.)
Victory in the Ancient Library opened up (very temporary) access to the steamship, and sailing transportation. I took advantage of this to travel to Istory, where the Flame and Angel Rings are on sale. Black had a powerful incentive to get a Flame Ring, which would allow him to heal himself with castings of Fire 2! He could even attack himself with the Flame Rod if he didn't want to expend magic points. Black was about 15,000 gold short of the 50k price tag, however, so I had him fight more Wild Nacks outside Karnak for a little while. The forest east of the town always produces a random encounter with five of them, who fell easily to one casting of Fire 2 and gave 625g for each battle. Ten minutes later, Black was walking away with his new accessory from Istory.

The Sandworm was also rather easy, as I imagine it is for any class other than the Berzerker. I do want to point out how much lower the damage output was against a boss that lacked any kind of elemental weakness. Compare with the Byblos screenshot above, for example. Not only do enemies with elemental weakness take double damage, they also lose all magic defense when hit by spells that target their weakness. Those two factors account for the huge disparity in damage, from 600 to 1500+.
The Quicksand Desert was short and uneventful. This being my third run through FF5, I knew the fastest way through the maze, and didn't stick around to fight extra battles (nothing here was weak against Black's spells). The Crayclaw boss, which is encountered upon getting the airship, went down in two castings of Bolt 2. The biggest problem was making sure to win the fight with none of the teammates alive, who had been revived during a story-forced overnight rest! The turtle boss at the Adamantium was a little more difficult:

The boss hit hard, 200+ damage per attack, and had the ability to strike twice in a row uninterrupted. Even though Black only needed three castings of Ice 2 to win, he was still killed on my first attempt. Solution: equip the Elf Cape accessory for the 1/3 chance to dodge physical attacks. This worked perfectly on the second try, and you see Black dodging an attack with the cape above. For all that the Flame and Wall Rings tend to steal the spotlight, there's still an important role for the Elf Cape to play against melee attackers.
That brought Black up to Sol Cannon, one of FF5's most notorious bosses. Remember the trouble that Solo had here? As it turns out, I made the Sol Cannon fight more difficult than it had to be with Solo. The encounter consists of the actual Cannon itself (which fires "Surge Beam", an attack that always deals 50% of max hit points) and two Launchers, who fire "Missiles" that inflict 50% of CURRENT hit points in damage and incur the Aging status effect. With Solo, I made no effort to target to the two Launchers, because they are listed as having 10,800 hit points in the code - and that's a lot! But as it turns out, I was misreading a confusing part of the code. Look at this:
React:HP Damage & HP < 10000{
Change Target:Self
Punishment
}
What this means is that after taking 800 damage, the Launchers will target themselves and use "Punishment", which is a self-destruct feature. So, in essence, they actually have 800 hit points and not 10,800. Why the game is coded this way, I have no idea. In practical terms, it meant that Black could target the two Launchers first and take them out quickly, then he would only have to worry about the intermittent Surge Beam strikes from the main cannon itself. Here's what the Launchers looked like when they were destroyed:

A little explosion at the top of the cannon. It was a little unclear which targets were the Launchers and which was the actual cannon itself! Black had to figure that out through trial and error. Anyway, even though Black could take out the Launchers quickly, he couldn't do it so fast as to prevent them from getting at least one Missile attack off. That meant the Aging/Old status, which was bad news. So Black still needed to grind out 50k more gold for an Angel Ring to prevent the status ailment, just as Solo had done. I have not yet managed to find a way to avoid this; I wonder if anyone else knows a solution (?) Seems like you absolutely need an Angel Ring to beat Sol Cannon if playing a solo character. Anyway, I was actually able to do this quite quickly by going back to Karnak and felling more Wild Nacks, at 650g per battle. Black only gained two levels in the process, to 30, which is good because I was specifically trying not to over-level him if possible.
Now protected from the Aging effect of the Missiles, Black focused on taking out the two Launchers in a renewed engagement with the boss. Three rounds was enough to pull that off, then use an Elixir just in time to avoid getting pasted by the Surge Beam. The best news was that the Sol Cannon itself was weak against Lightning, and was thus taking 1500 damage per casting of Bolt 2. Like the Launchers, Sol Cannon kills itself after taking 12,500 damage so overall Black needed 9 castings to win out. He alternated Bolt2/Bolt2/Elixir and succeeded at the cost of 4 Elixirs total. There were now 11 more in stash - always make sure to have a healthy supply for solo variants! There are a lot of them to be found in Karnak Castle before it explodes, and two more in Tycoon. This game definitely rewards exploration.
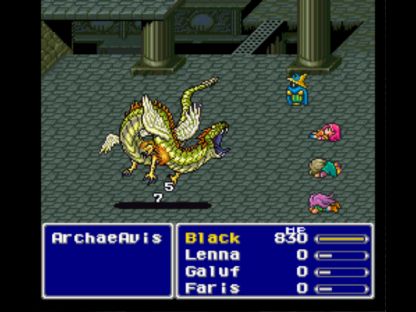
The Lonka Ruins weren't very noteworthy. The boss at the end though... ugh. Where do I start? ArcheaoAvis goes through a total of five different forms, you may recall: wind, ice, fire, lightning, and undead. The first four each have 1600 hit points, and the last one has 2500. Generally speaking, each form has three possible moves: normal attack, special attack (which inflicts a status ailment), and elemental attack, which corresponds to the form. The last, undead form of ArcheaoAvis combines all these attacks together and is generally the most difficult overall. ArcheaoAvis didn't have any elemental weaknesses, but Black's normal magic spells were enough to get him through the first four forms without undue trouble, using Fire on the first two forms and Ice on the last two. (Making sure to swap from Fire Rod to Ice Rod in mid-battle to keep the bonus damage!) However, the final undead form is IMMUNE to fire, ice, and lightning. To make matters worse, it's also immune to sleep, poison, and toad - Black's only other spells. Ummm... what in the world is Black going to do now?
Break out his piddly dagger, I guess. Uhh, that's only doing about 75 damage per attack, and ArcheaoAvis has 2500 health. Odds of Black surviving long enough to attack 30+ times: not too good.  Here's the AI code for ArcheaoAvis' final form:
{Breath Wing,Maelstrom,Specialty} (a)
{Entangle,Fight,Specialty} (b)
{Flame,Maelstrom,Specialty} (a)
{Entangle,Fight,Specialty} (b)
{Thunder,Maelstrom,Specialty} (a)
{Entangle,Fight,Specialty} (b)
{Blaze,Maelstrom,Specialty} (a)
{Entangle,Fight,Specialty} (b)
This might look complicated, but there are really only two patterns here. The "a" rounds that I marked saw ArcheaoAvis do one of three things: an elemental attack that inflicts 1/4 of max hit points (Breath Wing/Flame/Thunder/Blaze all do the same thing, just attuned to different elements), Maelstrom (which drops health to critical), or his "Specialty" attack: Claw. Claw was a physical attack that inflicted Charm status, confusing Black - very bad for a solo game. The "b" rounds marked above saw ArcheaoAvis either use Entangle (a paralysis attack, also bad for a solo game), Fight normally, or use the Claw specialty attack again. Then the pattern simply repeated. So there were all manner of dangerous abilities here, between elemental quartering attacks, Maelstrom dropping hit points to critical, and Entangle/Claw dishing out nasty status ailments. My initial impression: this fight is friggin' IMPOSSIBLE! 
Alright, calm down. Remember, there's always a solution in FF5, you just have to find it. I literally spent over an hour pouring through the Algorithms Guide and going through Internet FAQs looking for a loophole of some kind. Long story short: there was no magic solution to this problem. Black was going to have to fight his way through this one with his physical attack. So let's find the most effective way to do that, shall we? The absolute best weapon in the game for a Black Mage at this point was the Guardian Knife, which has 36 attack. Subtract out ArcheaoAvis' 6 defense, and that would be 30 damage per multiplier. I could double Black's damage just by moving him to the front row, where he would get 6x multiplier instead of 3x - but that would leave him vulnerable to increased physical damage in turn from the boss. Hmmm.
Through experimentation, I soon began to figure out that it wasn't the elemental attacks that were most dangerous to Black, it was the physical strikes from ArcheaoAvis that were doing the worst damage. The Claw specialty attack in particular was bad, Charming Black over and over again. I decided to swap from the Flame Ring accessory to the Elf Cape to add some more physical evade. This actually made a noticeable improvement:

Black began dodging a non-trivial amount of the Claw attacks coming his way. As it turns out, the Guardian Knife also has a separate 1/4 chance to evade physical attacks, and this is indeed cumulative with the Elf Cape! Combine the two together, and Black was getting 50% odds to dodge melee attacks (2/3 * 3/4 = 1/2). Now I could move him up to the front row and stand some chance of surviving. I looked at the math for Knife damage and saw that Black would pick up an extra attack multiplier at level 34, from 6 to 7. That would pull damage from the 180-200 range into the 220-250 area. I went ahead and added three more levels, and indeed saw a notable improvement. Black returned back to the ruins, and on my very first attempt started getting a favorable outcome. ArcheaoAvis was avoiding his Claw move, and Black was dodging it on the occasions where it did come out. Three attacks... six attacks - halfway there! - just a few more rounds... Black's using Elixirs after each Maelstrom, and otherwise staying out of the critical range.
Finally, we're down to one last round, needing just the eleventh and last hit to put the boss away. If ArcheaoAvis does anything other than Claw or Entangle, Black's going to win. He uses... Maelstrom! Now, if my math is wrong, Black's going to die here on the next attack. But I trusted that I had added up all the damage correctly - and I was right! 

Got a seriously sweet victory picture too, with Black winning with 5 hit points left. As I explained above, that's somewhat disingenous (since I would have used another Elixir in any other situation) but it definitely looked cool. What a battle! I actually thought it was impossible at first, and then I won by gaining a mere four levels (30 to 34). It's all about having the right plan in this game! Power-leveling need not apply.


