
 |
|
|
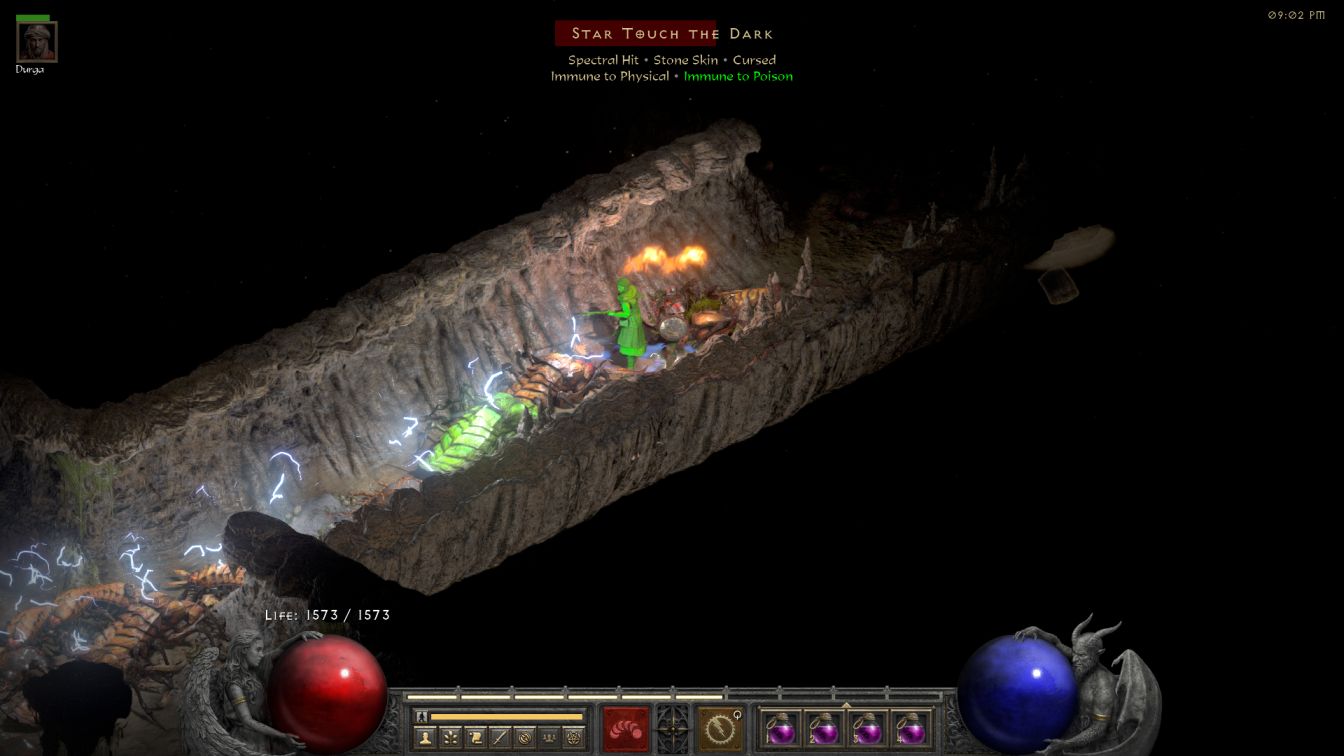
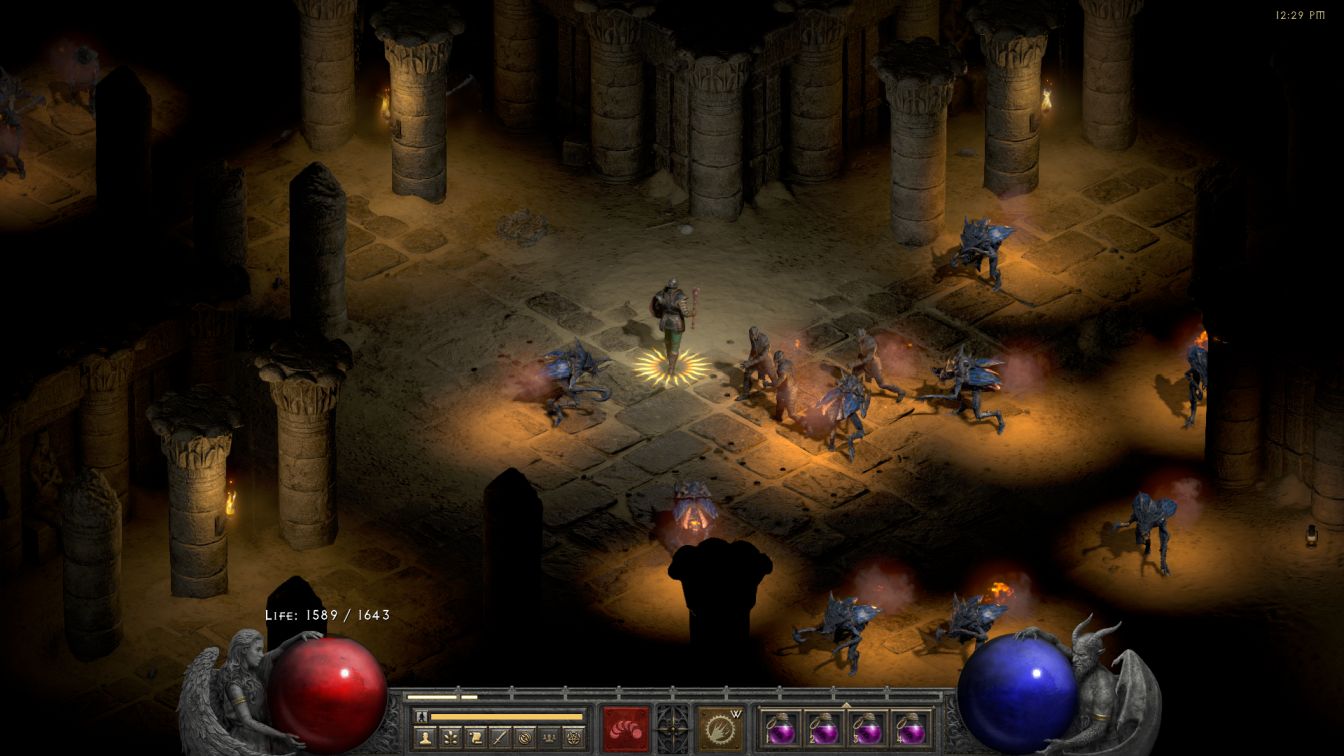
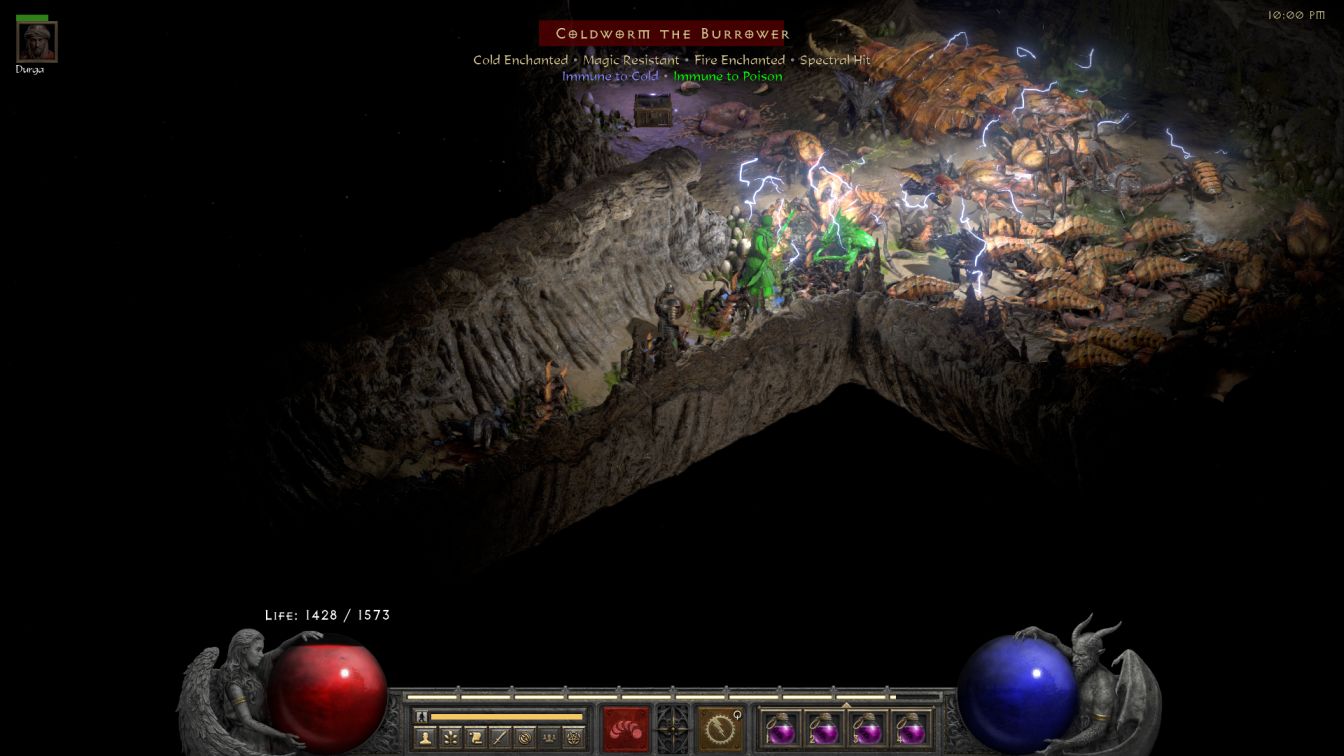
WillPower continued the second half of Act Two at CLVL 76. Durga had surprisingly managed to survive Claw Viper Temple 2 and I decided that the Maggot Lair would be a perfect place to get the most use out of the mercenary while he was still alive. The cramped spaces of the underground tunnels were indeed a place where having a spear-wielding bodyguard was exactly what WillPower needed, and I spent all three floors of the place hiding behind the safety provided by Durga. There was zero room to maneuver which meant either tanking hits with Durga or tanking them with WillPower himself while the elemental auras did their work. All three floors of the Maggot Lair share the same collection of potential monsters, two types of maggots and two types of beetles along with Black Locust flies. WillPower had the good luck to draw the incredibly weak Black Locusts on each floor and no maggots at all on Maggot Lair 2, instead seeing lots and lots of beetles along the way. Those things hit hard and were Lightning Immune but posed no threat with Durga to tank them in one-on-one fights. In fact, Durga managed to survive the entire Maggot Lair thanks to lots of potion-drinking and some timely retreats back to town when his health dropped into the red. He gained almost five levels in the process too, from Level 71 to just short of Level 76, thanks to the accelerated experience curve of mercenaries. This was just the ticket to get him back on track after he'd fallen way behind from having been dead so long. Coldworm's room was absolutely packed with enemies but Holy Fire burned through the beetles lurking there and then Holy Shock worked its way through all of the maggots afterwards without issue.
The Ancient Tunnels was the other area that I'd previously skipped over which now had to be explored for the purposes of a full clear. These foul sewers were slightly more open than the Maggot Lair and as a result Durga survived for about two minutes before a boss pack cut him down; I couldn't keep him alive without constant trips back to town and it simply wasn't worth the effort here. This area had two fairly easy opponents in the form of skeleton mages and mummies along with a much tougher foe in the Invaders. They were very beefy with almost 10,000 HP apiece along with having fire immunity and 50% lightning resistance to make them feel even more resilient. Although it was possible to zap them to death with Holy Shock, the process took so long that it was faster to tag everything with Prevent Monster Heal, even the normal enemies. As a result, the Ancient Tunnels were fairly straightforward when facing the skeletons and mummies and dragged out noticeably when the Invaders appeared.
With those leftover areas finished off, WillPower could now begin moving forward again starting with the Palace. Harem 2 mostly featured cold-tossing skeleton mages and Dune Beasts although the Invaders showed up here again to be another pain in the rear. It was remarkable how WillPower could walk into a crowded room of skeletons with total unconcern and watch everything crumble to dust within a few seconds, then spend several minutes slowly walking in circles to kill a pair of Invaders. Unfortunately the skeleton mages were the only foes that had zero lightning resistance, with everything else in the Palace having a sizable amount and that was on top of the Fire Immune property on the Invaders. Holy Fire was getting a good workout as well since it was needed against the Lightning Immune Dune Beasts. At least WillPower had the big advantage of never needing to pause to cast an ability which made it much easier to dodge incoming missile attacks of the sort that the Palace floors are infamous for having.
As WillPower descended deeper into the Palace Cellars, he continued to run into Invaders on floor after floor. They were joined by Blunderbores on Palace 1 who had a similar profile: Fire Immune, high health, and 50% lightning resistance. However, the Blunderbores were significantly slower in terms of foot speed and played out much like mummies, not dangerous due to their inability to reach WillPower in most circumstances. The Invaders were one of the faster melee enemy types and also had a really annoying AI behavior pattern where they would sometimes retreat when they dropped to about a quarter health remaining. Sometimes they would freeze up and stand in place, sometimes they would run off to a corner, and sometimes they would continue attacking normally. It was frustrating when they would run off and start healing back to full which was another reason why I tried to tag all of the Invaders with Prevent Monster Heal.
The Blunderbores dropped out on Palace 2 but unfortunately the Invaders stayed along with more Dune Beasts and skeleton archers. This floor had a disproportinately high number of Invaders as it felt like roughly 70% of the level rolled as that monster type and I don't think it was mere perception because they required so much more effort to kill. There were multiple Invader champ packs that WillPower had to cut his way through before he was finished with this place. Palace 3 turned out to have Invaders once again, making them present in 4 out of 4 of the Harem/Palace floors plus the Ancient Tunnels that I had cleared immediately beforehand, argh! Five consecutive areas with those things wasn't much fun. There was another Invader champ pack plus a Dune Beast boss that WillPower encountered within the first 10% of the bottom floor and I had to expend some real effort to defeat them without waking up more of the level.
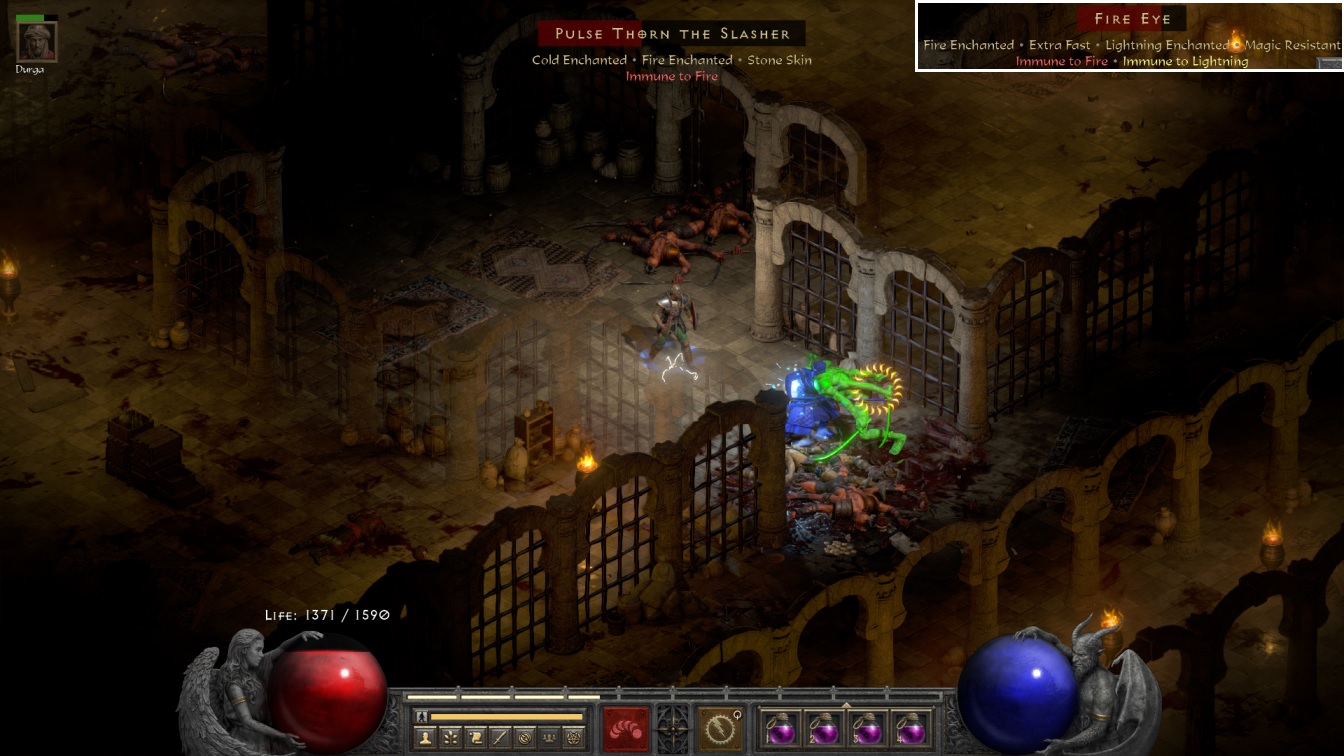
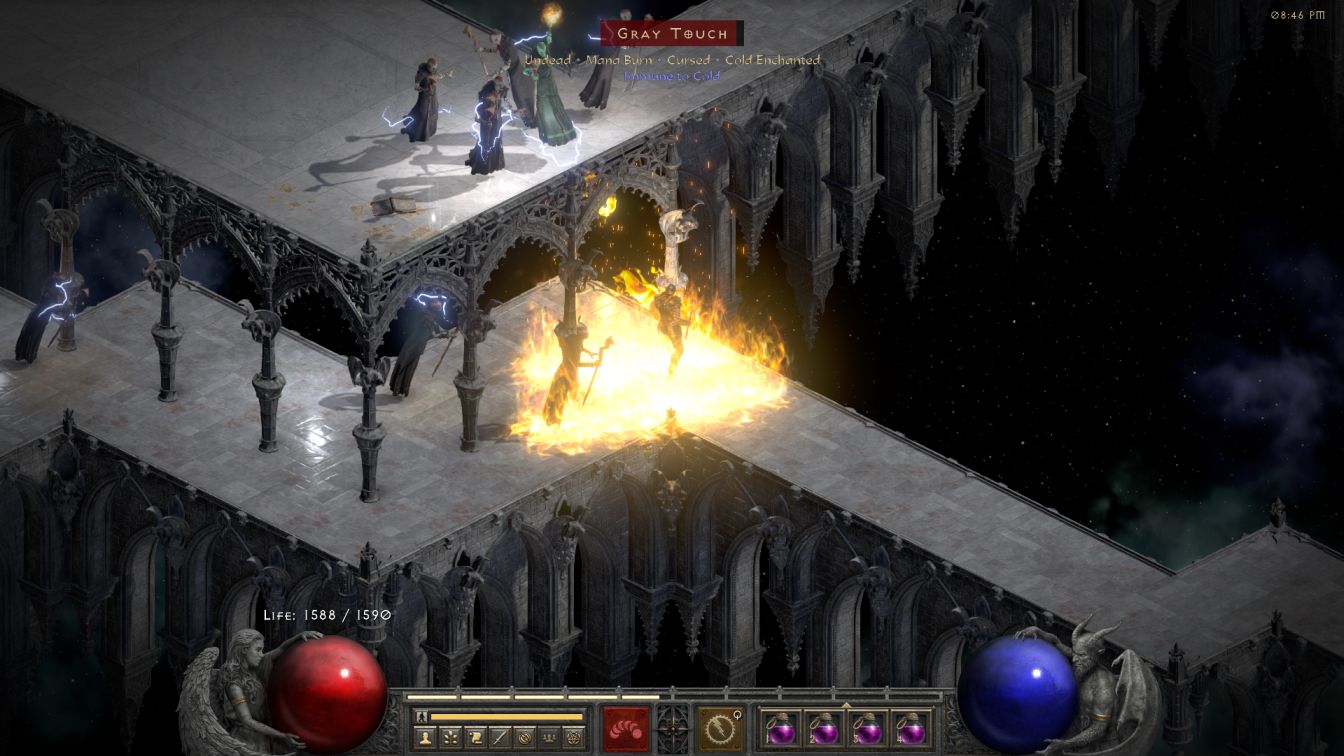
I was working my way over to the Arcane Sanctuary portal to secure it just in case WillPower had to bail out of a town portal or Save and Exit somewhere else, that way he wouldn't lose all of the progress he'd made thus far. I made it to the central portal without much trouble and claimed the waypoint, then continued exploring the top side of the floor. I fought an Cursed Invader boss there and thought that I had encountered Fire Eye only to discover that his name was "Grief Eye the Witch" - another Invader boss with the word "Eye" in its name! I was glad that WillPower was able to defeat this imitator first because Fire Eye was in the very next room and his Extra Fast trait had his minions absolutely flying all over the place. I pulled them apart into smaller groups with footwork, tagged everything with Prevent Monster Heal and slew the minions, then returned for Fire Eye himself. He was Lightning Enchanted which gave him a double immunity and forced me to bring Durga out of storage for some physical and poison damage. This was working well until Fire Eye decided to run away on low health and proceeded to race across half the level, directly into two more boss packs where I snapped the screenshot above. The fact that Fire Eye wasn't regenerating health allowed me to get the kill eventually but sheesh, what a pain in the butt tracking him down! WillPower did defeat every foe in the whole Palace although it took about 90 minutes of real-world time to proceed from the Palace 1 waypoint to the end.
The Arcane Sanctuary at least didn't have any more Invaders to worry about since it always holds the same three monster types: Hell Clan goats, Spectres, and Ghoul Lord vampires. The ghosts were by far the easiest of this trio and they barely even registered as an opponent for WillPower, often dying in as little as three or four pulses of Holy Shock. The goats weren't much of a problem either as they had no lightning resistance and only moderate total health to go along with a very predictable melee AI which would chase my Paladin in endless circles. I was often able to position WillPower across some kind of terrain obstacle and watch as the goats shuffled around aimlessly while being zapped to death. It was the third enemy that caused most of the issues here, with the Ghoul Lords possessing high health, both fire and lightning resistances, plus innate lifesteal from their abilities. They were annoying enough with that vampirism that I found it faster to hit all of them with Prevent Monster Heal which did appear to block their leeching from spells. Of course, needing to hit every single vampire in the whole Arcane Sanctuary with PMH spears definitely took a lot of time, not to mention then needing to stand around and watch them bleed out from Holy Shock afterwards. Like the Invaders, the Ghoul Lords would also try to run away when they dropped low on health to make more trouble down the road - argh!
WillPower started out in the M.C. Escher distorted perspective quadrant of the Arcane Sanctuary where he quickly ran into one boss after another. I wound up facing eight different bosses / champ packs in this single quadrant of the area, with five of them rolling as the most difficult Ghoul Lord type. According to the Amazon Basin, the whole Sanctuary is only supposed to have 7-9 bosses in total so this was either colossally bad luck or something funky going on with the monster generation, neither of which would surprise me. The second quadrant (the straight line area) contained zero bosses of any kind and took significantly less time to clear as a result. This portion of the Arcane Sancutary had one additional opponent though:
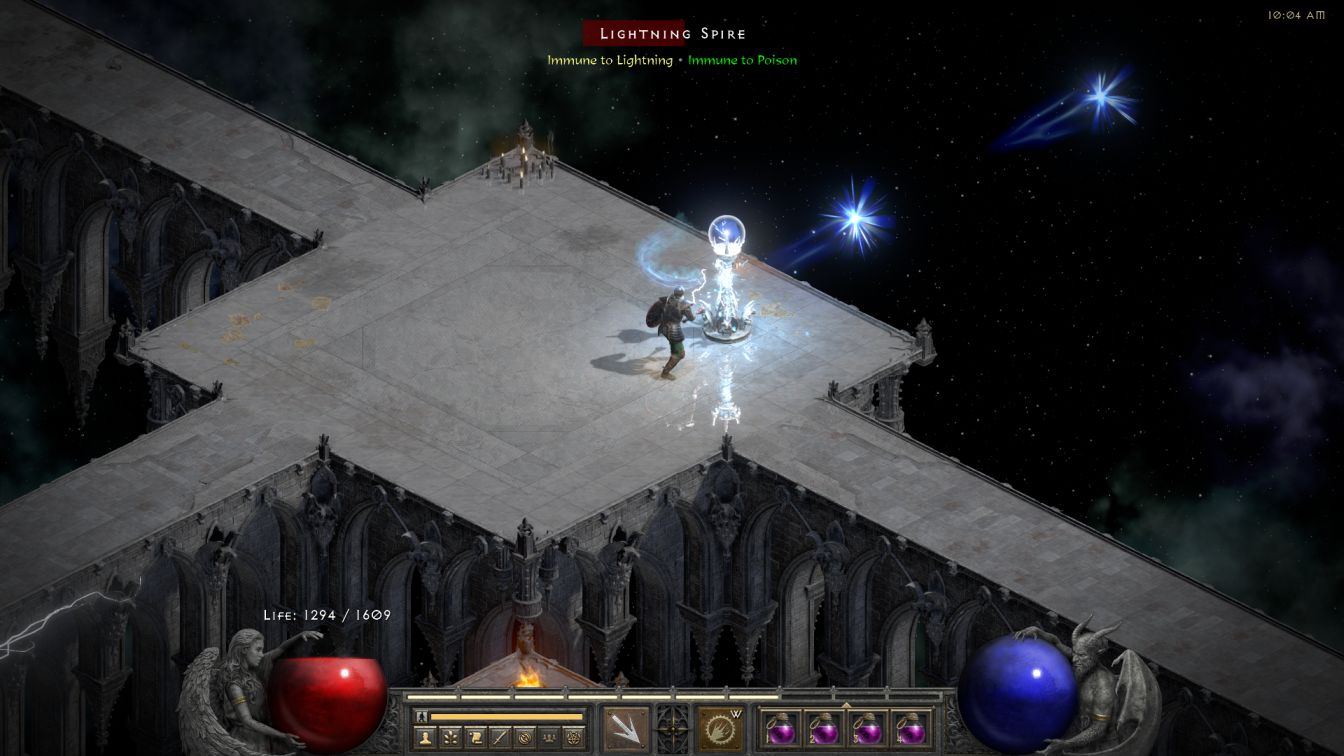
The very annoying Lightning Spires were present at several of the major intersections which meant that they needed to be removed for safety's sake. The Lightning Spires had a massive 30,000 HP total, lightning immunity, and 90% fire resistance to make them almost unkillable by WillPower's standard setup. In order to speed things up, I went ahead and used WillPower's elemental-enhanced melee blows which were normally off limits by variant rule. Recall that Holy Fire dealt 355-890 damage via its aura effect but a much greater 2133-2671 fire damage when added to WillPower's melee strikes. This damage was also applied at a much faster rate since I didn't have to wait two seconds between elemental pulses, perfect for chopping down this sturdy structure. I should also mention that there's a bright star graphic that shoots out when the Paladin hits something with an attack when using one of the elemental auras as seen above. For most of the game, I'd been using this graphical effect as a way to tell if Prevent Monster Heal had been applied; the little star would shoot out when a glaive toss applied elemental damage which was simultaneously a way to know that PMH had landed. Pretty clever, huh? In this one case, WillPower was using the elemental auras the way that they were meant to be used and not simply for passive aura damage.
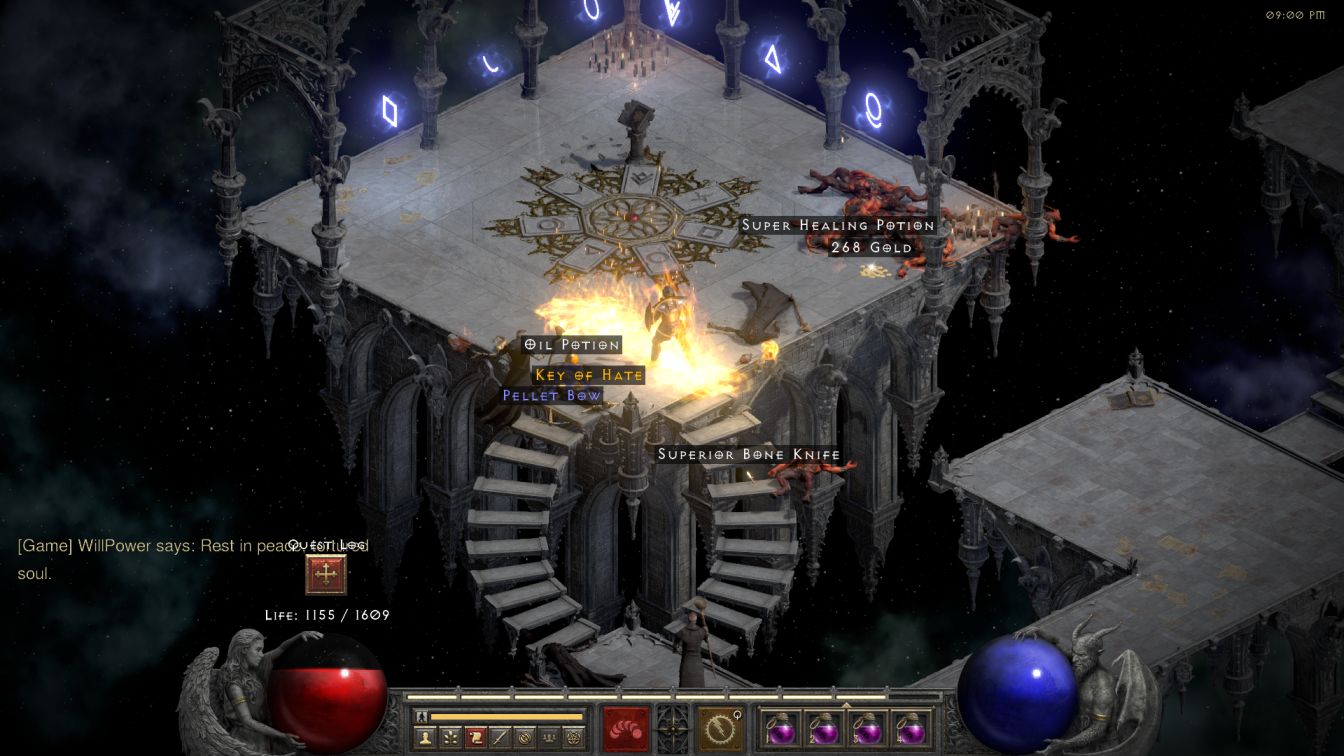
It took so long to clear the first two quadrants of the Arcane Sanctuary that I paused there and came back to do the remaining two on the following day. (Remember that the map doesn't change in Offline mode unless the player switches between difficulties.) The third quadrant was the one with the teleporters, probably the easiest of the bunch for WillPower, and it wound up holding the Summoner as well. He was holed up on his platform with a bunch of Ghoul Lords and the former Horadric mage died before his crew of vampires due to his tiny health total. The Summoner dropped a Key of Hate which I understand is part of the process for making it to Uber Tristram to fight Uber Diablo, not that I've ever done that. The final quadrant was uneventful though I did make sure to get everything for a full clear of the place. Overall the danger level in the Arcane Sanctuary was quite low, I was just getting mighty tired of all those Ghoul Lords by the end of the process.
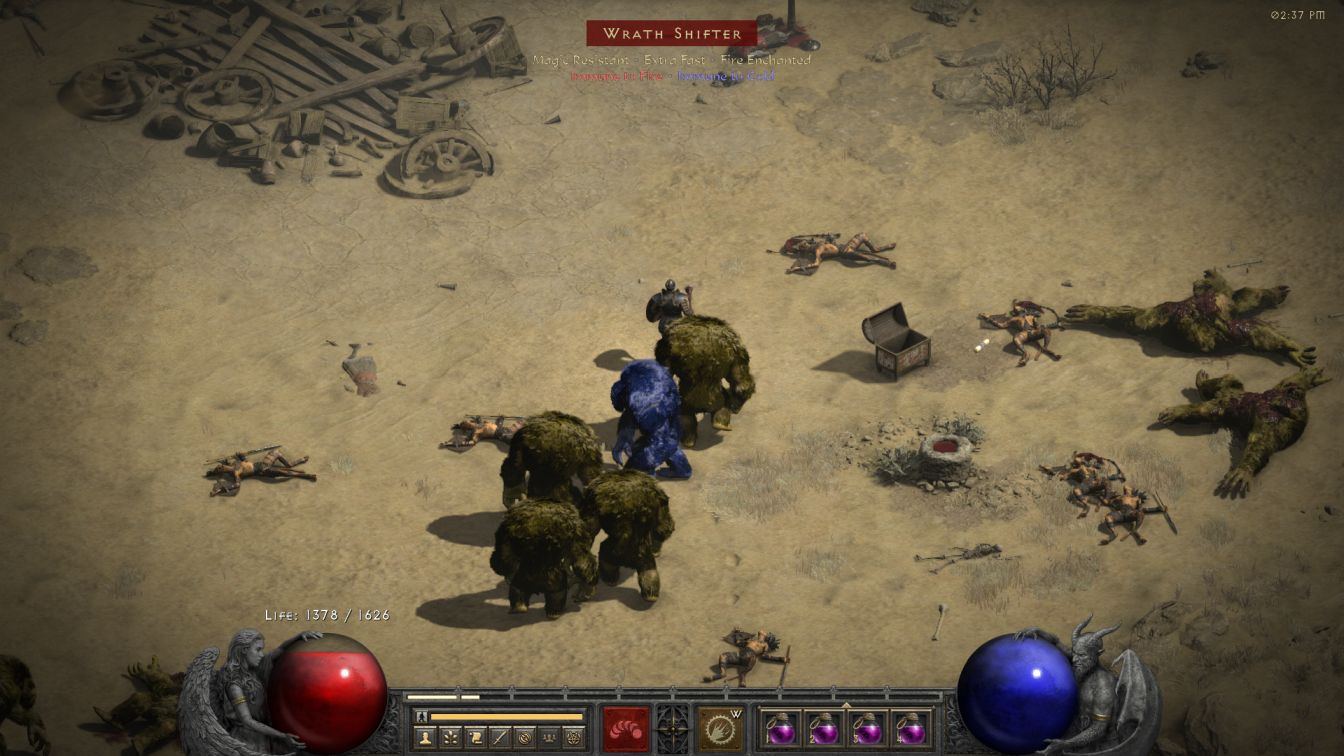
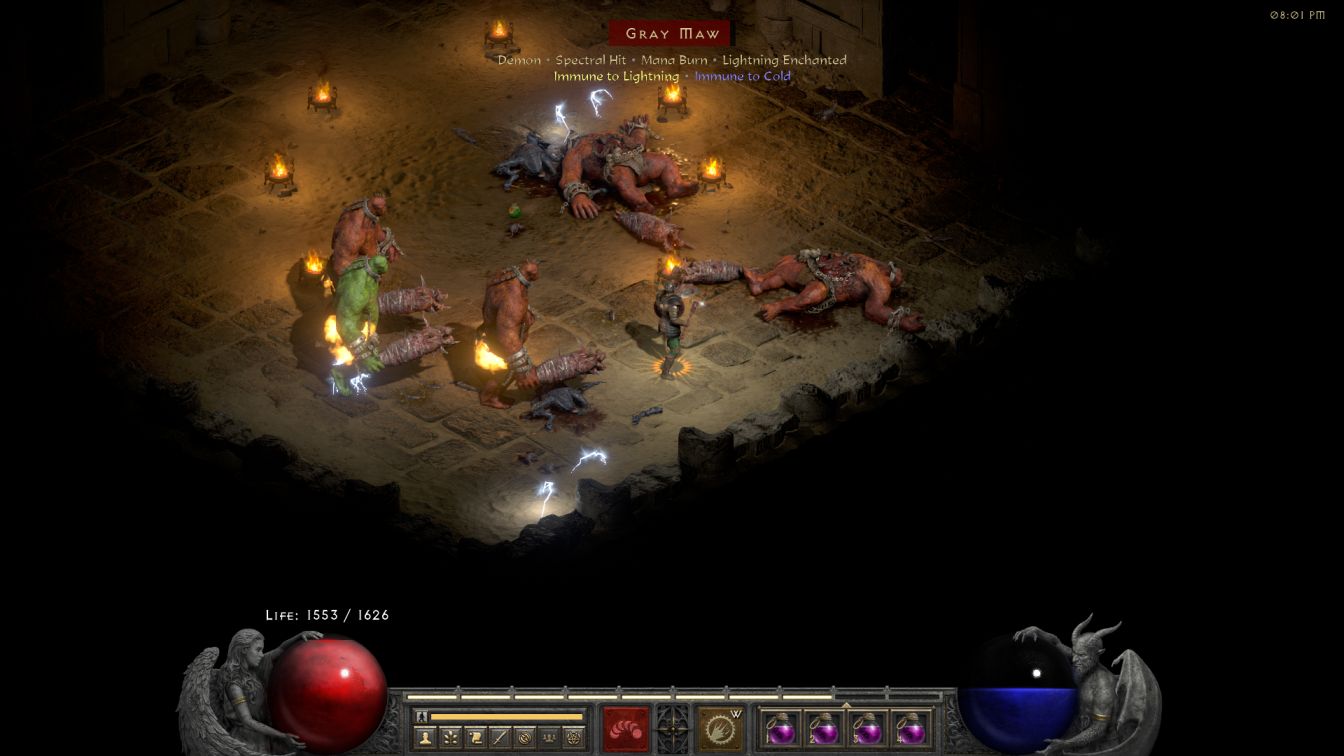
The Canyon of the Magi was the last outdoor desert area of Act Two and it was a relief to be back in wide open spaces, albeit temporarily before venture down into the tombs. WillPower had a pretty friendly draw here with Hell Cats and Hell Slingers making up a good chunk of the enemy population, both of which had zero lightning resistance and died very quickly to Holy Shock. The third monster turned out to be Crushers who were much tankier and brought 50% lightning resistance to force the use of Holy Fire instead. They were still fairly reasonable although I had to watch out for the increased movement speed that they picked up when dropping below half health. The most noteworthy foe was the Crusher boss pictured above who had Extra Fast trait to juice him and his minions with extra speed, plus Fire Enchanted to create an elemental immunity, plus Magic Resistant trait to take him up to something like 90% lightning resistance. It would have been completely impossible to make any progress here without Prevent Monster Heal and even with all regeneration shut down it still took forever to kill the beast. I actually walked across half of the whole Canyon with this boss in tow, fighting other enemies while the Crusher kept chasing me, for about 15 minutes before the thing finally keeled over. Annoying as that was, I still preferred these enemies to maggots blanketing the deserts with their eggs or beetles which would be Lightning Immune and rule out the use of Holy Shock.
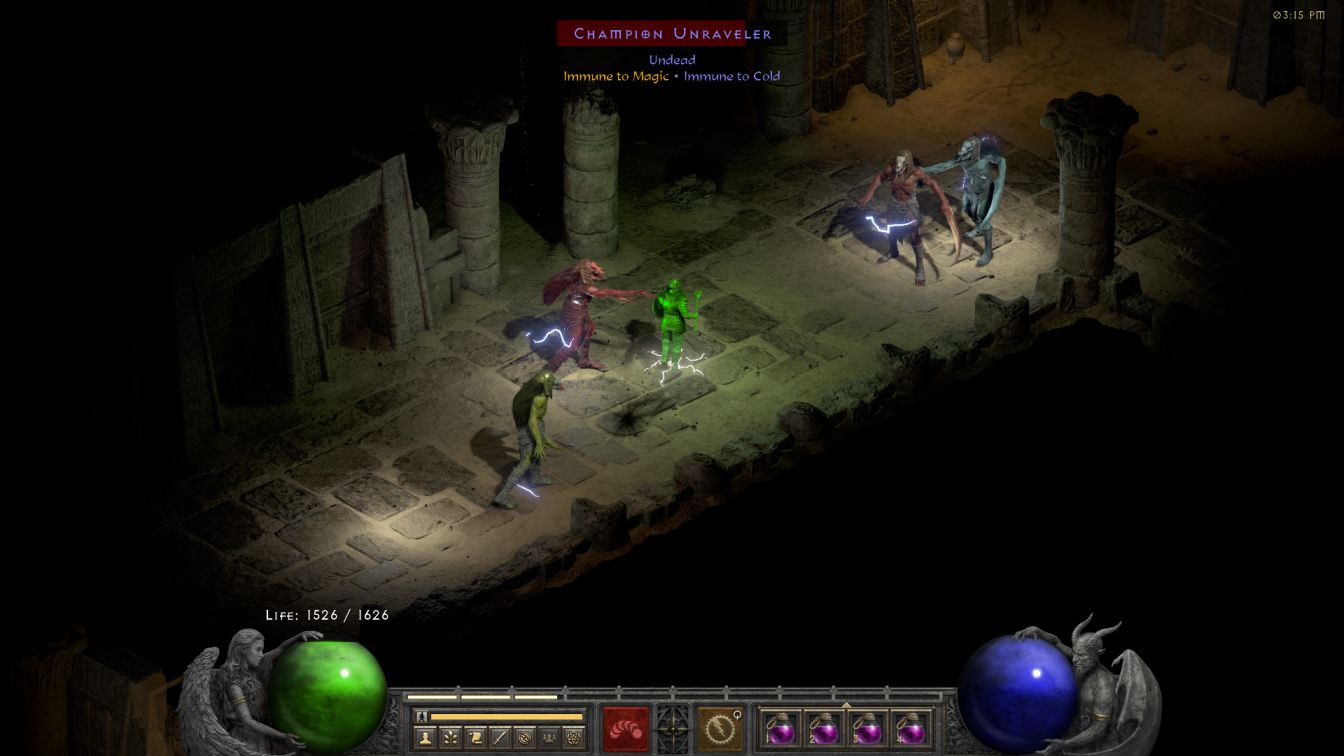
The True Tomb was in the central fourth position at the very top of the Canyon and therefore I started out on the left side and resolved to work through the False Tombs in clockwise fashion while skipping the middle one until last. Tomb #1 had a large central room at the stairs filled with Unravelers/Burning Dead, Apparitions, and Ghoul Lords. These were very much not the enemies that I wanted to see, with everything resurrectable and Ghoul Lord vampires back again, however I counted myself lucky that there were no bosses in that starting room. WillPower kept the various undead chasing after him until he could tag the one Unraveler in the room with PMH, then wait for it to die to Holy Shock, followed by zapping the numerous resurrectables to death. That gave me one room's worth of space to work with and the rest of Tomb #1 was spent pulling one group of undead opponents after another back to the starting chamber for disposal, only going after the Unravelers once everything else was dead. It was highly tedious but the only safe way to proceed. There were several vampire bosses, one of them Extra Strong / Cursed (though fortunately they don't use their melee attacks very often), plus this Unraveler champion group in one of the corridors near the gold chest:
This was highly delicate work as WillPower had to fight the Unravelers in this cramped hallway. I could not retreat into the previous room as there were skeleton bodies inside which would only have been revived endlessly - all four Unraveler champs had to die right here! I was hoping for some relief in Tomb #2 and had my hopes dashed upon entering: more Unravelers/Burning Dead, more Ghoul Lords, and the one easy monster type Apparitions swapped out in favor of another resurrectable in Preserved Dead mummies. This was not much fun and made for another lengthy process of pulling undead foes away from the Unravelers over and over and over again. WillPower fought seven bosses in the small confines of this False Tomb, fortunately not until after he had the starting area secured, resulting in another lengthy slog to clear out the 4-5 rooms that comprised the place. There were multiple different Unraveler bosses along with double vampire bosses at the room with the gold chest, almost a dozen Ghoul Lords zipping around hurling fireballs and raising fire walls as WillPower tried to hit them with Prevent Monster Heal one at a time. It took almost 40 minutes to clear out this False Tomb - surely the next one had to be better, right?
Spoiler alert: it was not.
Tomb #3 drew my least-favorite of the various entrance segments, the one pictured above with three corridors that run off in each direction away from the stairs. This one leaves the player with little room to operate and tends to have monsters flooding in from all sides with no safe spaces available, which is exactly what happened this time around. WillPower had drawn beetles for a change, and while normally I would have been overjoyed to get a non-resurrectable foe, there were way too many of them entering the picture from three directions at once. There was also a Fanaticism boss arriving from the southeast corridor and despite my best efforts to bob and weave through the mob of enemies closing in, there were simply too many of them. WillPower was pinned against the wall and I wasn't able to make it out of a town portal before they were on him. My only choice was to Save and Exit or else suffer WillPower's first death, with my Paladin making it out safely at the cost of two full rejuvs. I loaded the game back up and tried a second time only to have the same thing happen again; this time it was a Blunderbore boss that trapped WillPower and nearly ended his life before I was forced to Save and Exit a second time. I hated to make use of this cheese option but there was literally nothing else possible, either Save and Exit or else take a character death. I'm pretty sure that I wouldn't have been able to get WillPower out in time if this hadn't been Offline mode (where everything pauses on this screen, unlike the online servers) and it was a close call regardless with another four full rejuvs burned in the process.
On the third time around in Tomb #3 there was a mummy boss and its minions at the entrance. That was still quite bad, however the mummies were slow enough that WillPower could walk in a mini-loop right at the stairs and burn them to death with Holy Fire before waking anything else up. That finally gave me enough room to get started in the False Tomb, whew! Sadly, the monster mix that allowed WillPower to get down the stairs in the first place made the rest of the level an absolute torture fest to complete. There were only two monsters in the whole tomb: mummies and Unravelers/Burning Dead - the third straight tomb with wall-to-wall resurrectables! The Burning Dead themselves weren't actually that bad and died readily to Holy Shock, the problem was the Unravelers who would bring them back to life endlessly if they were anywhere within revival range. Thus Tomb #3 was another Pied Piper festival from beginning to end, with WillPower leading all of the melee undead on a merry chase away from their greater mummy companions before coming back to finish the Unravelers. Rinse and repeat about a hundred times to clear out the whole tomb. At least most of the bosses here were mummies although there were a pair of Unraveler bosses who made my life miserable until they could be cleaned up. The final room of the tomb was also one of the most packed I've ever seen in my life; I had to pull a disgusting number of skeletons and mummies out of there to reach the Unravelers in the back. I think that there may have been as many as 50 enemies in a small room, every single one of which had to be lured away from the greater mummies to make any progress forward.
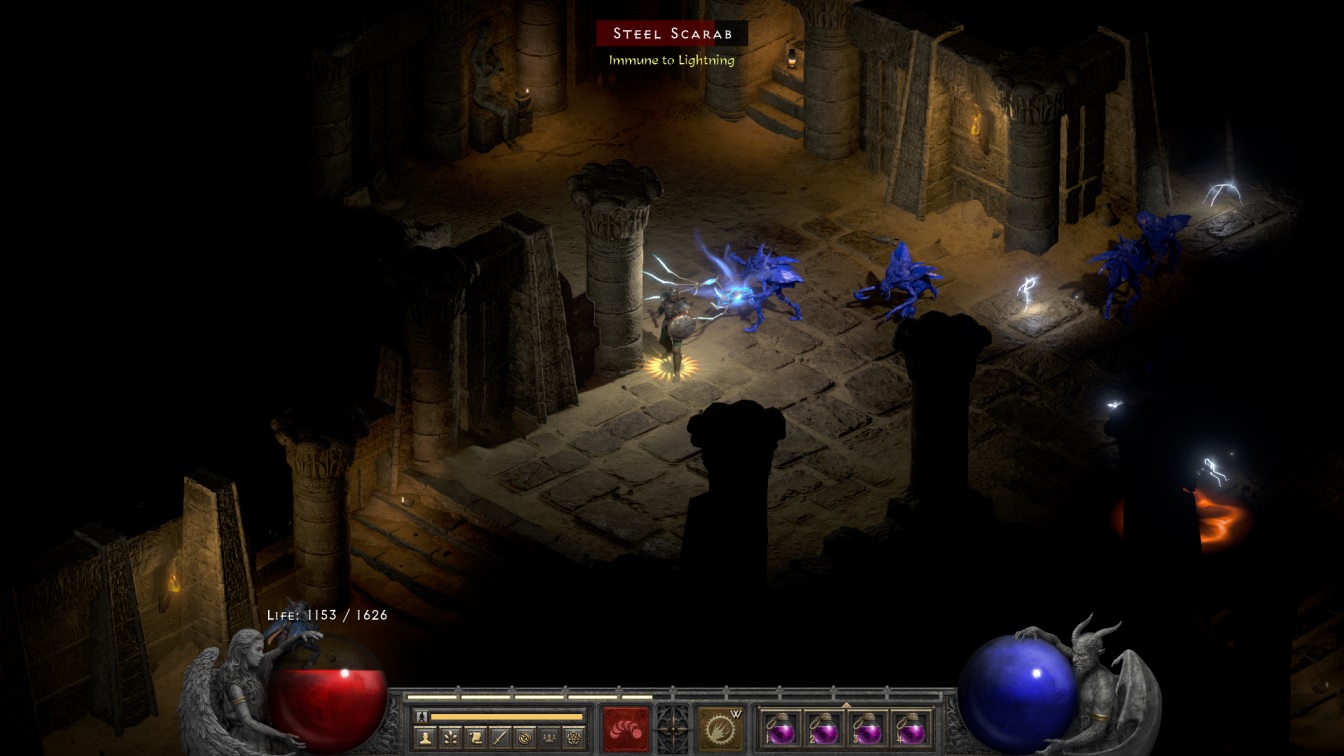
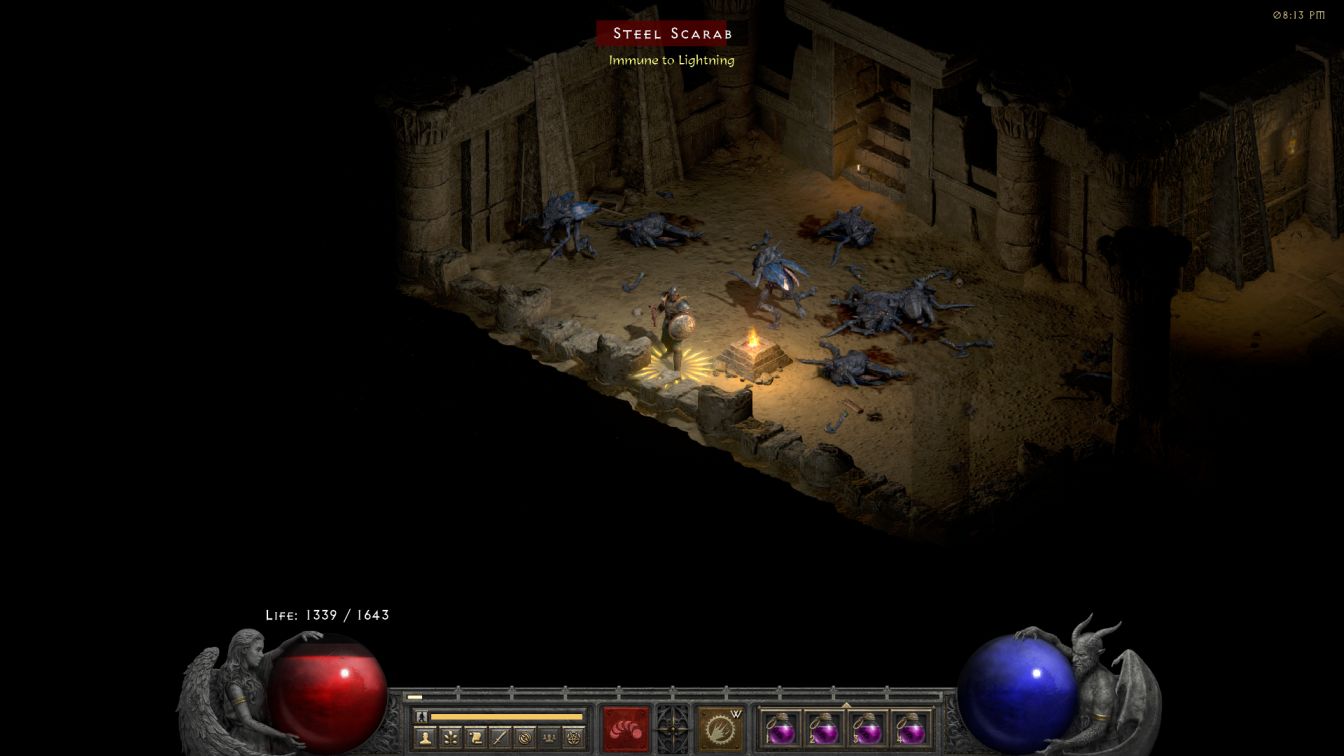
Tomb #5 had the exact same entry segment as the previous tomb and I was worried about a similar disaster getting started inside. Fortunately there were no bosses anyway near the stairs, only a series of normal Steel Scarab beetles and Apparitions trickling in a couple at a time. The small numbers allowed WillPower to clear out all of the initial hallways and establish some retreat room before any of the bosses started showing up. This tomb was heavy on beetle bosses with three of them plus a pair of beetle champ packs, and while the normal beetles weren't terribly tough customers, they became a lot more dangerous when juiced up with Extra Fast speed or Cursed trait. The third enemy type was Ghoul Lords which was certainly preferable to more Unraveleres - finally a tomb without reviving antics. Actually there was a fourth monster here as well: Mummy Sarcophaguses that bred lots of Dried Corpses. One of them produced about 50 mummies before running out of its supply, a case where I think WillPower was resetting the thing by stepping out of its room repeatedly to retreat from its mummies. All in all, this wasn't as relaxing of a tomb as I would have expected given the lack of Unravelers.
There was another open room at the start of Tomb #6 and WillPower was forced to walk in mini-loops next to the stairs when he was confronted with more beetles right out of the gate. I managed to avoid waking anything else up and sorted out the initial welcoming party, then fought several more beetles and a couple of Gorebellies to secure the initial room. This tomb would have Ghoul Lords as the third monster draw (no Unravelers, hooray!) but the bulk of the place was those first two enemies, lots and lots of beetles and the big pinheads including several bosses of each type. They were an interesting pair to have, with the beetles much faster and therefore more dangerous while the Gorebellies were extremely tanky and took forever to kill without being much of a threat. The beetles were all Lightning Immune, of course, however their 5000 HP total and zero fire resistance made them easy prey for Holy Fire. By contrast, the Gorebellies had 11,000 health apiece and 50% resistance to both fire and lightning to block both of WillPower's offensive tools. I had no choice but to hit all of them with Prevent Monster Heal glaives to make any progress, in addition to hitting all of the Ghoul Lords as well to shut down their innate healing. At least the beetles would just die to Holy Fire without needing PMH antics.
This is also a good time to mention that Holy Shock's damage wasn't quite as powerful as I had been anticipating. I had noticed from the very beginning that its lightning damage seemed to be highly variable and the hours that I spent crawling through these tombs served to confirm how the elemental aura worked. I had been thinking that Holy Shock would always deal its maximum damage (about 2000 at this point) at close range and then dwindle out to the minimal 1 damage at max range. That was clearly not the case: Holy Shock actually dealt 1-2000 damage up close and then decreased to 1-1000 damage at max range. This was much worse since WillPower was typically only a few yards away from his opponents and the massive variation in Holy Shock's actual damage could be highly frustrating. Sometimes he would clearly roll a bunch of double-digit outputs in a row and the enemy healthbar wouldn't move at all. Overall then, while Holy Shock was still better than Holy Fire against everything but lightning resistant targets, the extreme randomness of its damage undercut the usefulness of the elemental aura more than I'd been hoping to see.
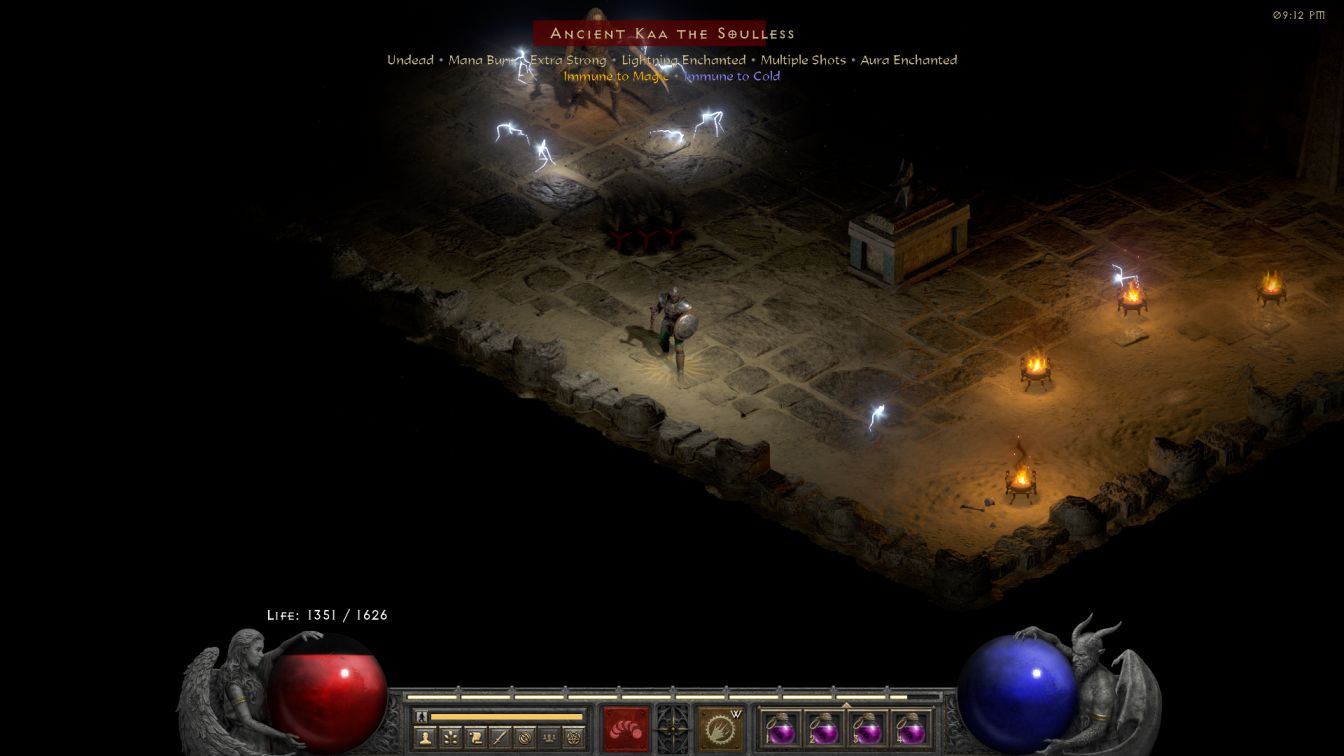
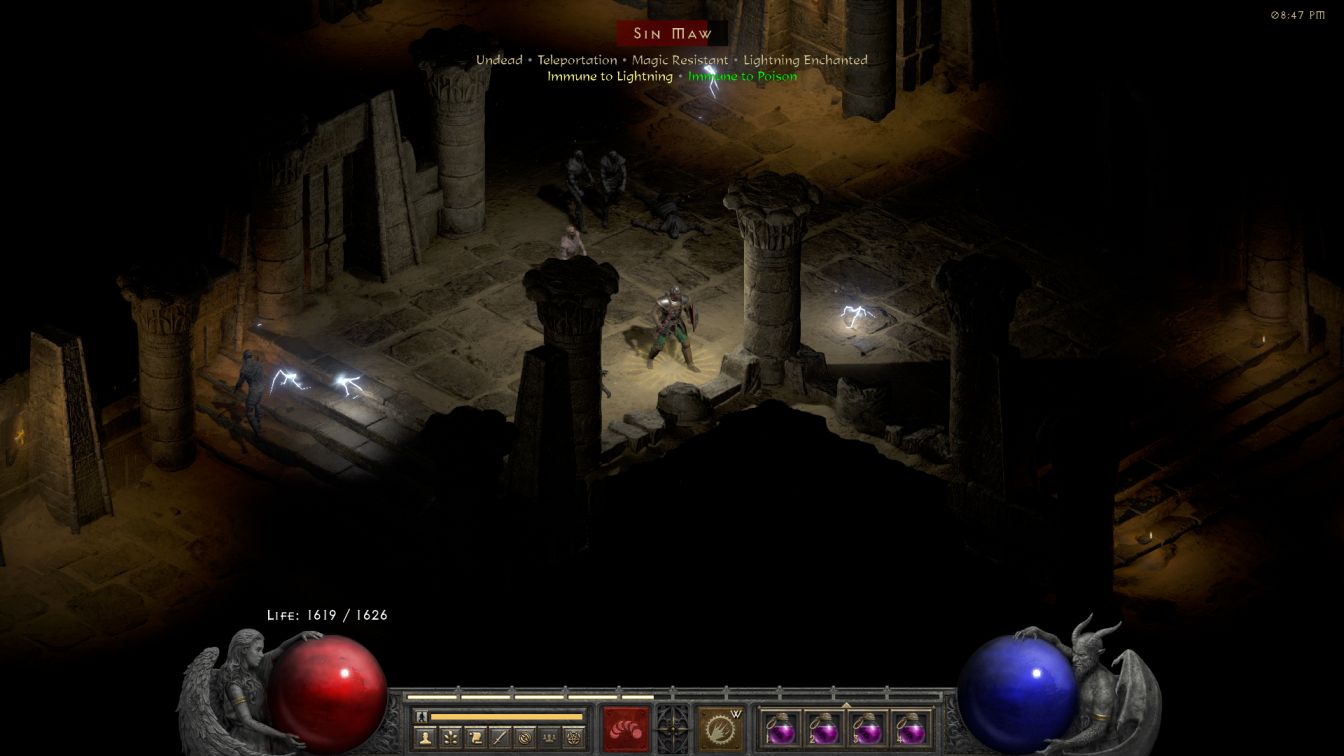
Tomb #6 kept going and going with additional connecting chambers and I figured out fairly quickly that it must be Kaa's Tomb. Eventually I managed to track down the greater mummy himself, lurking in one of the back corners as he always does. The fight against Kaa had been a bit of a disaster in Nightmare difficulty and I was pleased to find that it was much more routine this time around. WillPower lured out the Burning Dead minions (and about a dozen beetles who were also hanging out with Kaa) into another room where they could be zapped to death with Holy Shock and only went back to fight Kaa when everything else was dead. His Extra Strong / Multishot Unholy Bolts packed a punch but WillPower had been through worse trials by now and Kaa was something that he could handle with something approaching relative ease. I made sure to tag Kaa with Prevent Monster Heal and then relied on Holy Fire since the boss has 95% lightning resistance in Hell difficulty. The rest of the tomb was uneventful and I have to say that this was a good draw for WillPower to have in Kaa's large dungeon. It still took about two hours to clear in full despite having no other greater mummies to worry about.
The last False Tomb was over on the extreme right end of the Canyon and greeted WillPower with this sight upon arrival. The initial room was the same almost-complete circular layout that had given me so many problems on Halls of the Dead 2 and there was a welcoming party of beetles immediately on top of my Paladin. WillPower killed the initial few beetles right there at the staircase, taking a terrible beating in the process since I was too scared to venture any further to the right and wake up more beetles. They came piling in anyway though, probably tagged by a flash of Holy Fire due to its extreme range, and I was just barely dropping the initial critters as more of them showed up. WillPower ended up getting cornered by three beetles and I had to drink four full rejuvs before the aura could finish off one of them and allow my character to slip free of the wall. Then some Burning Dead skeletons began entering through the hallway to the southeast and WillPower had to draw them into the tight back corner where there was even less room to maneuver before dropping a Cursed/Extra Fast Unraveler boss just through the doorway. As usual, it took a tremendous amount of effort to get the tiniest foothold established.
The rest of Tomb #7 was about what I had come to expect from the Tombs by now, lots of hard work without being too life-threateningly dangerous once there was room for WillPower to move and fight. The last monster type was Blunderbores which I considered to be a good draw by now, with the big muscleheads taking a while to kill at the tradeoff of rarely hitting WillPower. Beetles were once again the scariest enemy due to their fast movement and erratic patterns. Other fun tidbits from this place included the corridor to the southeast holding a large chamber with seven Unravelers inside, five of them champs of some kind, plus a room to the northeast with a beetle boss and a Mummy Sarcophagus that spat out two dozen undead before collapsing. Still, these were threats that I'd seen before by now and I was eager to finish up here and move on to the True Tomb.
There was a bit of a real-world delay before WillPower was able to tackle the True Tomb, in part because I needed to have a lengthy block of time set aside to clear the whole area and also in part because everyone in the family came down with some nasty illnesses for a week. Eventually though WillPower was ready and headed off to the True Tomb in spot #4 at the northern tip of the canyon. I was presented with one of the most open setups available in the Tombs, with the staircase on the right hand side and then three corridors lined with pillars running off to the northeast, northwest, and southwest. There were also beetles and mummies swarming everywhere so WillPower had to watch his step immediately; I was able to down a good number of beetles with Holy Fire but still had to escape out of a town portal when they cornered my Paladin against a wall. Upon returning back from the Canyon of the Magi waypoint, I found that there was enough space for WillPower to clear out the opening room and establish a firm foothold, always the toughest part of these underground areas. The True Tomb can actually be much easier than the False Tombs in this regard because the vastly larger size of the place means bosses are less likely to spawn at the entrance. Sure enough, it was all normal opponents here which made things relatively simple.
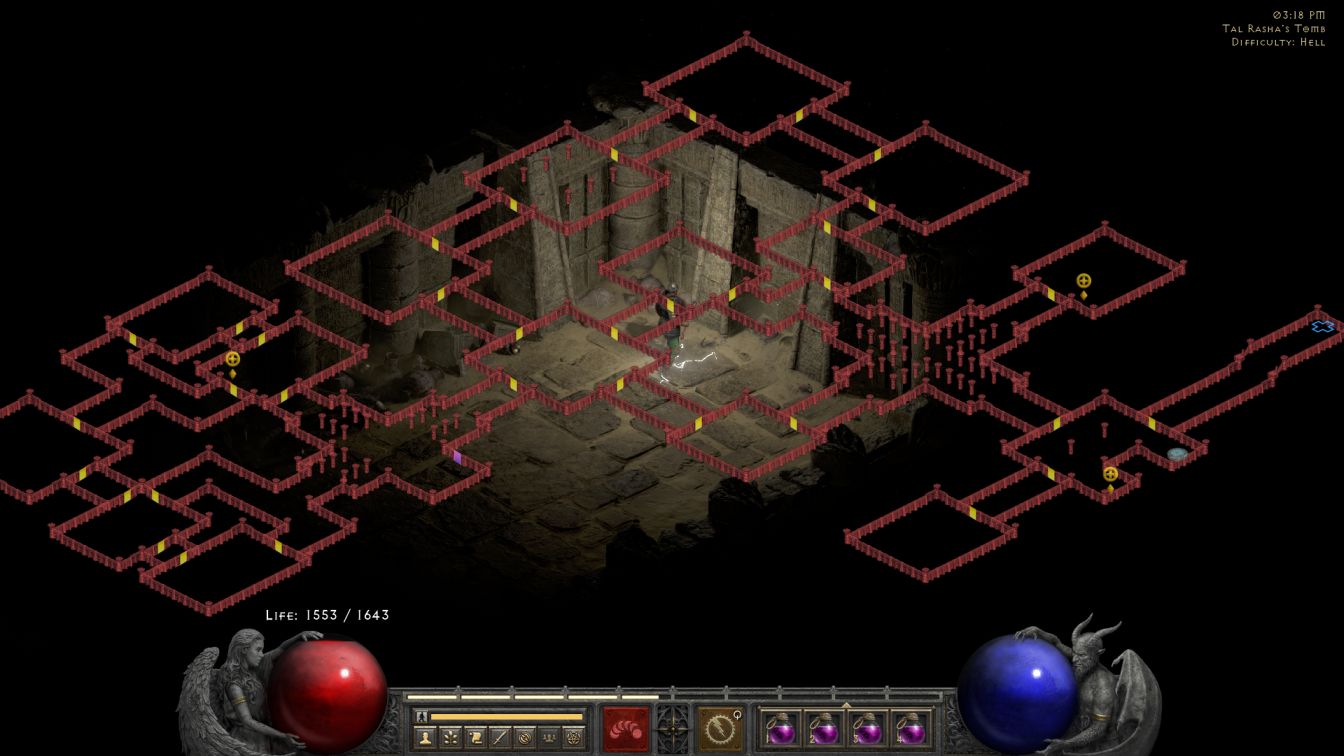
Two of the three enemies were clearly beetles and mummies, about as good as WillPower could have hoped for. I was praying for Apparitions to show up as the final monster type (by far the easiest for WillPower) when I turned a corner and spotted some bright red skeletons, argh. More Burning Dead and Unravelers to deal with, sigh.  Ah well, I guess it was fitting that they would show up here yet again after having tormented me across the entirety of the False Tombs. Five tombs with Unravelers and only one with Apparitions was just my luck. Now I knew how to deal with these guys by now and the actual danger level was relatively low once WillPower had cleared out space near the entrance. The presence of the Unravelers simply meant that it was going to take ages to get a full clear of the whole True Tomb which is much bigger than any of the other Tombs, almost twice the size of Kaa's Tomb and something like five times the size of a normal False Tomb. I turned on a podcast to have something to listen to and WillPower got down to work.
About an hour later, I had cleared out a good chunk of the True Tomb and found the segment that led to the orifice chamber. I decided that it would make more sense to face Duriel right now, just in case there was a game crash or something random, and I could always come back to clear the rest of the True Tomb if needed. Therefore WillPower went back to town to Cube together the Horadric Staff, brought poor Durga back to life to serve as bait, and headed into the boss room:
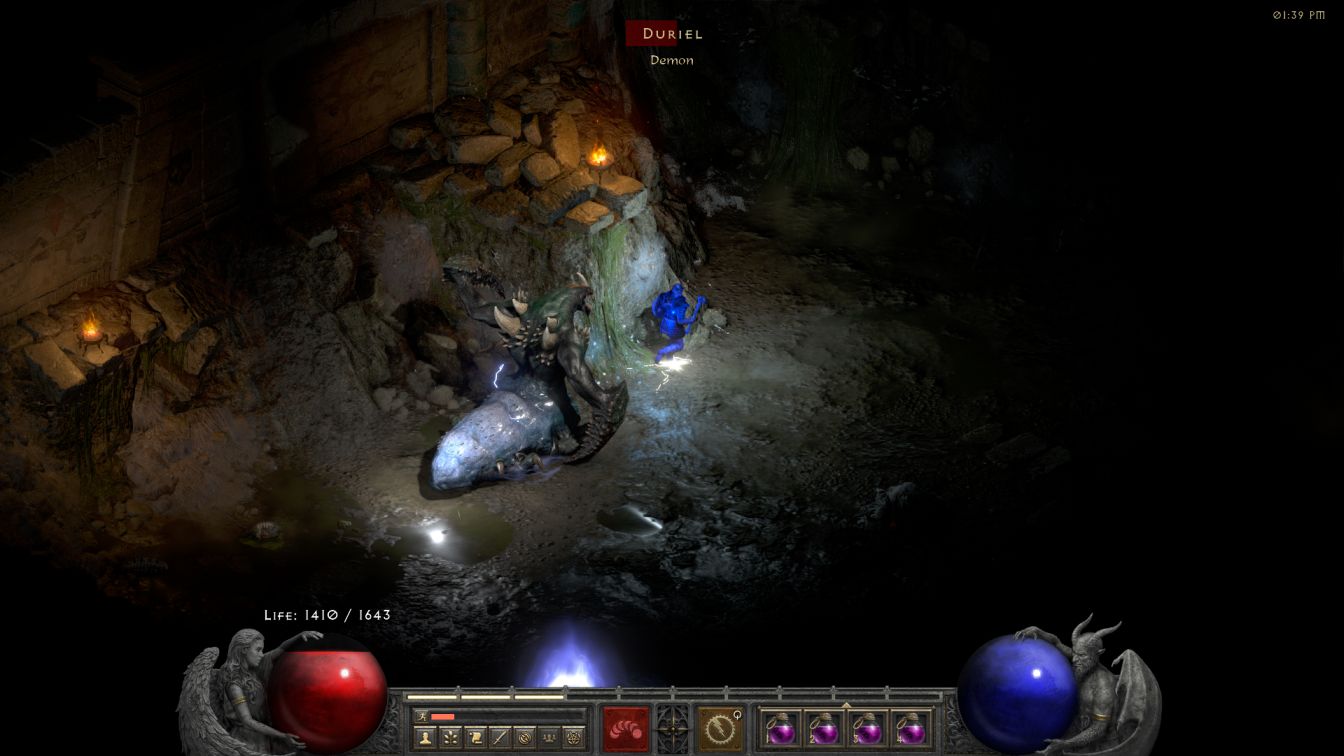
Duriel is one of the cheapest bosses in the whole game, largely because of his Holy Freeze aura to chill the player and the claustrophobic nature of the little enclave where he has to be fought. I started out the battle by racing to the side to throw up an emergency town portal and hurl some glaives just to ensure that Duriel was tagged with Prevent Monster Heal. Durga bought me enough time to get the PMH tag before biting the farm and then we were off to the races. WillPower could never stand and fight Duriel, only lead him on an endless chase around the room as Holy Shock ticked away in the background. I found that WillPower's running speed while chilled with 30% faster movement was almost exactly the same as Duriel's running speed. Thus the two of them moved in a weird dance around the room, running in circle after clockwise circle. This is the first time that I've gotten an extended look at Duriel's run animation which looks a bit like a gorilla lumbering forward with its long front arms pulling it along. Duriel would get in the occasional hit when I didn't trace the loop pattern correctly but by and large this was a pretty peaceful chase, with WillPower never needing more than the occasional red potion for healing.
The biggest issue in this boss fight bizarrely turned out to be running out of stamina! Yes, even WillPower who had something like 400 stat points invested into Vitality would eventually start to run out of stamina from spending long minutes running on end. (And it had to be running, not walking, as Duriel was too fast for WillPower's normal walking.) The screenshot above actually captures WillPower down in the red on stamina which forced me to go back to town halfway through the fight to purchase two stamina potions. That was, uh, not something I was expecting. Otherwise this all went about as smoothly as possible aside from my hand starting to get sore from holding down the left mouse button for so long. Duriel has 84k health in Hell difficulty and 75% lightning resistance so the whole process took about 13 minutes on the clock from start to finish. He still died just like everything else though:
I have to say that this was one of the boss fights I was most concerned about and it was a relief to have this in the rear view mirror. Then after talking to Tyrael and securing my quest progress, I spent the next 90 minutes clearing out the rest of the True Tomb in tedious fashion. I did get it done though and let me tell you, WillPower was more than ready to be finished with those darn Tombs! I was tired enough from this whole process that I might take a short break from this character before continuing. Sooner or later though, it will be on to Act Three to continue onwards and see if WillPower can complete the rest of his quest.


