

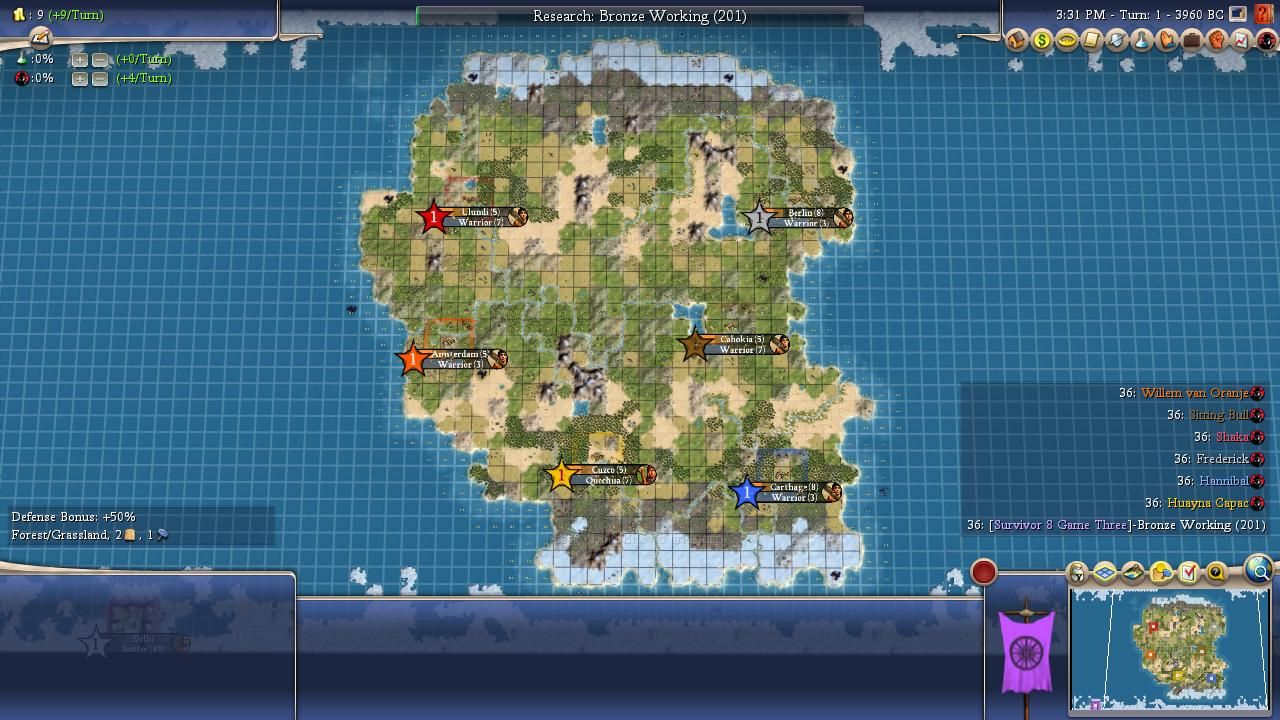
One of the recurring features of past seasons of AI Survivor have been our "alternate histories", running additional iterations on the same maps to see if the same events would play out again. Game Three was another opening round shocker as powerhouse leaders like Huayna Capac, Hannibal, and Willem all faltered as the victory went instead to the much-maligned Sitting Bull. Was that something which would unfold in each game? This was a topic that called for more investigation with alternate history scenarios. Following the conclusion of previous seasons of AI Survivor, I had gone back and investigated some of the completed games and found that they tended to play out in the same patterns over and over again. While there was definitely some variation from game to game, and occasionally an unlikely outcome took place, for the most part the games were fairly predictable based on the personality of the AI leaders and the terrain of each particular map. Would we see the same patterns play out again and again on this particular map?
The original inspiration to run these alternate histories came from Wyatan. He decided to rerun the Season Four games 20 times each and publish the results. The objective in his words was twofold:
- See how random the prediction game actually is. There's a natural tendency when your predictions come true to go "See! Told you!", and on the contrary to dismiss the result as a mere fluke when things don't go the way you expected them to (pleading guilty there, Your Honour). Hopefully, with 20 iterations, we'll get a sense of how flukey the actual result was, and of how actually predictable each game was.
- Get a more accurate idea of each leader's performance. Over 6 seasons, we'll have a 75 game sample. That might seem a lot, but it's actually a very small sample, with each leader appearing 5-10 times only. With this much larger sample, we'll be able able to better gauge each leader's performance, in the specific context of each game. So if an AI is given a dud start, or really tough neighbours, it won't perform well. Which will only be an indication about the balance of that map, and not really about that AI's general performance. But conversely, by running the game 20 times, we'll get dumb luck out of the equation.
Wyatan did a fantastic job of putting together data for the Season Four games and I decided to use the same general format. This particular set of alternate histories were run by TheOneAndOnlyAtesh with assistance from Eaupxs I. Forgott and Daniel Oberon - many thanks for spending so much time on this task!  Eauxps posted the resulting data from the alternate histories and then discusses some of the findings below in more detail. Keep in mind that everything we discuss in these alternate histories is map-specific: it pertains to these leaders with these starting positions in this game. As Wyatan mentioned, an AI leader could be a powerful figure on this particular map while still being a weak leader in more general terms. Now on to the results:
Game One | Game Two | Game Three | Game Four | Game Five
Game Six | Game Seven | Game Eight | Game Nine | Game Ten
Game Eleven | Game Twelve | Game Thirteen | Game Fourteen | Game Fifteen
Game Sixteen | Game Seventeen | Game Eighteen | Game Nineteen | Game Twenty


(Note : "A" column tracks the number of war declarations initiated by the AI, "D" the number of times the AI is declared upon, "F" the points for finish ranking, and "K" the number of kills.)
TheOneAndOnlyAtesh: It should be obvious even before knowing the Alternate Histories results that the actual Game Three outcome was quite unlikely. After all, Sitting Bull of all leaders simultaneously took down three of the best techers in Civ IV, all by himself. The only question was, how much of an outlier was the actual game? The answer is that although the game was an improbable result, it was not an utterly nonsensical one like Hammurabi's Game One victory. Sitting Bull reprised his Standing Bull performance twice, showing that there indeed were scenarios in which he could be strong. Sitting Bull's survival required that he either be left alone long enough to withstand a dogpile, or that he only have to deal with a 1v1 against Hannibal, who absolutely hated Sitting Bull's guts in these games. When the latter situation took place, Sitting Bull was able to snowball, as Hannibal's land was too hammer poor to combat Sitting Bull's relentless unit pumpage alone. From there, Sitting Bull could thrive off of two commerce rich empires' worth of territory. His Game 4 victory saw him impressively outtech Huayna Capac and beat him to Tanks, while he held off a 3v1 (including a backstab from Frederick) in his Game 16 win before running roughshod over the Financial South with Elephants and Catapults. Such games were rare, however. In general, Sitting Bull was predictably toast, being in a central position surrounded by low peaceweight enemies. Many replays consisted of him either getting repeatedly ground into dust by dogpiles, or in him becoming cannon fodder for whichever leader was the runaway. Truth be told, his 25% survival rate was impressive considering the circumstances.
The main reason Sitting Bull had a chance in these games was that Frederick, his neighbor to the North, was as much of an aggression magnet as the Native American, despite his relatively isolated position. While Sitting Bull usually wisely adopted Huayna Capac's religion, Freddie frequently founded a religion of his own and then proceeded to completely fail to spread it, making him the global pariah instead. There were moments in which the other leaders would cross or bypass Sitting Bull's territory in order to invade Germany. Game 4 was especially hilarious in that aspect - Frederick was attacked NINE times, including a 4v1, but since all of these wars were cross map ventures, the German leader escaped unscathed (these fruitless wars also contributed greatly to Sitting Bull's victory in that game). In general, however, Freddie tended to churn out disappointing performances. Of course, he was just screwed in some situations, especially if Sitting Bull died too quickly. He did not always make the best of his situation, however, as he always tended to start slowly due to questionable early research choices and sluggish early expansion. If he could be left alone and/or capitalize on a dogpile, however, Freddie had the ability to become a factor in these games.
To my surprise (but likely not to most others), Huayna Capac was far stronger than the actual game seemed to indicate. I thought that his land was just too poor to compete, even for a Financial/Industrious/quasi-Creative leader. However, these alternate histories revealed three key factors that more than compensated for Huayna's crappy starting position. First was the religious spread. Huayna founded one of the first two religions in every single game I ran, and he was consistently the best at spreading it and making religious allies. His most common religious rivals were Freddie, as alluded to above, and Willem, but the latter usually only spread his religion to Shaka, who, of course, can never be counted on as a religious ally. Secondly, although Huayna's land was poor, Sitting Bull's was very rich, and Huayna was in the best position to make the Native American lands fine additions to his own. Finally, Huayna could not have asked for a better neighbor than Hannibal. This went beyond Hannibal having a similar peaceweight and being unable to plot at Pleased. Hannibal often softened up Sitting Bull cities for Huayna to capture, kept potential rivals at bay, and was generally a reliable but unthreatening presence for Huayna. Moreover, Hannibal offered another easy route for Huayna to expand, whether it was from gifting over culturally crushed cities or being an easy conquest for the Inca.

However, Huayna was not the most dominant leader in this setup. The replays confirmed what the actual game may have suggested: much of the community had misread Willem's prospects. The pregame consensus was that Willem would be unable to contend with Huayna's culture and Shaka's aggression all in his face. However, like in the actual game, Willem always had plenty of space. In all twenty replays, Shaka settled his second city in the same coastal spot as he did in the actual game, away from Willem, while Huayna settled his future holy city in the same exact Eastern spot towards Hannibal. Willem actually had tons of expansion room and the best land of all the Financial leaders. Considering that Willem has one of the best trait combinations for AI Survivor purposes, it was evident that Willem should have been regarded as the favorite in this game, as he churned out playoff worthy performances in 12 out of 20 games. A strong Willem usually meant a dead or irrelevant Huayna, as Willem had better land and thus a better economy, and Willem more frequently won the late-game showdown between the two leaders. Of the four games in which both of them were the playoff ticket, three were textbook Huayna Culture victories where the game ended before any dramatic face off could take place, while in the other game, Huayna was a second fiddle for the entire game.
Having Shaka directly North of Willem was not nearly as much of a hindrance as the community expected, especially since the Dutch leader could link up with Freddie to take down Shaka. In fact, Willem and Freddie frequently worked as a tandem in their best games. In fact, Willem absolutely pwned Shaka in these alternate histories - for example, in Game 9, Willem caught a METALLESS Shaka with his pants down en route to steamrolling the entire rest of the map. (He almost repeated this in Game 19, but Shaka connected Iron in the nick of time.) He certainly out-Shakad Shaka in these replays.
The consistent 2nd city settling patterns also meant two other things: first, Hannibal was relegated to second-rate status, getting squeezed in a corner in every replay. Hannibal's best shot at the playoffs came from either riding the coattails of Huayna or Willem, staking a claim in Native America, or being the last person on the lunch menu of one of the Northern leaders, and his sole victory was a backdoor Culture victory in which he hid behind a dominant Huayna the entire game while Huayna's progress was significantly slowed by endless hordes of raving Zulus. The Carthaginian leader also had a strange tendency to self-sabotage in these games (see the individual leader discussions for more details).
Secondly, Shaka was weaker than expected, netting the highest First To Die rate of all of the non-Sitting Bull leaders. Willem was just too strong of a target for him. Shaka did have two wins, but they were rather lucky, as they relied on stronger leaders throwing away certain victories. Shaka's best opportunity for success came not through Willem, but through Freddie, and the two fought for supremacy over the North in almost every single replay. Freddie and Shaka were like Harry Potter and Lord Voldemort; neither could live while the other survived, and there was only one game out of the twenty in which they both made it to the finish line. The actual game was a good indication of how Shaka often fared in these games. He typically spent too much time bashing his skull against one of his neighbors, eventually falling behind economically, and getting carved up by a Dutch-German coalition. Shaka's banishment into the nether realm was a primary catalyst of all of Freddie's best performances, including the actual game. Both of Freddie's wins came from when he was able to capitalize the most on a 2v1, while a major reason for Willem's actual game performance being so weak compared to the alternate histories was that Willem peaced out far too soon, leaving the entire North free for Freddie.
The primary diplomatic lines were driven by peaceweight divisions and the Shaka/not Shaka division. Religion had far less significance save for exacerbating other sources of tension. In general, the tech pace was slow - it is unusual to see Financial leaders like Huayna and Willem having Turn 355 ish wins. This slow pace seemed to both stem from the strongest techers generally having the lowest quality land and from how violent these games were. For example, Game 4 had TWENTY wars, a ludicrous number in the post-Apostolic Palace era of AI Survivor (the AP tended to inflate the war count due to constant enforced peacemaking and holy wars). Even the games with few wars tended to be quick domination victories or have endless protracted conflicts. Willem winning the only two Spaceship victories in this field said a lot about how strong his position really was compared to the other leaders.
Another important map factor to point out was the importance of the North Central flood plains region between Shaka's and Frederick's starting positions. In general, whichever leader was able to dominate that region was always a formidable contender. Securing control over that region was a common feature in the best performances of all the leaders. It bears repeating that the early settling patterns were almost identical in every single game. Huayna and Sitting Bull's cities already bordered Carthage on Turn 10; Sitting Bull and Shaka consistently expanded aggressively; Willem had plenty of room and often took advantage. With such bloody games, making at least one friend was crucial for a leader's success. In any game, the difference between a Huayna and a Willem win was that one was able to get a coalition partner while the other got stuck in a protracted 1v1. Hannibal and Freddie made particularly good sidekicks, and it is notable that the two Diplomatic wins stemmed from the former voting for Huayna in Game 1 and the latter electing Willem as World Leader in Game 8.
Let us delve deeper into each leader's individual performance.

Willem of the Netherlands
Wars Declared: 36
Wars Declared Upon: 35
Survival Percentage: 60%
Finishes: 6 Firsts, 6 Seconds (42 points)
Kills: 11
Overall Score: 53 points
A major advantage Willem had over the rest of the field was that he had the most flexible paths to victory among all the leaders here, considering how he was the only leader to win by every possible victory type here. He could run over Shaka, he could snowball off of Huayna or Sitting Bull, he could work with Freddie, Hannibal, or even Huayna, and/or he could just simply out-econ his competitors. Even when things did not go perfectly for Willem, he was still in a great position to make the playoffs. Every single one of his Runner Up performances were strong performances, in which he either maintained relevance or killed a rival. This was not the case for most of the other leaders, who were much more boom-or-bust. However, there was one commonality in all of Willem's wins: he had to deal with Shaka in some way, and he sometimes either failed to do so, took too long, or got dogpiled by Shaka and Huayna early. In Game Five, he also launched a foolish cross-continent crusade against Freddie, leaving him easy pickings for Shaka - some of his worst performances came from veering into Monty levels of insanity.
However, the most common reason Willem faltered should come as absolutely no shock to anyone: avoiding Rifling for too long. He occasionally also just could not do anything against a 20+ city Sitting Bull, Freddie, or Shaka runaway. However, Willem more often than not researched Rifling in a reasonable timeframe, and his aggression tended to be focused and well-timed. Perhaps having Shaka breathing down his neck - Willem vs. Shaka was one of the first two war declarations in 80% of these games - was a good thing for him, as it kept him on high alert militarily.
Most impressive performance: Hard to choose from, but probably the aforementioned Game 9 one in which he ripped Shaka apart for the earliest elimination of the set and won a blistering fast Domination win. Although his Game 6 win was faster, it stemmed from a Shaka suicide and a rare dogpile of Huayna, rather than Willem brute forcing his way. I personally found Game 19 as a better Honorable Mention - Willem actually beat Huayna to Rifles in that game and launched a Turn 333 Spaceship, a fantastic economic performance considering the circumstances.
Worst performance: Game 3, where he got killed early by Shaka. Dishonorable mention goes to his moribund Game 5 performance. The first five games had me believing that Willem might just have a losing personality, before he went on an absolute tear in the remaining set of games.
Willem Award: Game 2, when he caught a terrible case of his own syndrome and got run over by Zulu Knights.

Huayna Capac of the Incans
Wars Declared: 41
Wars Declared Upon: 29
Survival Percentage: 60%
Finishes: 7 Firsts, 2 Seconds (39 points)
Kills: 10
Overall Score: 49 points
As I had alluded to, Huayna's diplomatic position compensated for his awful land. He had Sitting Bull and Freddie for other targets to attack, Hannibal as an attack dog and an easy source of territory, and was far enough away from Shaka to not have to worry about him - the two never fought early in any of the twenty replays. Luckily for Huayna, he also did not have to worry much about Willem early, unlike in the actual game when Willem's early war declaration relegated the Inca to irrelevancy. In order to maximize his chances, Huayna had to find some way to break out of his tundra cocoon. The best way to do so was to weaken Sitting Bull, and in some games, Huayna did so by settling his 3rd city towards the center of the map instead of the tundra. Otherwise, Huayna had to either hope for Sitting Bull to be dogpiled, or for the rest of the field to stalemate in their wars. He often struggled to take on Sitting Bull 1v1 - understandably so against a Protective leader with Totem Poles and a 10/10 unit build tendency. Sometimes, attacking Hannibal (or being attacked by him) was a path to success, but losing an erstwhile companion did sometimes hurt - Huayna did not win all of these games, and the ones he did win were nail biters.
Because of Huayna's relatively narrow path to victory, his performances tended to be boom-or-bust, hence his lower score than Willem. Like in the actual game, Huayna also had a tendency to start slow due to building too many early wonders, although this sometimes helped him as well - he looked like he was going to be irrelevant in Game 2, until his culture was so strong that he gained half of Carthage without so much as lifting his pinky. (Sullla and the Twitch livestream would have spontaneously combusted if that game took place - that was a Troll King-esque performance from Hannibal). Nevertheless, Huayna usually expanded much better than he did in the actual game, and the results are indicative of this fact. Huayna might be in a bit of a slump as of late, but this should serve as a reminder to never ever count him out of any game. Remember that every single other top leader has also been through similar slumps. Huayna demonstrated in these replays why he is worthy of his place atop the AI Survivor leaderboard, and one would be hard pressed to find another leader that could have done this well from the same position.
Best performance: Game 13 easily. A Turn 266 victory is patently absurd, and it could have easily been in the 250s if Huayna had not inexplicably turned off the Culture slider in the middle of his Culture run.
Worst performance: In Game 6, Huayna expanded horribly and was First To Die to an early Willem and Sitting Bull 2v1. Dishonorable mention to Game 16, which had shades of the actual game.
Louis Award: Turning on the Culture slider pre-Rifling in Game 20, allowing Shaka to catch up in tech. It is safe to say that one should never allow Shaka to reach tech parity.
Willem Award: Taking too long to research Rifling in Game 19… allowing Willem van Oranje to run him over with Cavalry.

Hannibal of Carthage
Wars Declared: 40
Wars Declared Upon: 13
Survival Percentage: 60%
Finishes: 1 First, 7 Seconds (19 points)
Kills: 8
Overall Score: 27 points
Even though the replays proved that the map generation had screwed over Hannibal - Huayna and Sitting Bull boxed him in with their second cities in all twenty games - Hannibal was still an excellent pick to score points. Truth be told, these alternate histories likely underestimated his true strength in this setup, especially considering that he was attacked less than once per game on average. There were obviously games in which he was the Robin to another leader (like Game 1) or the last leader on the chopping block (Game 20), but there were also games in which he was the strongest leader on the map. Ironically, that was not the case in his only victory. His backdoor Culture victory in Game 2 was a precursor to Hannibal's self-sabotaging tendencies. He completely threw away two certain victories (Games 12 and 14) by inexplicably turning on the Culture slider prematurely, and both games led to Domination victories for his conquerors. Game 12 was especially a throw - Hannibal was five turns away from victory when Shaka captured one of his Legendary cities, and Hannibal had enough of a tech lead that he definitely did not need to attempt a slow culture victory. Alongside Huayna's Game 20 throw, it should be apparent that pre-Rifling culture attempts are incredibly dumb moves. These games still showcased how Hannibal could win, however: if Willem got bogged down or run over, and/or if Hannibal benefited more from dogpiling Sitting Bull, he definitely had an outside shot at victory.
In general, however, Hannibal had two flaws that prevented him from showing his potential in this setup. First, it should be said that the real issue with his land was that it had no production. It was actually quite good for commerce, and Hannibal was consistently a top leader in tech even with few cities, but with such little production, it was difficult for Hannibal to expand and to fight early wars. Almost every early war that was not him dogpiling Sitting Bull or Freddie ended with irrelevance at best and embarrassing flameouts at worst. Hannibal's other issue was not researching culture early enough, which of course compounded his already precarious situation. There was a noticeable difference in performance when Hannibal researched Mysticism in a timely manner.
Best performance: Hannibal legitimately played extremely well in Game 12, enough so that he nearly got away with his premature Culture attempt.
Worst performance: A lot to choose from, but in Game 18, Hannibal launched a cross map war on Freddie, only for the Germans to obliterate his army, march right down South, and delenda Carthago.
Wang Kon Award: Game 2, for obvious reasons. Just look at the picture!
Bismarck Award: Game 17, in which Hannibal saved Huayna Capac from Willem, liberating much of former Inca… until he got Panzered into smithereens by Freddie despite being the tech leader. He would likely have survived if he kept those Incan cities for himself.

Frederick of Germany
Wars Declared: 25
Wars Declared Upon: 66
Survival Percentage: 50%
Finishes: 2 Firsts, 3 Seconds (16 points)
Kills: 11
Overall Score: 27 points
After the first 12 games, I was ready to conclude that Frederick was indeed worthy of his reputation as one of the worst AI leaders in Civ IV. How could he muster such god-awful performances with such nice and plentiful land? However, in the remaining eight games, Freddie redeemed himself in a major way, surviving seven of them and making the playoffs in 50% of them. There was one major factor in Freddie's marked improvement in the later games: he actually adopted Huayna's religion, instead of always founding his own. This was a major reason he was attacked the most of all the leaders (yes, more than Sitting Bull) - while Sitting Bull tended to get Huayna's religion, Freddie stubbornly stuck to a minority religion before getting dogpiled out of the game. His success and survival rate with a religion of his own was subpar, to say the least.
In quite a few games, however, Freddie functioned a lot like Hannibal. Despite being a peaceweight outlier, he surprisingly was a great sidekick for both Willem and Huayna in multiple games, particularly the Game 8 slog that finally ended when Freddie voted Willem as World Leader. Unlike Hannibal, Freddie also had a clear and reliable path to victory - Shaka. Freddie's strongest performances were much like the actual game, stemming from him getting the spoils of Shaka's territory if he was able to either dogpile Shaka or develop well enough to run over an exhausted Shaka. Hannibal was also a good secondary target due to his weakness, and both of Freddie's victories involved him conquering the entire Northern hemisphere before marching South and murdering Hannibal and/or Huayna. However, Freddie's weaknesses were on full display: he just consistently mismanages the early game. Freddie is legitimately an excellent mid-to-late game leader, but his pure Production flavor and poor early expansion can cause him to start so slowly that he can never show his late game strength. It was, however, really satisfying to witness Panzers actually be relevant in Game 17, as although Hannibal had Tanks, they were shredded by the Tank-shredding Panzers (recall that as Germany, it is better to keep Panzers than to upgrade them to Modern Armor!).

Also, in hindsight, Freddie's land may not have been that great. Like Hannibal's, it did not have all that much in the way of production. After the first 12 games, I had Daniel Oberon (thank you!) run five games with Mansa Musa in Freddie's position, and here were the results:
Game 1: A super weird game in which no one died and Hannibal won a Diplomatic victory. Mansa Musa was the score leader and had the Culture slider on, however.
Game 2: Huayna being Financial/Alive
Game 3: Mansa won by Culture!
Game 4: A Sitting Bull steamroll similar to the actual game, with Mansa (!) tagging along
Game 5: Shaka smash
Game 6 (an extra game due to how much of an outlier Game 1 appeared to be): Similar to Game 2
One win, two Runner Ups, getting destroyed in the other games. Taking into account Freddie's performance, it seems that Mansa is equally as strong as Freddie in this setup considering the diplomatic situation, and that his land is not all that great - even Mansa's one Culture victory came on Turn 346, which would be a mediocre Spaceship date let alone Culture. Do take these results with a grain of salt, however - the fact that Mansa, a quintessential all-or-nothing leader, had two Runner Up performances says a lot about how wacky this game's setup was.
Best performance: Game 17, in which after murdering Shaka, he executed an incredibly well-timed backstab of Willem to ensure his victory.
Worst performance: Game 6, when he died in a 1v1 to a cross map invasion from Shaka - yes, Freddie's expansion was so bad in that game that other leaders had occupied the territory between him and Shaka, rendering this a cross map war. His Game 12 First To Die performance was also quite pathetic.
Wang Kon Award: Game 4, where as previously mentioned, Freddie was attacked nine times, including being on the wrong side of a 4v1… but survived because Sitting Bull served as a buffer, paving the way for one of Sitting Bull's victories.
Hatshepsut Award: Game 15, when Freddie had a massive army at the gates of Cusco when Huayna was a few turns from a Cultural victory… but rather than attack, HE STOPPED TO HEAL HIS UNITS and never attacked, allowing Huayna to claim victory.

Shaka of the Zulus
Wars Declared: 60
Wars Declared Upon: 25
Survival Percentage: 45%
Finishes: 2 Firsts, 1 Second (12 points)
Kills: 14
Overall Score: 26 points
Although Shaka did not score the least points in these replays, he, in my opinion, was the worst leader in this setup. With three Financial leaders in the game, Shaka was always going to fight an uphill battle, but he still pulled out a lot of disappointing performances, like in the actual game. If there was one thing that was at least somewhat normal about the actual game, it was that Shaka consistently wore himself out with his incessant warring, with the end result that one of his neighbors eventually put him out of his misery. Even in many of the games in which his wars were successful, he was often too far behind to compete and ended up suiciding himself into the runaway.
Shaka did have one avenue to success: instead of attacking Willem first, instead attack and kill Freddie early, and THEN hope that Willem avoided Rifling for too long and take advantage. Both of his wins involved him doing exactly this. However, his two wins were still quite lucky, and if Hannibal (in Game 12) and Huayna (Game 20) had continued teching rather than opting for Culture, they would have likely won instead of Shaka. Unfortunately, Willem's Creative-induced border tensions usually meant that Willem was Shaka's primary outlet for his rage, and this favored the Dutch most of the time.
Best performance: Both of his victories, in Games 12 and 20, were similarly impressive. As mentioned before, Shaka conquered one of Hannibal's legendary cities five turns before a Carthaginian Culture win to claim victory in Game 12, while Huayna only survived in Game 20 because Shaka had reached the domination limit. His other playoff appearance in Game 7 was not too shabby either, and it actually showed a surprisingly restrained and reasonable Shaka.
Worst performance: Other than the obvious Game 9, Shaka was pretty terrible in Game 17.
Zara Yaqob Award: Game 9. How does SHAKA end up defending himself with Chariots against Willem of all leaders?

Sitting Bull of the Native Americans
Wars Declared: 17
Wars Declared Upon: 56
Survival Percentage: 25%
Finishes: 2 Firsts, 1 Second (12 points)
Kills: 5
Overall Score: 17 points
Even though Sitting Bull got dogpiled into insanity in the first three games, it was evident to me that he would replicate his actual Game Three victory at least once in these replays. As it turns out, he did that twice! Unlike Shaka, it felt that Sitting Bull earned these wins more. Similar to the actual game, Sitting Bull always expanded well, was not always an easy conquest, and it was clear that if he avoided an early dogpile, Sitting Bull did have the ability to make something of his position. One thing that I realized about Sitting Bull's position: his land was pretty darn good, something the community may have overlooked due to the leader occupying it. His capital had a wet Corn and a Copper resource, and Sitting Bull started with Agriculture and was predisposed to go for Bronze Working early in order to unlock his Dog Soldiers. To tack on, there was an immediately workable Gems resource near his land and plenty of rivers. Thus, Sitting Bull had the ability to expand like an Imperialistic leader without crashing his economy, and indeed he did that - sometimes expanding all the way into the fertile flood plains region in between Shaka and Freddie. If a leader with a less extreme peaceweight occupied Sitting Bull's position, that leader may have been incredibly strong in this map.
There was also the presence of Hannibal nearby. In most games, this was terrible for Sitting Bull, but when he could get a fight against Hannibal without Huayna interfering, Carthage was an easy conquest for him due to how much of Hannibal's empire would be hammer-poor fishing villages. It should come as no surprise that Hannibal was First To Die in both of Sitting Bull's victories. Although Sitting Bull's other playoff performance, in Game 17, came from him tagging along with Freddie, his teching was still quite good for a non-Financial leader.
So why did Sitting Bull perform much better than Game One Winner Hammurabi in their respective alternate histories? There were two main reasons. First of all, Freddie was a much more reliable aggression magnet than Churchill, and he helped absorb some blows for Sitting Bull. Recall that Freddie was attacked more than Sitting Bull, an incredulous outcome considering Native America's closer proximity to hostile neighbors. The second reason is that while Game One was full of aggressive warmongers, it did not have any quite to the level of Shaka, and Shaka especially helped keep Willem occupied, warding off potential aggression towards Sitting Bull. Ironically, Sitting Bull may be the type of leader who needs enemies in order to maximize his winning chances, as without anyone to attack, he just crashes his economy building a massive army and never using it.
Best performance: Although out-teching Huayna in Game 4 was impressive, I found his Game 16 win to be more of a "Standing Bull"-esque performance, considering that it relied less on weird cross map shenanigans and more on Sitting Bull just flat out playing well. In that game, he overcame an early 3v1 (with one of the three being FREDDIE), killed Hannibal, and ran over the map with Cavalry. The listed results fail to show how truly impressive Standing Bull was in Game 16; he could have won at least 50 turns earlier had he decided not to go into Culture mode upon killing Huayna.
Worst performance: In Game 13, Sitting Bull fumbled his expansion (including losing two Settlers), making him an extremely weak target for Huayna. It is no surprise that this led to Huayna's Turn 266 victory.
Stalin Award: Sitting Bull had a promising Game 2 start, but he ruined it by attacking FREDDIE on Turn 69.
Hatshepsut Award: Sitting Bull came close to running over Huayna in Game 10, but pathfinding issues caused his invasion to falter and for him to eventually be First To Die.

One could place the likely outcomes into three categories:
1) Huayna, with the help of Hannibal, runs over Sitting Bull and snowballs while the other leaders drag each other down in wars. These games tended to be slower due to Huayna's poor starting land and Sitting Bull always being a tough nut to crack.
2) Willem runs over one of his neighbors - including Huayna himself in Game 6 - and becomes an unstoppable runaway. He tended to research better than even Huayna when he was not overly bogged down by Shaka.
3) Willem and Huayna expand poorly and/or get stuck in fruitless wars, paving the way for one of the Northern leaders to steamroll the map.
The only true outlier was Game Two, which had all the traits of a Huayna win, except the tech pace was so slow that Hannibal pulled the rug underneath Huayna with a Hail Mary Culture win, aided by Shaka being a troll. All in all, every single leader in this map had a notable path towards victory. Each one had spectacular and stunning performances alongside equally embarrassing flameouts, and I consider myself extremely blessed that these awesome sets of games ended up being my first ever Alternate Histories run. Every leader had compelling and entertaining moments, the majority of these games would have been as entertaining as the actual game was, and I almost feel bad that I ended up depriving someone else of the opportunity to do this game's Alternate Histories.


