

Game Five Alternate Histories Spreadsheet
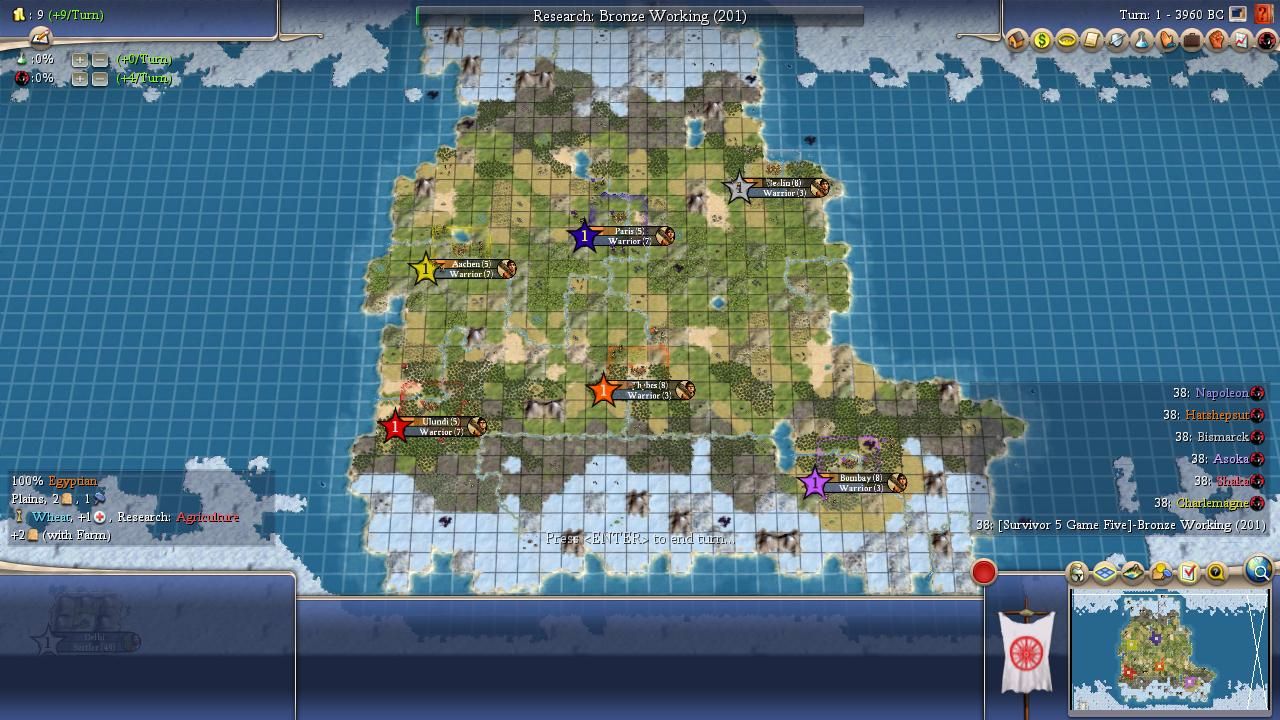
One of the recurring features of past seasons of AI Survivor have been our "alternate histories", running additional iterations on the same maps to see if the same events would play out again. Game Five turned into a mostly peaceful culturefest with Asoka and Charlemagne holding hands as both advanced into the playoffs. Was that something which would unfold in each game? This was a topic that called for more investigation with alternate history scenarios. Following the conclusion of Seasons Three and Four of AI Survivor, I had gone back and investigated some of the previous games and found that they tended to play out in the same patterns over and over again. While there was definitely some variation from game to game, and occasionally an unlikely outcome took place, for the most part the games were fairly predictable based on the personality of the AI leaders and the terrain of each particular map. Would we see the same patterns play out again and again on this particular map?
The specific inspiration to run these alternate histories came from Wyatan. He decided to rerun the Season Four games 20 times each and publish the results. The objective in his words was twofold:
- See how random the prediction game actually is. There's a natural tendency when your predictions come true to go "See! Told you!", and on the contrary to dismiss the result as a mere fluke when things don't go the way you expected them to (pleading guilty there, Your Honour). Hopefully, with 20 iterations, we'll get a sense of how flukey the actual result was, and of how actually predictable each game was.
- Get a more accurate idea of each leader's performance. Over 5 seasons, we'll have a 60+ games sample. That might seem a lot, but it's actually a very small sample, with each leader appearing 5-10 times only. With this much larger sample, we'll be able able to better gauge each leader's performance, in the specific context of each game. So if an AI is given a dud start, or really tough neighbours, it won't perform well. Which will only be an indication about the balance of that map, and not really about that AI's general performance. But conversely, by running the game 20 times, we'll get dumb luck out of the equation.
Wyatan did a fantastic job of putting together data for the Season Four games and I decided to use the same general format. First I'll post the resulting data and then discuss some of the findings in more detail. Keep in mind that everything we discuss in these alternate histories is map-specific: it pertains to these leaders with these starting positions in this game. As Wyatan mentioned, an AI leader could be a powerful figure on this particular map while still being a weak leader in more general terms. Now on to the results:
Game One | Game Two | Game Three | Game Four | Game Five
Game Six | Game Seven | Game Eight | Game Nine | Game Ten
Game Eleven | Game Twelve | Game Thirteen | Game Fourteen | Game Fifteen
Game Sixteen | Game Seventeen | Game Eighteen | Game Nineteen | Game Twenty


(Note : "A" column tracks the number of war declarations initiated by the AI, "D" the number of times the AI is declared upon, "F" the points for finish ranking, and "K" the number of kills.)
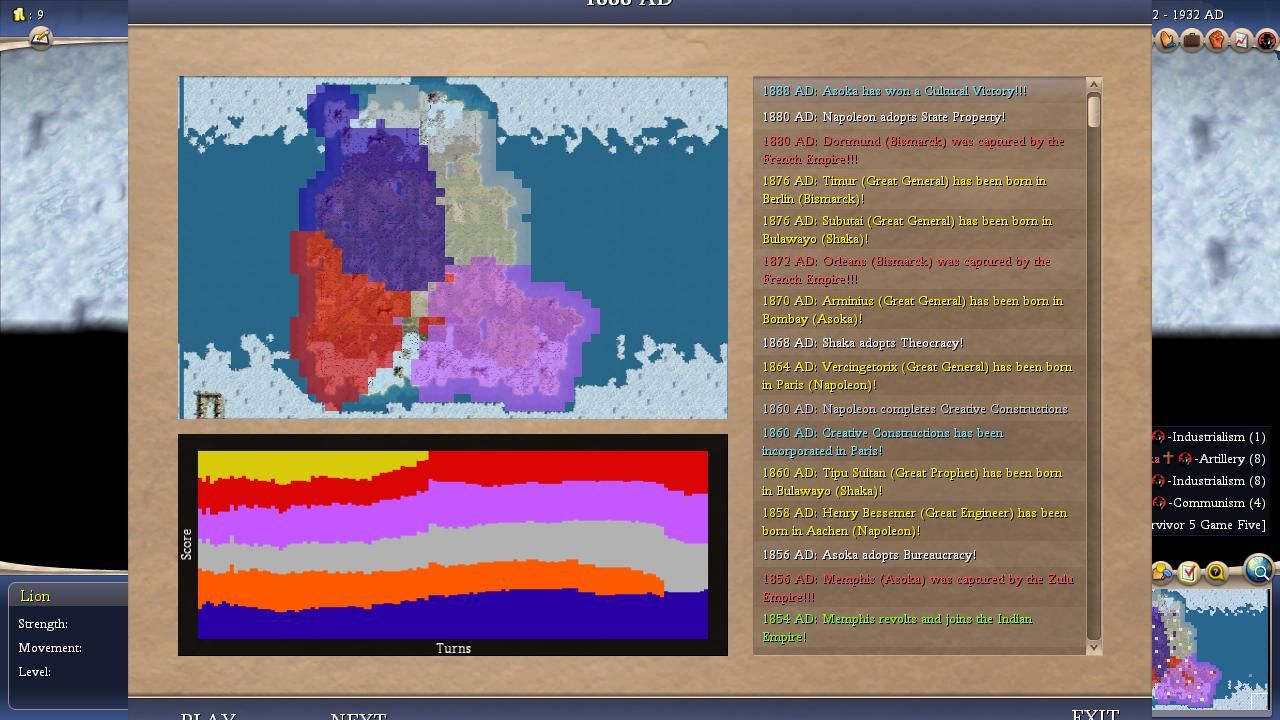
When doing the alternate history scenarios, the goal is to figure out whether the game we experienced in the AI Survivor competition would be typical for the map setup. Initially, I saw Asoka win three of the first four games that I ran and I figured that we had seen a predictable outcome which would repeat over and over again. Then Asoka won only one of the next ten games with all five of the other leaders achieving at least one win in that span - whoops. So much for predictability!  When I put together the written report for Game Five, I included this line at the end: "This could end up being an interesting game to revisit in alternate history scenarios due to the unpredictable nature of the leaders involved. If Napoleon had chosen to attack Hatshepsut instead of Charlemagne, or if Hatty hadn't engaged in ritual suicide with her attack on Asoka, this could have been a very different game." This offhand prediction proved to be highly accurate because the replays of this map often went off in very different directions from what we watched on the Livestream.
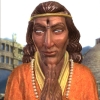
I mentioned potential alternate scenarios where Shaka and Napoleon worked together to take down Hatshepsut and a situation where Asoka and Hatshepsut managed to avoid warring with one another. What I missed was an even more common scenario that led to drastically different game outcomes: Shaka joining Napoleon in attacking Charlemagne. In the game that we watched, Napoleon launched an early invasion of the Holy Roman Empire and Charlemagne barely managed to hold off the French interlopers, losing one city and retaining a second one by virtue of a single Protective archer managing to reach City Garrison III promotion. This allowed Charlemagne enough time to finish researching Iron Working technology and connect his iron resource, then stall out the rest of the conflict. However, Holy Rome was nowhere near as fortunate in many of the alternate history scenarios and Shaka often joined Napoleon in early attacks to seal the doom of Charlemagne. He was the runaway winner in the First to Die contest, getting knocked out before anyone else ten different times. This resulted in Holy Rome having one of the worst survival percentages of any nation and this meant that the game we watched was somewhat uncommon, only occuring about a third of the time.
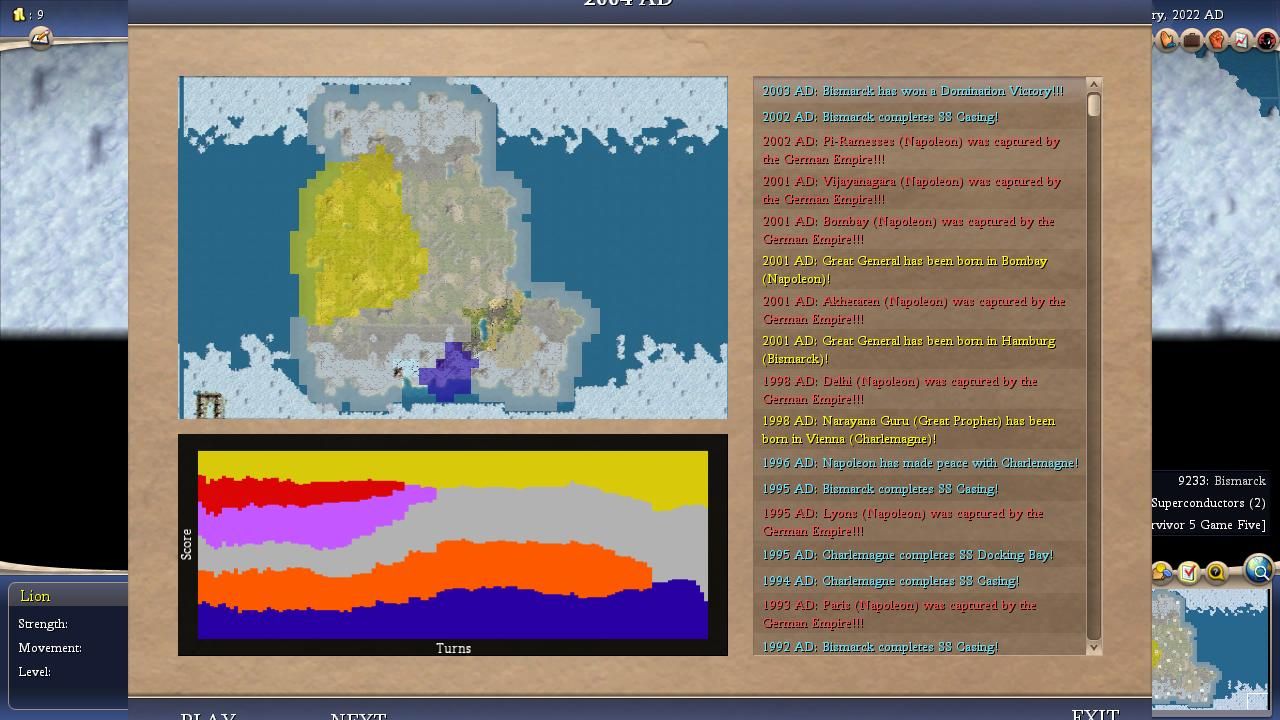
The many games where Charlemagne suffered an early exit resulted in enormously different gameplay from the actual Game Five. Napoleon and Shaka naturally ended up stronger as a result, especially Napoleon who was typically the biggest beneficiary of Holy Rome's collapse. There was a very strong correlation between Charlemagne being First to Die and either Napoleon or Shaka winning the game; out of the ten times that Holy Rome suffered an initial defeat, Napoleon won six times and Shaka won once. There was a clear blueprint here: the low peace weight warmongers would destroy Charlemagne first, then devour Hatshepsut's territory, and then polish off a Domination win against whomever was left. Interestingly, this meant that Hatshepsut had the worst survival rate of anyone in the game (17 eliminations in 20 matches) but she was rarely the first leader to be killed, only winding up First to Die three times. The pattern that we had seen on Livestream proved to be highly typical in a more general sense, if not the First to Die part, with Egypt having strong early games and then collapsing in the midgame due to poor diplomacy with everyone else. Hatshepsut and Asoka also warred frequently in the alternate histories so that was not an unlikely event at all - border tension and opposing religions combined to make them frequent enemies.
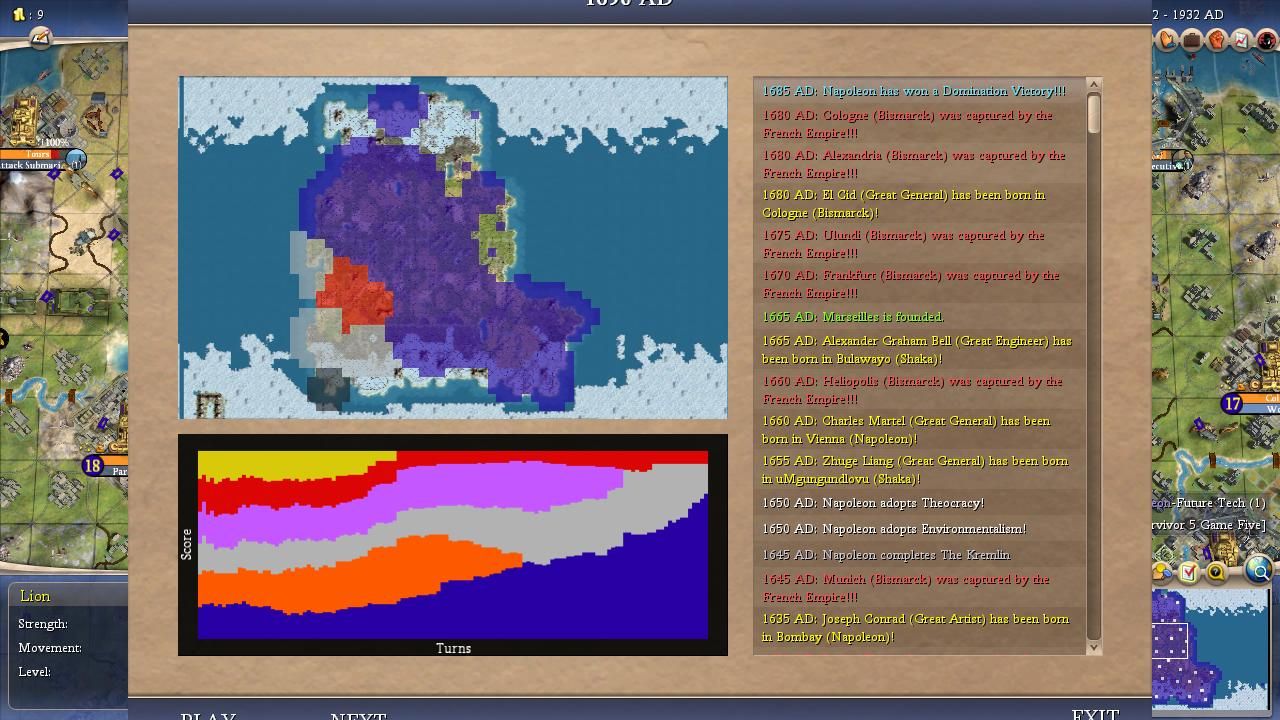
Thus these alternate histories generally played out in one of two different fashions. If the warmonger leaders could score an early kill (usually over Charlemagne but also occasionally over Hatsheptsut), then Napoleon or Shaka could grow large enough to overwhelm their rivals and achieve a Domination victory. Napoleon was much better at doing this than Shaka and the Zulus seemed to suffer from having land which was too heavy on tundra to be productive. However, if the militaristic civs failed in their conquests or ended up stalled out in lengthy wars that went nowhere, then Asoka or Bismarck would be able to seize the wheel and end up victorious. We already knew what an Asoka victory would look like from the actual Game Five and his wins in the alternate histories played out in the same fashion: long stretches of peace, lots of running the culture slider, and so on. Asoka won six times and all but one of those victories came by culture. The big surprise to me was the strength of Bismarck, who took home four victories (all by Domination) and five additional runner-up finishes. Bismarck's win condition was technology as he proved to be the best techer in this bunch. His Domination wins were really economic wins as he out-researched the Napoleons and Shakas of the world to reach more advanced units and then crushed his rivals with panzers. Asoka also built a strong economy but he would normally head off into cultureland leaving Bismarck as the undisputed tech king. Amazingly not a single one of these 20 alternate histories ended in a Spaceship finish and Bismarck was the only leader who ever came close to reaching the end of the tech tree. The net result was three leaders who had roughly even chances to win (Napoleon, Asoka, Bismarck) and then two trailing leaders who occasionally could become strong (Charlemagne and Shaka) followed by one leader who was a sitting duck (Hatshepsut).
Now for a look at the individual leaders:

Napoleon of France
Wars Declared: 49
Wars Declared Upon: 56
Survival Percentage: 45%
Finishes: 6 Firsts, 2 Seconds (34 points)
Kills: 17
Overall Score: 51 points
Napoleon somewhat shockingly graded out as the highest scoring leader in these alternate history scenarios. He had roughly the same odds to win as Asoka with both of them taking home the crown half a dozen times but Napoleon's wins were much more dominant, quite literally as all of those victories came via Domination. This meant that Napoleon scored triple the kills of Asoka and narrowly edged him under our AI Survivor scoring system. France was very much a "high risk, high reward" nation on this map as Napoleon was surrounded on all sides by potential rivals. He was actually eliminated more times than he survived to the end of the game and France found itself in significantly more wars than anyone else (105 total wars - Hatshepsut was second with 85 total wars). Napoleon was badly squeezed on territory and he needed some good luck to fall his way in order to break free of his constrained start. As mentioned above, this was invariably an early conquest of Charlemagne that snowballed France ahead with additional land and population. I can't stress this point enough: Charlemagne was First to Die in all eight games where Napoleon advanced to the playoffs with a top two finish. There were many games where Napoleon launched an early war and failed to achieve success, leaving him a weak and bullied leader that wound up getting eliminated sometime in the midgame. This was the outcome that we watched on Livestream and it was a common occurrence across the alternate histories.
However, if Napoleon could polish off that first conquest successfully, the power of France was unleashed and it rarely stopped until the rest of the world found itself singing the Marseillaise. Napoleon has an extremely high Build Unit preference and Military tech flavor in his AI programming. He will train tons of units and research nothing but military techs. It's a terrible combination if Napoleon falls behind since he'll stagnate himself in endless unproductive wars... but if he gets ahead it's a recipe for successful conquest. This AI setup was responsible for several French victories, such as in Game #16 and Game #18 where a stronger Egypt failed to pursue military technology and Hatty was destroyed by a determined Rifling beeline on the part of Napoleon. Conversely, it also doomed Napoleon in the games where he couldn't snowball ahead and he kept ramming stacks of units into stronger, more advanced rivals on all sides. Napoleon essentially had the position of Austria from Avalon Hill's "Diplomacy" game: high odds for the solo win but also high odds to be eliminated. It was always a wild ride watching him in action on this map.
Asoka of India
Wars Declared: 24
Wars Declared Upon: 29
Survival Percentage: 70%
Finishes: 6 Firsts, 6 Seconds (42 points)
Kills: 6
Overall Score: 48 points
Asoka was the leader who ended the alternate histories with the most finish points and reached the playoff round with the most top two finishes. If we ignored the points scored from kills, he was the top performing leader on this map by a good margin. Asoka was certainly the most consistent leader across the Game Five alternate histories with the highest survival rate (70%) and zero matches with a First to Die early exit. His isolated corner starting position ensured that Asoka always survived until the midgame and usually managed to stick around until the end even if India wasn't the most powerful nation. Although the sheltered southeast corner also made it more difficult for Asoka to break out and become a runaway AI, his pacifistic nature meant that India was unlikely to embark on a conquering spree anyway. Asoka's one Domination victory took place in a highly unusual game where he overran Napoleon's territory at an early date and then became unpopular enough with the other AIs to keep getting sucked into wars and acquiring their land. Asoka found himself involved in significantly fewer wars than any of the other AIs (only 53 total wars) which reflected his peaceful demeanor and more isolated position. Asoka generally wanted to avoid fighting and often was able to do so.
Asoka's fate was typically determined by what was happening elsewhere on the map. When the other leaders stalemated in their wars and failed to have any dominant power emerge, he was able to plug away in the corner of the map and take home a Cultural victory. This could be highly risky and it sometimes backfired; for example, in Game #15 Asoka teched all the way to Mass Media without picking up Rifling but was never called on it and won easily by culture. Conversely, in Game #8 Asoka tried to run the culture slider at an early date only to be annihilated by a German empire that never stopped teching ahead to infantry and tanks. Asoka also tended to be pretty good at avoiding notice from his rivals and sneaking his way to unlikely victories. He repeatedly won matches where he was not the in-game score leader, something that rarely happens in AI Survivor. He pulled this off in Game #1, Game #3, and Game #9, and of course his ability to survive to the finishing date meant that he backdoored his way into a number of second place finishes. In other words, even though Asoka had the best record in terms of reaching the top two spots, he rarely took India into a position where it was an overwhelming powerhouse. His wins were considerably less dominant than Napoleon's wins, if that makes sense. This was one of the better setups for Asoka and he was a well-deserved favorite in the picking contest for Game Five.

Bismarck of Germany
Wars Declared: 53
Wars Declared Upon: 21
Survival Percentage: 65%
Finishes: 4 Firsts, 5 Seconds (30 points)
Kills: 16
Overall Score: 46 points
Bismarck was the true surprise story from the alternate histories on this map. He was basically a punchline in the Game Five that we watched, failing to tech The Wheel and sitting around with zero resources connected in his territory for the first 80 turns of the game. Given the poor performance of Bismarck in past seasons of AI Survivor, there was no reason to think that he would accomplish anything on the replays of the map. And yet even in the game that we watched Bismarck did wind up being pretty competitive down the strech, surviving to reach the finish and having at least the potential to threaten Asoka's Cultural victory. The Germans fared much better in many of these repeat scenarios, with Bismarck not acting like a total moron and actually improving his resources in timely fashion. I don't know what weed he was smoking on Livestream but this was not a repeated performance. Instead, Bismarck spent a lot of time lurking around and waiting for the right moment to make his move. He was very rarely attacked (only 21 times in all) thanks to having Napoleon pulled towards Charlemagne/Hatshepsut on one side and the pacifistic Asoka on the other side. This ended up working much better than I expected as Bismarck had an excellent survival rate (65%), second only to Asoka, while managing four wins and five runner up finishes.
I mentioned above that Bismarck's secret to success was teching ahead and reaching a position of military advantage through superior units. This was best demonstrated in Game #8 where Bismarck simply stayed at peace while everyone else fought and teched to unbeatable lategame units. Bismarck also tended to do well in games where Napoleon was weak since he was one of the leaders in best position to capitalize on a French collapse. The sample size was small here but Napoleon was eliminated in three of the four games where Bismarck was the victor. The German leader struggled in games where he came under repeated attack from Napoleon and wasn't able to get his economy up and running. Bismarck was only First to Die one time in the bizarre Game Five where Hatshepsut solo conquered Germany and then went on to become the runaway AI. Needless to say, this didn't happen in any of the other matches. Bismarck was the solid, unassuming, non-flashy leader in this game who quietly ended up being one of the stronger competitors. Napoleon, Asoka, and Bismarck combined together to win 16 of the 20 alternate history scenarios and there was a sizable drop in performance from the top trio to the remaining three AI leaders.

Charlemagne of Holy Rome
Wars Declared: 35
Wars Declared Upon: 41
Survival Percentage: 35%
Finishes: 1 First, 4 Seconds (13 points)
Kills: 14
Overall Score: 27 points
Charlemagne turned out to be the leader most often suffering First to Die status across the twenty replays of this map and by a wide margin to boot. He had an unfortunate position sandwiched in between Napoleon and Shaka along with a lack of copper to train early metal units, something which caused his downfall in many of the alternate histories. Often Charlemagne was simply overwhelmed by a pair of invasions from his two neighbors before he could manage to get defensive units up and running. His worst games saw multiple different attacks launched before Iron Working could be researched for a source of metals. With nothing but archers and chariots on hand for defense, Charlemagne experienced eliminations on Turn 129, Turn 121, Turn 114, Turn 125, and on Turn 96. Charlemagne did have the Protective trait to buff up his archers and he invariably founded the Christian holy city in each game which gave him cultural control over the border region with the Zulus. These weren't enough much of the time, however, and an early exit from Charlemagne would go on to shape the gameplay of the wider map whenever it took place.
The best games for Charlemagne were the ones that resembled the actual Game Five, situations where he faced only a single attack or no attacks and had time to connect his iron resource. When events played out in this fashion, Holy Rome could wind up being one of the stronger empires on the map. There was room for Charlemagne to expand to the north and he would wind up larger than Napoleon and Shaka if left uncontested. Charlemagne always had to hope that his two militaristic neighbors would race off to attack Hatshepsut and give him some breathing space in the early game. Charlemagne's one victory in Game #13 saw Napoleon die at an early date to a Holy Rome + Egypt coalition followed by a smooth snowball through Shaka and then Hatty and then Bismarck. Charlemagne was also able to pick up a few runner up performances, always behind either Asoka or Bismarck, never trailing in the wake of Napoleon or Shaka. Basically if either of the two warmongers did well then it meant that Holy Rome had been killed off already. Charlemagne was a reasonably effective AI leader on this map in the games where he wasn't wiped out early on - he simply lost out of the gate too often to be one of the top performers.

Shaka of the Zulus
Wars Declared: 51
Wars Declared Upon: 20
Survival Percentage: 40%
Finishes: 2 Firsts, 2 Seconds (14 points)
Kills: 8
Overall Score: 22 points
Shaka's role on this map was pretty easy to understand: he was a less successful version of Napoleon. Both leaders shared the same emphasis on training units and researching military techs, Napoleon simply had higher quality land and better prospects for expansion as compared with Shaka. The Zulu leader is probably better in big picture AI terms but on this map Napoleon was the stronger option. Shaka was hampered by a starting location which was situated just outside the tundra region of the map. It might have looked like he had room to expand northwards but Charlemagne's Christian holy city would always be planted in that region and squeeze the disputed border zone out of Zulu cultural control. Shaka would typically wind up with half a dozen cities, half of them planted in low-quality tundra locations, and that simply wasn't enough to fuel his desired conquest spree. Although Shaka was rarely First to Die and had a decent survival rate (40%), the Zulus tended to be a weak and bullied civilization overall, outpaced by the other leaders on the map. Shaka certainly couldn't fall back on economic traits or research superiority and if he couldn't get the conquerer's snowball off and rolling then there wasn't much left to fall back upon.
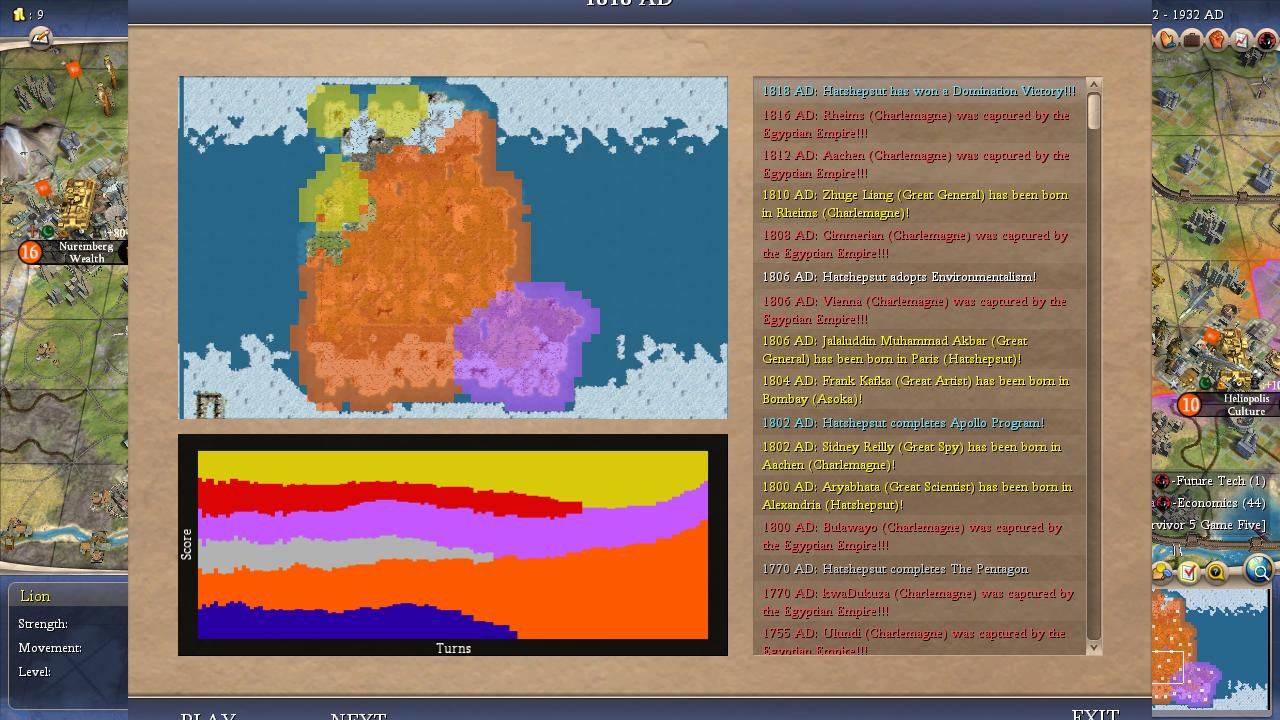
The best games for Shaka were Game #6 and Game #7 where he took first place twice in a row and then could never emerge victorious afterwards. Both games saw Charlemagne as the First to Die leader and I don't think this was a coincidence: Shaka could only have a strong game if Holy Rome was knocked out at an early date. In Game #6, Shaka was able to join in a general dogpile of Napoleon after Charlemagne was gone and then spam mass cavalry to crush Egypt afterwards to seal the win. In Game #7, Hatshepsut completely conquered Asoka (!) only to ignore Rifling tech to a dangerous degree afterwards. She should have won easily but Shaka pushed for military tech and then overran a more advanced Egypt that had neglected to defend itself adequately. Outside of those two games Shaka managed to achieve very little of consequence, not even producing much in terms of kills. He barely scored more kills than Asoka (8 to 6) and even weakling Charlemagne almost doubled him up with 14 kills for Holy Rome. Yes, some of that was the RNG of who landed the last hit on an enemy city, but it was also a testament to the generally weak nature of the Zulus. This was a bad map for Shaka and it was reflected in an overall poor performance.

Hatshepsut of Egypt
Wars Declared: 20
Wars Declared Upon: 65
Survival Percentage: 40%
Finishes: 1 First, 1 Second (7 points)
Kills: 5
Overall Score: 12 points
To no one's surprise, Hatshepsut ended up being the runt of the litter for this game of AI Survivor. She actually had quite a few strong early game performances and it wasn't unusual to see Egypt topping the scoreboard during the first 100 turns of the game. Hatshepsut was good at expanding and her Creative culture allowed her to control many of the early game border disputes. Napoleon in particular was often culturally crushed during the early turns. However, the fatal weakness for Hatshepsut was her central location in the middle of the map that left her exposed to attacks on all sides. She was a natural "worst enemy" for the low peace weight leaders and this consistently drew aggression from Napoleon and Shaka across the replays of this map. Even worse, Hatshepsut found herself sharing the world with high peace weight AI leaders who heavily emphasized religion and thus found themselves on opposite sides of the faith divide. It was very common for Asoka, Charlemagne, and Hatshepsut to each found their own religion and this kept them from uniting together against the low peace weight leaders. In fact, Asoka and Hatshepsut warred constantly across these games and that was invariably bad news for Egypt. Hatshepsut could generally hold her own against one opposing AI attacker but she stood little chance when two or three of them invaded simultaneously.
Even in the games where Hatshepsut did manage to survive the early game and reach the top of the scoreboard, she tended to undercut her own performance with poor decisions. I mentioned above how Shaka was able to defeat a much stronger Egypt in Game #7 when Hatshepsut demonstrated a suicidal tendency to ignore Rifling tech. (Maybe she was off studying at one of Willem's fine Dutch universities in this regard, heh.) This idiocy wasn't unique to Shaka either as Hatshepsut died in exactly the same fashion against Napoleon in Game #16. She had even killed off Shaka 1 vs 1 in that game only to ignore rifles and die to the French. The most amusing of Hatshepsut's deaths took place in Game #12 when she died to a German culture flip, the final Egyptian city popping off the map without being attacked. A lot of people don't even know that that's possible and it's always a laugher when it takes place. To her credit, Hatty did win a single time in the wild Game #5 where she solo conquered Bismarck then continued rolling through Napoleon and Shaka to become the unstoppable runaway. That match was a crazy outlier performance which was in no way typical for the rest of the alternate histories. Overall, the community correctly identified Hatshepsut as the weakest leader on this map and that fact was born out across the repeated playthroughs.

This was one of the most balanced games that I can recall from the alternate histories. There was no clear dominant leader, everyone took home at least one victory, and no one was able to score beyond 50 points across the twenty replays of the game. (At the other end of the extreme, Season Four Game Three saw Julius Caesar win 17 times in 20 games for a total score of 119 points!) I think that this was a reflection of the fact that this map had basically even odds to play out in several different directions. The early wars could stagnate and stalemate for long centuries on end, in which case Asoka was the favorite to huddle in his corner of the map and eventually win by culture. Alternately, Napoleon and Shaka could work together to eliminate one of their neighbors and then it was almost certain that a militaristic leader would accelerate over the conquerer's threshhold until they reached Domination. Finally, there was always a decent chance that Bismarck could out-tech his rivals and then use his more advanced units to reach a position of hegemony himself. This was an unpredictable map and the members of the community who backed Napoleon had ended up making a decent prediction that could have easily been correct. I was patting myself on the back for my prediction in Game Five that nailed everything correctly and it turns out in retrospect that I had actually been pretty lucky. Well, you know what we say around these parts about being lucky and good!  Thanks as always for reading and following along with AI Survivor.


